
動手做一個帶動畫的多選下拉控件(一):TypeView 的繪製與選中邏輯
編輯:iOS 開發綜合
先來看最終效果:
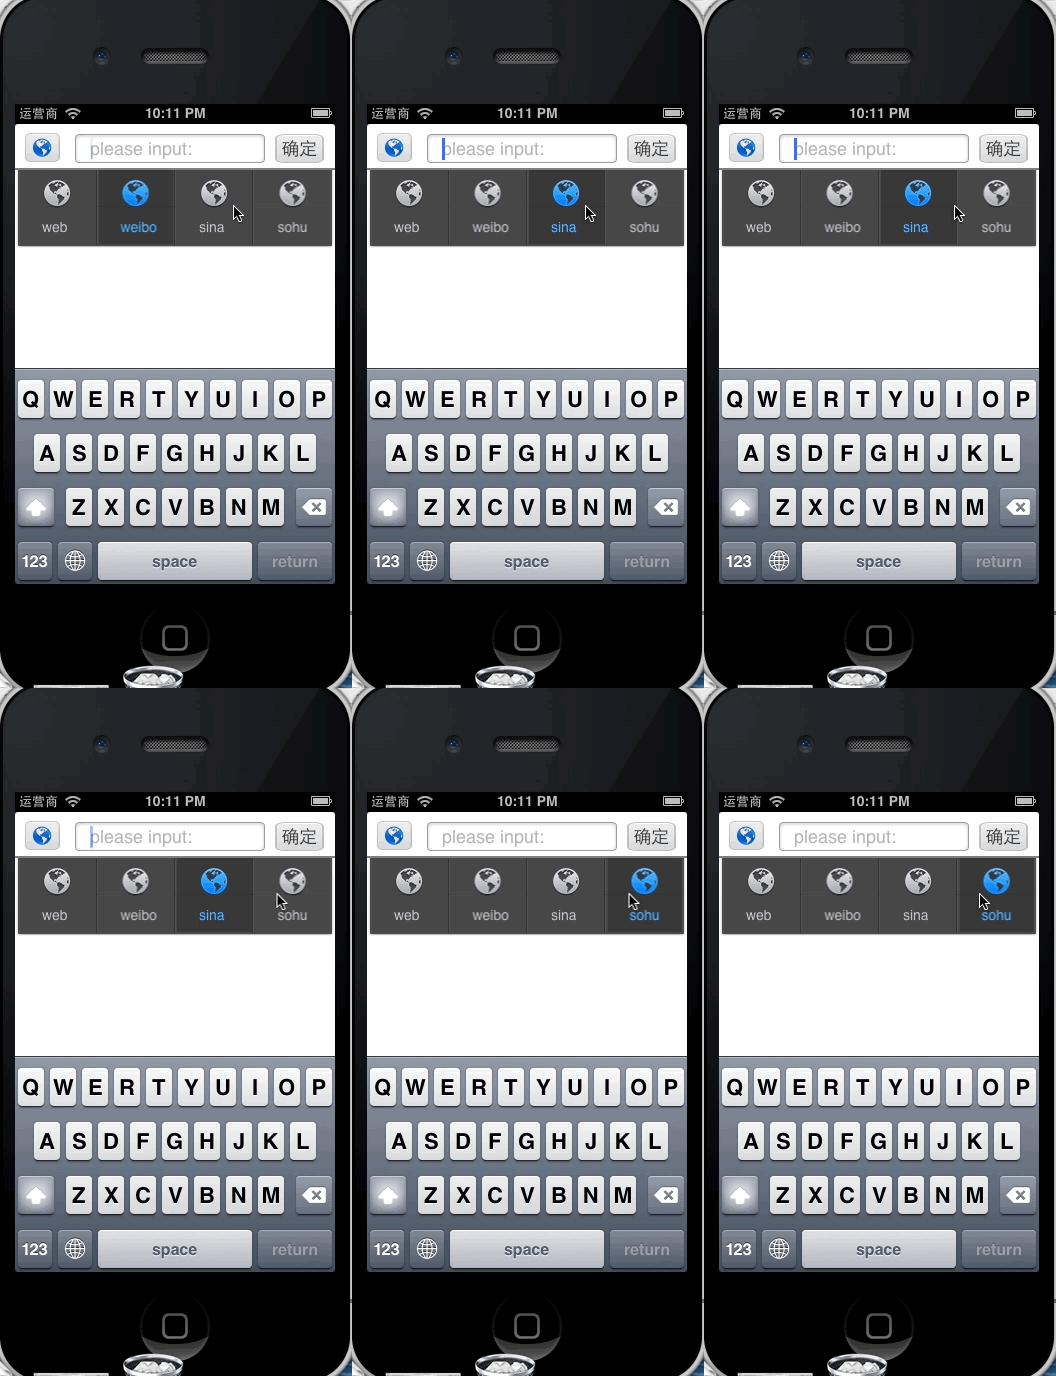
整個功能可以拆成兩個層次:頂部是一條帶有 UITextField 的搜尋 bar,下方則是帶著四個自訂 UIView 的下拉選擇面板。
我們先規劃好各個角色的命名:主控制器叫 MyViewController,頂部 bar 叫 TopBarView,下拉面板叫 TypeSelectView,面板裡每個類似按鈕的自訂 view 則稱為 TypeView。這一篇先把最底層的 TypeView 完成。
TypeView 的介面宣告
#define TypeView_Width  76
#define TypeView_Height 76

@class TypeSelectView;

@interface TypeView : UIView
@property (nonatomic, assign) int typeId;              // 標識是哪一項
@property (nonatomic, assign) BOOL bSelected;          // 是否處於選中狀態
@property (nonatomic, strong) TypeSelectView *typesView; // 反向引用父容器
@end
處理點擊事件
關鍵在於「單選」語義:一旦點中某一項,必須先把父容器中原本選中的那一項取消掉。
-(void)touchesBegan:(NSSet *)touches withEvent:(UIEvent *)event {
    if (!_bSelected) {
        // 目前點到的這項未被選中,先把原本選中的項取消
        if (_typesView.curSelectedView) {
            _typesView.curSelectedView.bSelected = NO;
            [_typesView.curSelectedView setNeedsDisplay];
        }
        _bSelected = YES;
        _typesView.curSelectedView = self;
        [self setNeedsDisplay];
    }
}
自繪內容
這裡刻意不用一堆子 view 拼貼,而是直接在 drawRect: 中用 Core Graphics 畫出背景、圖示與文字,好處是狀態切換時只需重繪一次。
- (void)drawRect:(CGRect)rect {
    CGContextRef context = UIGraphicsGetCurrentContext();
    CGContextSetFillColorWithColor(context, [CCommon RGBColorFromHexString:@"#c5c4cc" alpha:1.0f].CGColor);

    CGFontRef contextFont = CGFontCreateWithFontName((CFStringRef)[UIFont systemFontOfSize:14].fontName);
    CGContextSetFont(context, contextFont);
    CFRelease(contextFont);
    CGContextSetFontSize(context, 14.0);

    if (_bSelected) {
        // 選中時先畫出背景圖
        UIImage *bgImage = [UIImage imageNamed:@"change_icon_touch_bg.png"];
        CGRect bgRc = rect;
        bgRc.origin.x = (bgRc.size.width - bgImage.size.width) / 2 + 1.0f;
        bgRc.origin.y = (bgRc.size.height - bgImage.size.height) / 2;
        bgRc.size = bgImage.size;
        [bgImage drawInRect:bgRc];

        CGContextSetFillColorWithColor(context, [CCommon RGBColorFromHexString:@"#58baff" alpha:1.0f].CGColor);
    }

    // 依 typeId 決定圖示與文字
    NSString *imageName = @"mbWWW.png";
    NSString *text = @"";
    if (_typeId == 0)      { text = @"web"; }
    else if (_typeId == 1) { text = @"weibo"; }
    else if (_typeId == 2) { text = @"sina"; }
    else if (_typeId == 3) { text = @"sohu"; }

    if (_bSelected) {
        imageName = [imageName stringByReplacingOccurrencesOfString:@".png" withString:@"_touch.png"];
    }

    UIImage *typeImage = [UIImage imageNamed:imageName];
    CGRect rc = rect;
    rc.origin.x = (rc.size.width - typeImage.size.width) / 2;
    rc.origin.y = 10;
    rc.size = typeImage.size;
    [typeImage drawInRect:rc];

    // 文字畫在圖示下方
    CGPoint textPt = CGPointMake(rc.origin.x, rc.origin.y + rc.size.height + 10);
    [text drawAtPoint:textPt withFont:[UIFont systemFontOfSize:14.0f]];
}
值得注意的小細節:選中與未選中狀態採用不同檔名的圖片(加上 _touch 後綴),因此只要切換 bSelected 並呼叫 setNeedsDisplay,視覺回饋就自然到位。