
iOS_3:圖片瀏覽器實作(plist 驅動、切換、夜間模式與縮放)
編輯:iOS 開發綜合
這是一個經典的入門練習:用一個 plist 檔驅動圖片瀏覽器,加上滑桿切換、說明文字、夜間模式與縮放動畫。它涵蓋了 NSBundle 讀檔、控制項事件與 UIView 動畫三個基本技能。
一、介面與事件
BeyondViewController.h
#import <UIKit/UIKit.h>

@interface BeyondViewController : UIViewController
@property (weak, nonatomic) IBOutlet UILabel *pageNoLabel;      // 頁碼
@property (weak, nonatomic) IBOutlet UIImageView *pictureView;  // 圖片
@property (weak, nonatomic) IBOutlet UILabel *descriptionLabel; // 說明
@property (weak, nonatomic) IBOutlet UIView *viewSetting;       // 設定面板

- (IBAction)slideValueChanged:(UISlider *)sender;        // 切換圖片
- (IBAction)setting:(UIButton *)sender;                  // 顯示/隱藏設定
- (IBAction)switchClick:(UISwitch *)sender;              // 夜間模式
- (IBAction)sliderScaleValueChanged:(UISlider *)sender;  // 縮放
@end
二、從 mainBundle 讀取 plist
@interface BeyondViewController ()
{
    NSArray *_descArray;   // 說明文字陣列
}
@end

@implementation BeyondViewController

- (void)viewDidLoad {
    [super viewDidLoad];

    // 標準寫法:1. 取得 mainBundle;2. 取得檔案完整路徑
    NSBundle *mainBundle = [NSBundle mainBundle];
    NSString *fullPath = [mainBundle pathForResource:@"descs.plist" ofType:nil];
    _descArray = [NSArray arrayWithContentsOfFile:fullPath];
}
用成員變數保存是因為 slideValueChanged: 也要用到它。
三、滑桿切換圖片與說明
- (IBAction)slideValueChanged:(UISlider *)sender {
    int pageNo = (int)sender.value;   // 對應 0 ~ 15

    // 1. 換圖片
    NSString *imageName = [NSString stringWithFormat:@"%d.png", pageNo];
    _pictureView.image = [UIImage imageNamed:imageName];

    // 2. 換頁碼(顯示成 1/16 這種形式)
    _pageNoLabel.text = [NSString stringWithFormat:@"%d/16", pageNo + 1];

    // 3. 換說明
    _descriptionLabel.text = _descArray[pageNo];
}
四、設定面板的滑出動畫
#pragma mark - 設定:夜間模式與縮放

- (IBAction)setting:(UIButton *)sender {
    // 開始動畫
    [UIView beginAnimations:nil context:nil];
    [UIView setAnimationDuration:1];   // 預設為 0.2 秒

    int winHeight = self.view.bounds.size.height;
    CGFloat targetY = (_viewSetting.frame.origin.y == winHeight)
                    ? (winHeight - _viewSetting.frame.size.height)
                    : winHeight;

    // Objective-C 不允許直接改寫屬於結構體的屬性成員,必須用暫時變數
    CGRect frame = _viewSetting.frame;
    frame.origin.y = targetY;
    _viewSetting.frame = frame;

    // 結束動畫
    [UIView commitAnimations];
}
這段邏輯是「判斷目前位置,在畫面內就滑出去、在畫面外就滑回來」,用同一顆按鈕切換兩種狀態。
五、夜間模式
- (IBAction)switchClick:(UISwitch *)sender {
    self.view.backgroundColor = sender.isOn ? [UIColor darkGrayColor] : [UIColor whiteColor];
}
六、縮放
- (IBAction)sliderScaleValueChanged:(UISlider *)sender {
    [UIView beginAnimations:nil context:nil];
    [UIView setAnimationDuration:1];

    self.pictureView.transform = CGAffineTransformMakeScale(sender.value, sender.value);

    [UIView commitAnimations];
}

@end
執行結果:

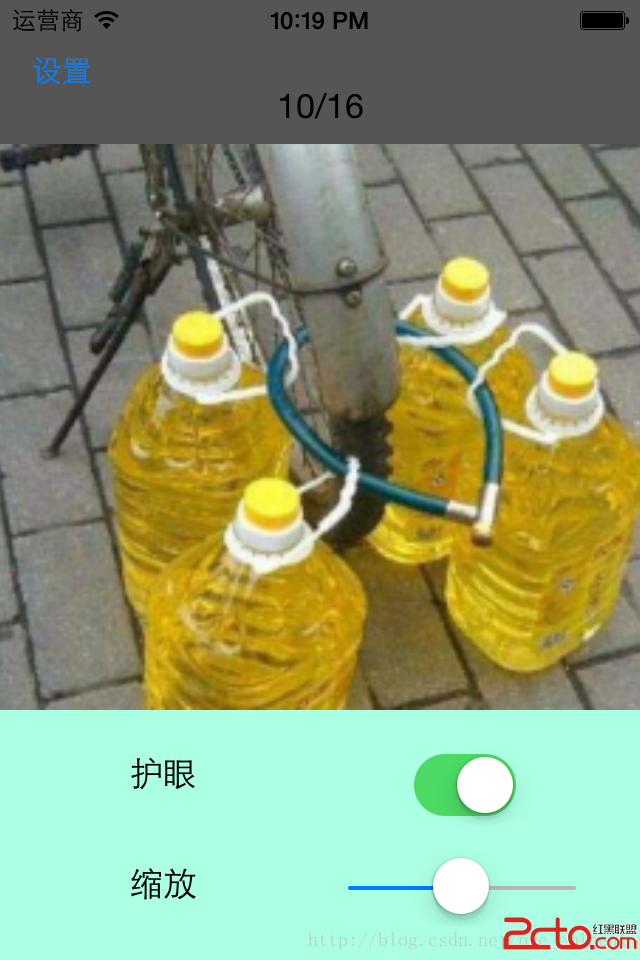
七、現代寫法對照
beginAnimations: / commitAnimations 這組 API 從 iOS 4 起就已廢棄。同樣的效果用 blocks 寫更短也更安全:
- (IBAction)setting:(UIButton *)sender {
    CGRect frame = _viewSetting.frame;
    BOOL isHidden = (frame.origin.y >= self.view.bounds.size.height);

    frame.origin.y = isHidden
                   ? self.view.bounds.size.height - frame.size.height
                   : self.view.bounds.size.height;

    [UIView animateWithDuration:0.3 animations:^{
        _viewSetting.frame = frame;
    }];
}
blocks 版本的好處是動畫完成後可以接 completion 做後續處理,而且 frame 的計算在動畫區塊之外,語意更清楚。
八、可以再加強的地方
- 圖片數量寫死成 16 不好,改成用
_descArray.count或列舉 bundle 中的資源。 - 滑桿數值可能出現小數,
%d.png之前記得轉成整數,並對索引做邊界檢查。 - 縮放若需要使用者雙指操作,改用 UIScrollView 的
minimumZoomScale會更自然。 - 夜間模式若要更完整,可為文字與背景各建立一套色彩,用 UITraitCollection 自動切換。
- 上一篇文章: iOS_8:鍵盤的簡單處理與附屬工具列
- 下一篇文章: iOS 檔案下載與上傳:Range 斷點續傳與 multipart POST 實作