
iOS_13:UITableView 編輯模式實作(紅樓夢資料範例)
編輯:iOS 開發綜合
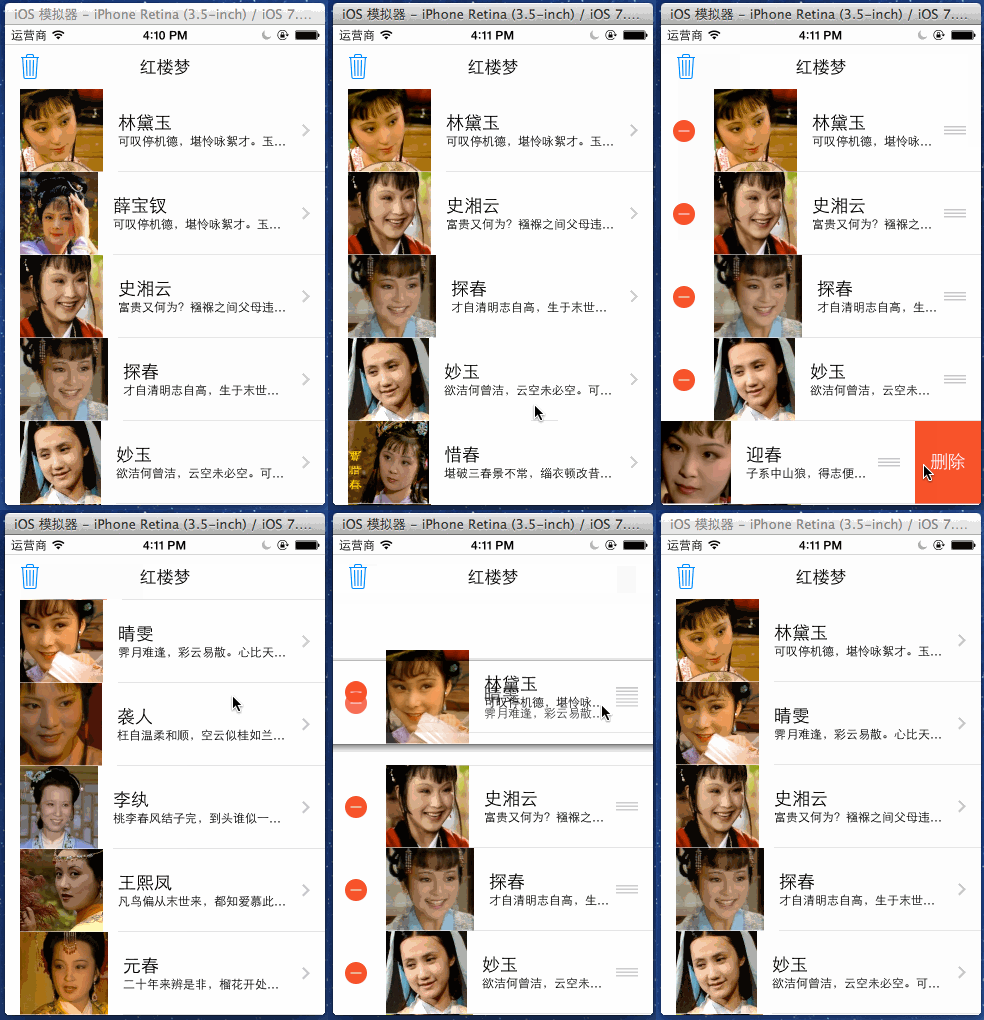
UITableView 的編輯模式不只是「刪除」而已,還包含排序、插入與多選。這篇用一份《紅樓夢》金陵十二美的 plist 資料,把刪除與拖曳排序完整做出來。
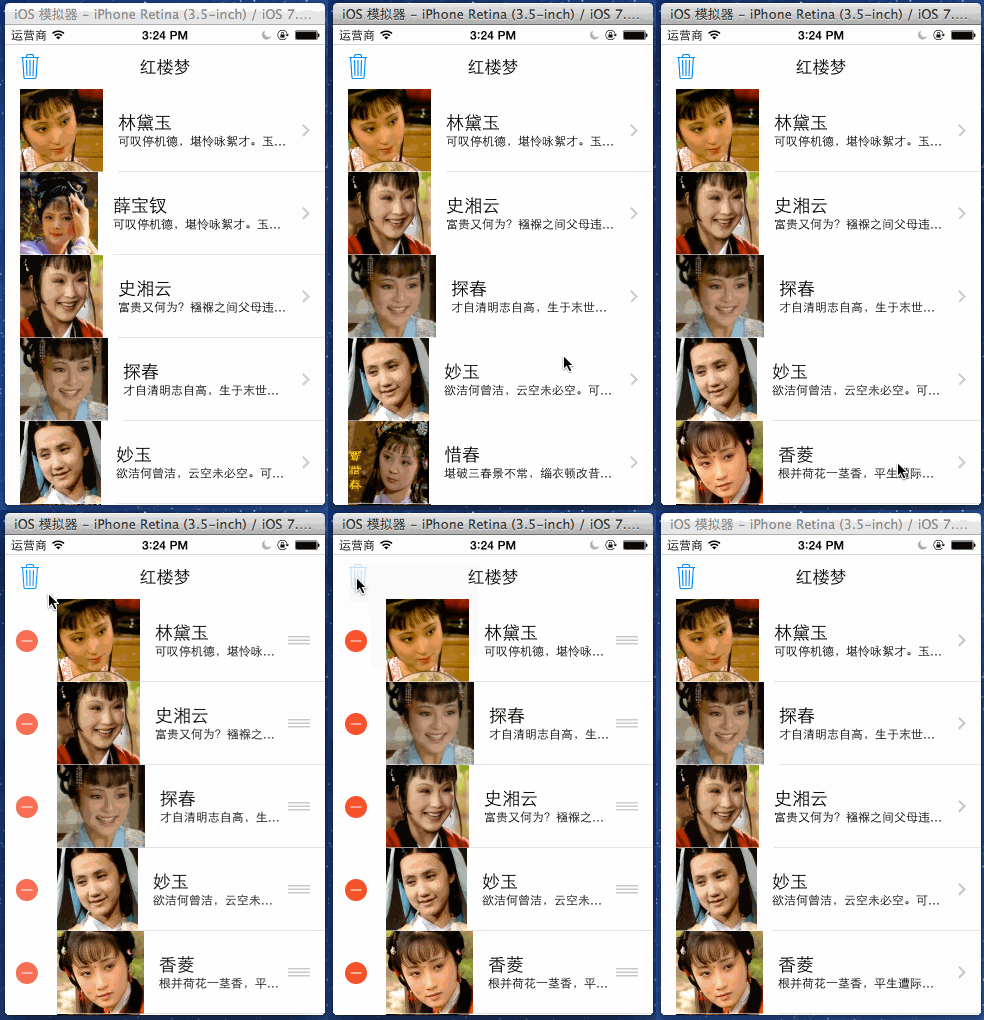
最終效果:
一、模型類 Girl
Girl.h
#import <Foundation/Foundation.h>

@interface Girl : NSObject
// UI 控件用 weak,字符串用 copy,其他对象用 strong
@property (nonatomic, copy) NSString *headImgName;  // 頭像圖片名
@property (nonatomic, copy) NSString *name;         // 姓名
@property (nonatomic, copy) NSString *verdict;      // 判詞

// 構造函數
+ (Girl *)girlNamed:(NSString *)name
        headImgName:(NSString *)headImgName
            verdict:(NSString *)verdict;

// 字典轉對象,一次填充
+ (Girl *)girlWithDict:(NSDictionary *)dict;

- (Girl *)initWithDict:(NSDictionary *)dict;
@end
Girl.m
#import "Girl.h"

@implementation Girl

+ (Girl *)girlNamed:(NSString *)name
        headImgName:(NSString *)headImgName
            verdict:(NSString *)verdict {
    Girl *girl = [[Girl alloc] init];
    girl.name = name;
    girl.headImgName = headImgName;
    girl.verdict = verdict;
    return girl;
}

// 用 self 而非 [Girl alloc],是為了讓子類繼承時仍會產生正確型別
+ (Girl *)girlWithDict:(NSDictionary *)dict {
    return [[self alloc] initWithDict:dict];
}

- (Girl *)initWithDict:(NSDictionary *)dict {
    if (self = [super init]) {
        self.name        = dict[@"name"];
        self.headImgName = dict[@"headImg"];
        self.verdict     = dict[@"verdict"];
    }
    return self;
}

@end
二、載入 plist 並轉成物件陣列
@interface BeyondViewController () <UITableViewDataSource, UITableViewDelegate>
{
    NSArray *_arrayWithDict;      // plist 原始字典陣列
    NSMutableArray *_girls;       // 物件陣列
}
@end

@implementation BeyondViewController

- (void)viewDidLoad {
    [super viewDidLoad];
    _girls = [NSMutableArray array];
    [self loadPlist];
}

- (void)loadPlist {
    // 1. 取得 mainBundle;2. 取得檔案完整路徑
    NSBundle *mainBundle = [NSBundle mainBundle];
    NSString *fullPath = [mainBundle pathForResource:@"girls.plist" ofType:nil];
    _arrayWithDict = [NSArray arrayWithContentsOfFile:fullPath];
    [self dictArrayToModelArray];
}

- (void)dictArrayToModelArray {
    for (NSDictionary *dict in _arrayWithDict) {
        // 控制器不必知道 Girl 內部細節
        Girl *girl = [Girl girlWithDict:dict];
        [_girls addObject:girl];
    }
}
三、進入與退出編輯模式
- (IBAction)trashBtnClick:(UIBarButtonItem *)sender {
    // 已在編輯則取消,否則進入
    [_tableView setEditing:![_tableView isEditing] animated:YES];
}
四、刪除:先改資料,再改畫面
// 實作了這個方法之後,手指左滑也會自動進入編輯模式並露出刪除鈕
- (void)tableView:(UITableView *)tableView
commitEditingStyle:(UITableViewCellEditingStyle)editingStyle
forRowAtIndexPath:(NSIndexPath *)indexPath {

    if (editingStyle != UITableViewCellEditingStyleDelete) {
        return;
    }

    NSInteger row = indexPath.row;

    // 順序很重要:先刪資料,再刪 row
    [_girls removeObjectAtIndex:row];
    [_tableView deleteRowsAtIndexPaths:@[indexPath]
                     withRowAnimation:UITableViewRowAnimationFade];

    [self statusCheck];
}

- (void)statusCheck {
    // 沒有資料可刪時停用按鈕
    _trashBtn.enabled = (_girls.count > 0);
}
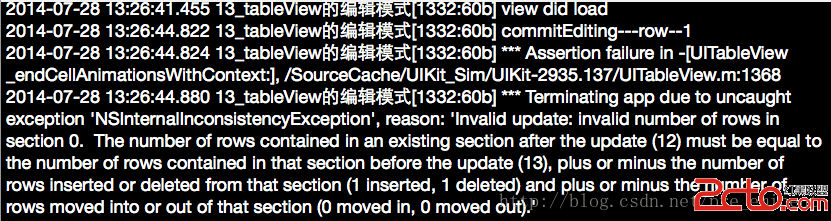
順序顛倒會直接崩潰,這是新手最常踩的坑:資料源與表格若不同步,系統會拋出 NSInternalInconsistencyException。
五、拖曳排序
// 只要實作這個方法,cell 就能自動拖曳排序
- (void)tableView:(UITableView *)tableView
moveRowAtIndexPath:(NSIndexPath *)sourceIndexPath
      toIndexPath:(NSIndexPath *)destinationIndexPath {
    Girl *girl = _girls[sourceIndexPath.row];
    [_girls removeObject:girl];
    [_girls insertObject:girl atIndex:destinationIndexPath.row];
    // 下次 cellForRow 就會依新順序顯示
}
六、資料源與版面
- (NSInteger)tableView:(UITableView *)tableView numberOfRowsInSection:(NSInteger)section {
    return _girls.count;
}

// 必須實作,否則會拋出 "dataSource must return a cell" 例外
- (UITableViewCell *)tableView:(UITableView *)tableView
         cellForRowAtIndexPath:(NSIndexPath *)indexPath {
    static NSString *cellID = @"Beyond";
    UITableViewCell *cell = [tableView dequeueReusableCellWithIdentifier:cellID];
    if (cell == nil) {
        // 四種樣式:Default / Subtitle / Value1 / Value2
        cell = [[UITableViewCell alloc] initWithStyle:UITableViewCellStyleSubtitle
                                     reuseIdentifier:cellID];
    }

    Girl *girl = _girls[indexPath.row];
    cell.textLabel.text        = girl.name;
    cell.imageView.image       = [UIImage imageNamed:girl.headImgName];
    cell.detailTextLabel.text  = girl.verdict;
    cell.accessoryType         = UITableViewCellAccessoryDisclosureIndicator;
    return cell;
}

- (CGFloat)tableView:(UITableView *)tableView heightForRowAtIndexPath:(NSIndexPath *)indexPath {
    return 83;
}

- (void)tableView:(UITableView *)tableView didSelectRowAtIndexPath:(NSIndexPath *)indexPath {
    [_tableView deselectRowAtIndexPath:indexPath animated:YES];
}
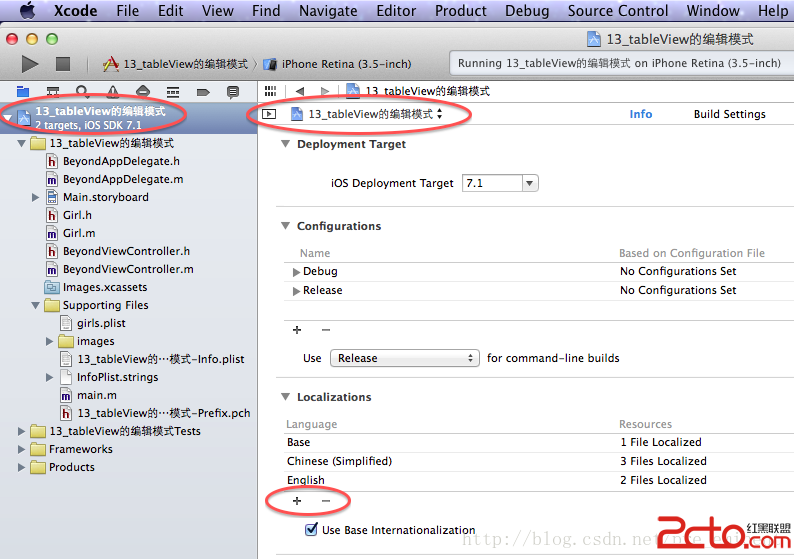
改成中文的編輯提示文字:
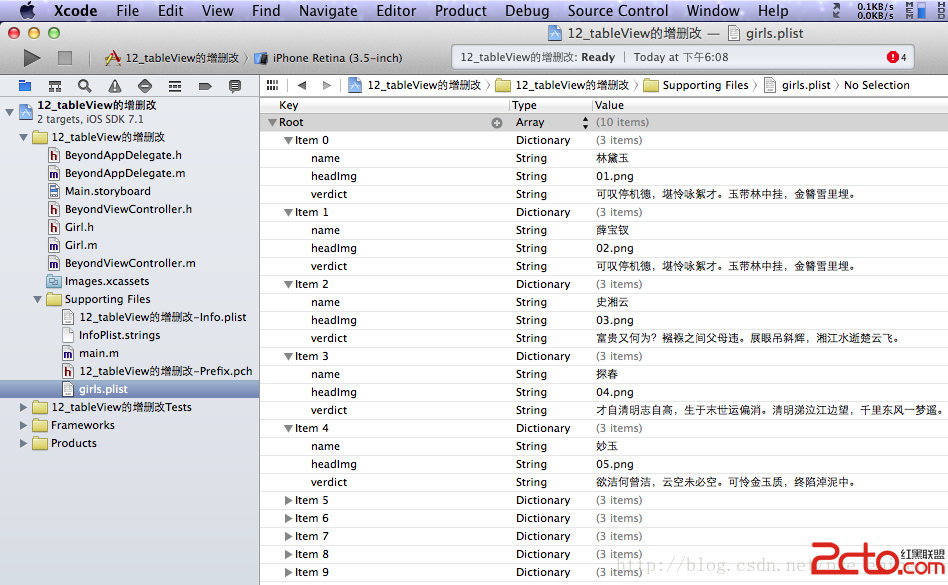
plist 的結構:
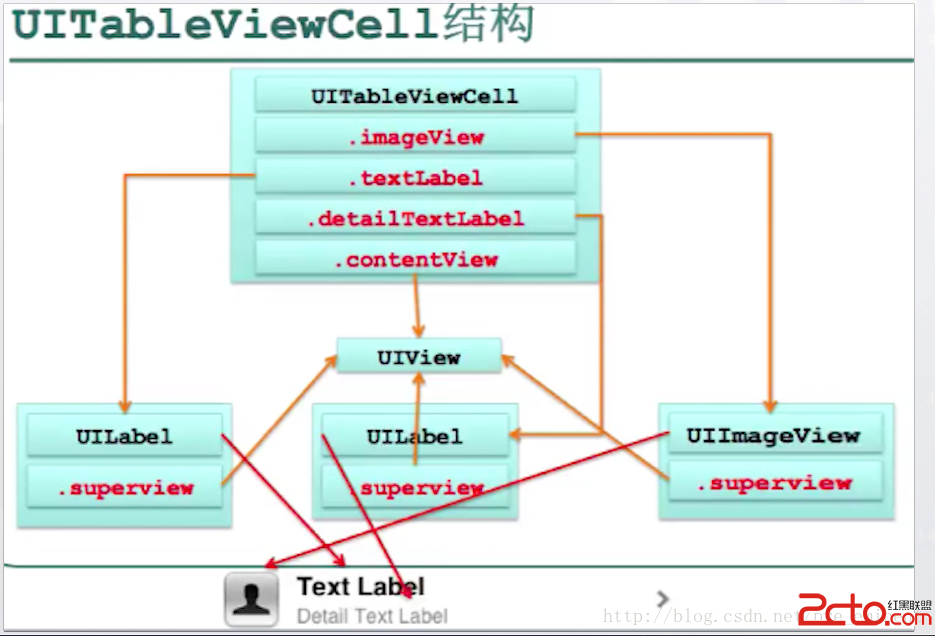
cell 內部還有一層 contentView,客製化時要特別注意:
另一個效果展示:
重點回顧
- 進入編輯模式用
setEditing:animated:,不要直接改editing屬性(不會有動畫)。 - 刪除與排序都必須「資料源先行」,表格更新在後。
- 想自訂刪除按鈕文字,實作
tableView:titleForDeleteConfirmationButtonForRowAtIndexPath:。 - 想禁止某幾行被刪,實作
tableView:canEditRowAtIndexPath:並回傳 NO。 - 想禁止某幾行被拖動,實作
tableView:canMoveRowAtIndexPath:。
- 上一篇文章: iOS 在 UIButton 內合成自定義箭頭圖示
- 下一篇文章: iOS 學習筆記(2):鍵盤控制、鍵盤類型設定與 Alert 對話框