
iOS 微博 OAuth 授權:取得使用者 accessToken 全流程
最終效果圖:
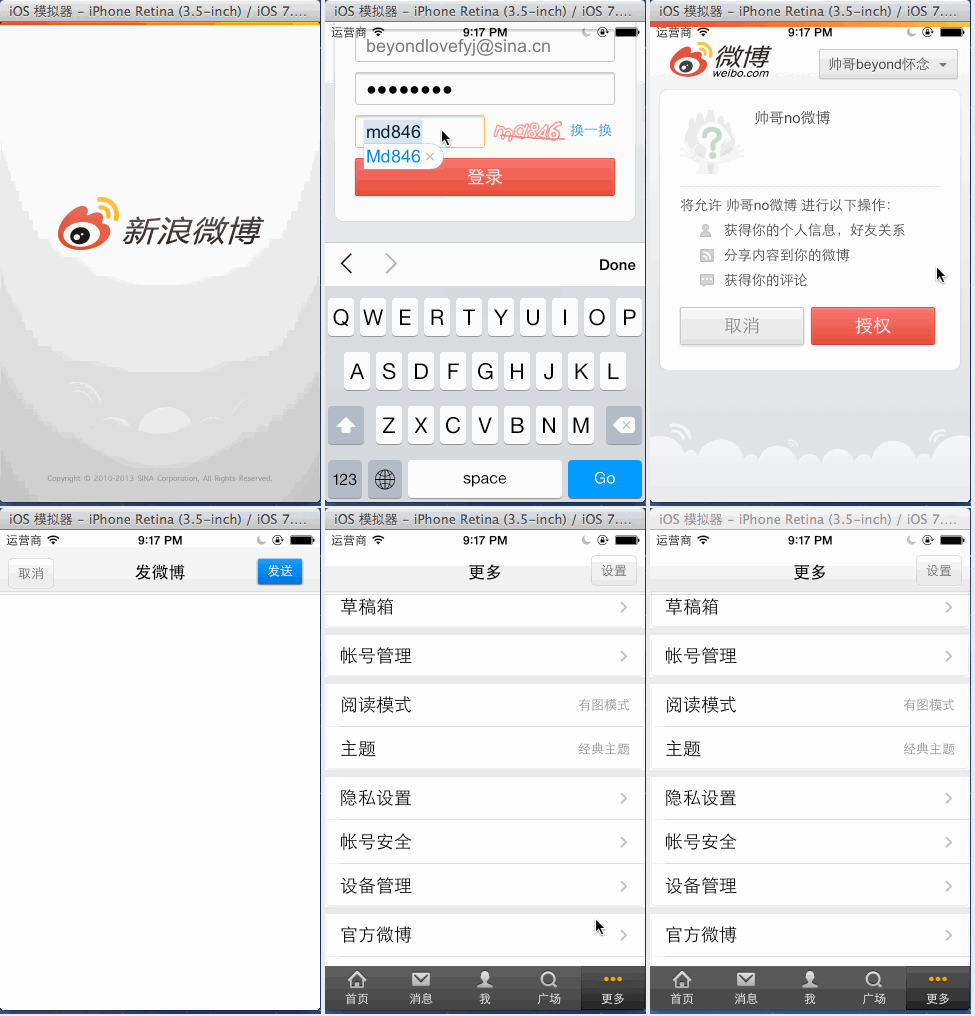
以下以 OauthViewController 為例,說明行動端如何走完微博 OAuth2.0 的三段式授權流程,取得 accessToken 與 uid。
OauthViewController.m
//
//  OauthViewController.m
//  20_帥哥no微博
//
//  Created by beyond on 14-8-5.
//  Copyright (c) 2014年 com.beyond. All rights reserved.
//

#import "OauthViewController.h"

@interface OauthViewController ()<UIWebViewDelegate> {
    // 成員變量,多個方法都要用到
    UIWebView *_webView;
}
@end

@implementation OauthViewController

- (void)loadView {
    // 直接讓 WebView 成為控制器的 view,省下一次 addSubview
    _webView = [[UIWebView alloc] init];
    self.view = _webView;
}

- (void)viewDidLoad {
    [super viewDidLoad];

    _webView.delegate = self;

    // 第一段:申請認證的網址
    NSString *oauthURL = [NSString stringWithFormat:
        @"https://api.weibo.com/oauth2/authorize?client_id=%@&response_type=code&redirect_uri=%@",
        kAppKey, kRedirectURL];
    [_webView loadURLString:oauthURL];
}

#pragma mark - WebView 代理

- (void)webViewDidStartLoad:(UIWebView *)webView {
    NSLog(@"真的開始加載--%@", webView.request.URL);

    MBProgressHUD *hud = [MBProgressHUD showHUDAddedTo:webView animated:YES];
    hud.labelText = @"頁面加載中...";
}

- (BOOL)webView:(UIWebView *)webView shouldStartLoadWithRequest:(NSURLRequest *)request navigationType:(UIWebViewNavigationType)navigationType {
    NSLog(@"能否加載--%@", webView.request.URL);
    return YES;
}

- (void)webViewDidFinishLoad:(UIWebView *)webView {
    NSLog(@"加載完畢--%@", webView.request.URL);
    [MBProgressHUD hideAllHUDsForView:webView animated:YES];

    // 使用者同意授權後,回跳 URL 會帶上 code,形如 https://www.abc.com/?code=888888888888
    NSString *reDirectURLContainsCode = _webView.request.URL.absoluteString;
    NSString *code = [reDirectURLContainsCode subStrFromLeftFlagStr:@"?code="];

    // 不是帶 code 的回跳頁,什麼都不用做
    if (code == nil) return;

    // 第三段:以 POST 方式發起最後一次請求,換取 accessToken
    NSString *accessTokenRequestURLStr = [NSString stringWithFormat:
        @"https://api.weibo.com/oauth2/access_token?client_id=%@&client_secret=%@&grant_type=authorization_code&redirect_uri=%@&code=%@",
        kAppKey, kAppSecret, kRedirectURL, code];

    NSURL *accessTokenRequestURL = [NSURL URLWithString:accessTokenRequestURLStr];

    NSMutableURLRequest *mutRequest = [[NSMutableURLRequest alloc] initWithURL:accessTokenRequestURL
                                                                 cachePolicy:NSURLRequestUseProtocolCachePolicy
                                                             timeoutInterval:10];
    // 指定為 POST,預設是 GET
    [mutRequest setHTTPMethod:@"POST"];

    NSData *receivedData = [NSURLConnection sendSynchronousRequest:mutRequest returningResponse:nil error:nil];
    NSString *responseStr = [[NSString alloc] initWithData:receivedData encoding:NSUTF8StringEncoding];
    NSLog(@"Response json is :%@", responseStr);

    // 把 JSON 轉成字典
    NSDictionary *dictionary = [NSJSONSerialization JSONObjectWithData:receivedData options:NSJSONReadingMutableContainers error:nil];

    NSString *access_token = [dictionary objectForKey:@"access_token"];
    NSLog(@"access token is:%@", access_token);

    NSString *uid = [dictionary objectForKey:@"uid"];
    NSLog(@"uid is:%@", uid);

    // 授權成功,切換根控制器
    UIActionSheet *actionSheet = [[UIActionSheet alloc] initWithTitle:@"授權成功"
                                                            delegate:nil
                                                   cancelButtonTitle:@"取消"
                                              destructiveButtonTitle:@"確定"
                                                   otherButtonTitles:nil];
    [actionSheet showInView:self.view.window];
}

@end
前置準備:第 0 步
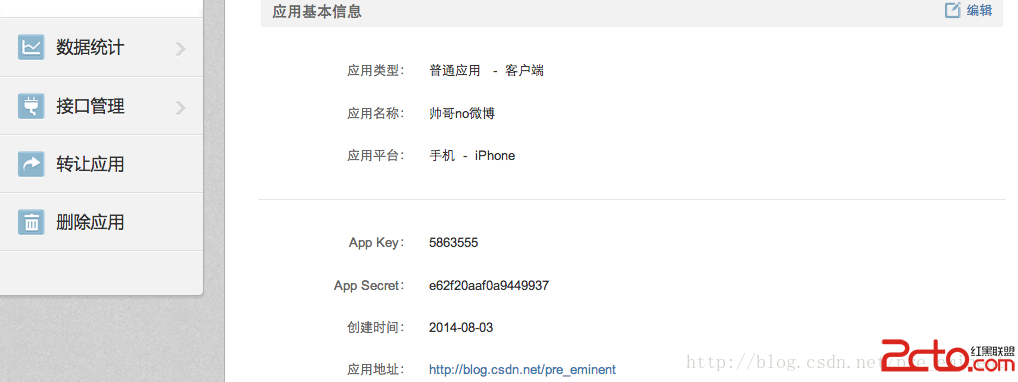
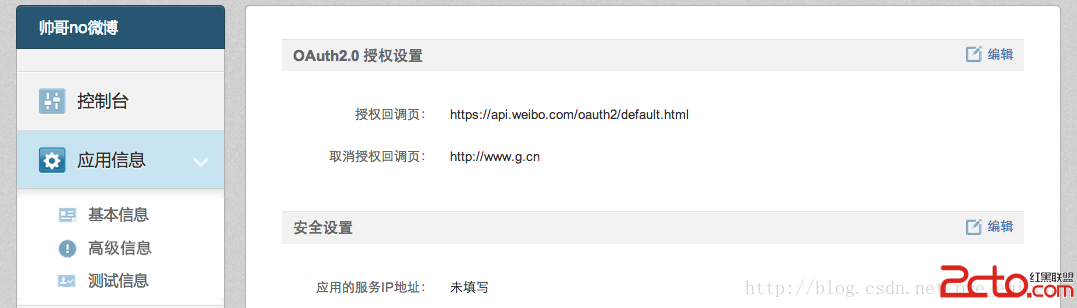
先註冊成為開發者,完成信箱驗證後即可建立行動應用。記下系統為該應用自動產生的 APPKey 與 APPSecret,並在應用資訊的進階設定中,填好授權完成後的回跳網址 Redirect_URI。
由於這裡是手機客戶端而非 Web 應用,Redirect_URI 的內容可以隨意填寫,但整個流程中必須全程使用同一個地址,否則換 token 時會被伺服器拒絕。
第 1 步:取得未授權的 request_code
這一步本質上就是帶使用者來到微博的登入頁,也就是 WebView 載入的第一個 URL:
https://api.weibo.com/oauth2/authorize?client_id=APPKEY&response_type=code&redirect_uri=https://api.weibo.com/oauth2/default.html
其中 APPKEY 是建立應用時系統配發的唯一識別碼,redirect_uri 必須與建立應用時自己填寫的一致。
第 2 步:使用者登入並按下授權
使用者輸入帳號密碼並登入後,頁面會自動轉往授權頁;按下授權鈕後,瀏覽器會重定向到 https://redirectURL/?code=888888888888。要做的事,就是從這個回跳 URL 中擷取 code 值(每次都不相同)。
這個 code 就是已授權的 request_code,但它只是中間人,不能拿它去取得使用者資料。
第 3 步:用 code 換取真正的 accessToken
接著用第 2 步擷取的 code 重新組裝網址,以 POST 方式發出最後一次請求。此時伺服器回傳的才是真正需要的 JSON:
{
access_token: 這才是真正的 ACCESS_TOKEN,
remind_in: 157679999,
expires_in: 157679999,
uid: 授權使用者的 uid
}
拿到這組資料後,通常會把 accessToken 與 uid 存檔,然後切換到主控制器,後續所有 API 呼叫都靠它進行。實務上建議把同步請求改寫為非同步,避免授權過程中出現畫面卡住。
- 上一篇文章: iOS 偵測使用者截圖並取得截圖內容
- 下一篇文章: iOS 開發:CocoaPods 安裝與使用完整教學