
iOS 本地通知(UILocalNotification)完整實作與觸發時機
編輯:iOS 開發綜合
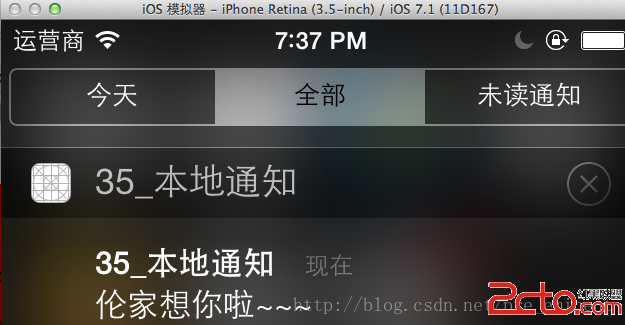
本地通知不需要伺服器推播,就能讓 App 在指定時間提醒使用者,是待辦提醒、打卡通知這類功能的標準解法。以下用一個完整範例走過建立、發送、取消的全流程,並釐清最容易混淆的「哪個代理方法會被呼叫」。
一、建立通知:控制器中的操作
// 新增一則本地通知
- (IBAction)addLocalNotice
{
    // 1. 建立通知物件
    UILocalNotification *localNote = [[UILocalNotification alloc] init];

    // 2. 設定各項屬性
    localNote.alertAction = @"操作標題";              // 動作按鈕文字
    localNote.alertBody = @"倫家想你啦~~~";            // 通知正文
    localNote.applicationIconBadgeNumber = 5;         // 圖示上的角標數字
    localNote.alertLaunchImage = @"Default.png";      // 點通知進入時的啟動圖
    localNote.fireDate = [NSDate dateWithTimeIntervalSinceNow:5]; // 5 秒後觸發

    // localNote.repeatInterval = NSCalendarUnitMinute; // 可設定重複間隔

    // 3. 排入通知中心
    //    註意:必須先移除舊的,避免重複排程
    UIApplication *app = [UIApplication sharedApplication];
    [app cancelAllLocalNotifications];
    [app scheduleLocalNotification:localNote];
}

// 取消所有本地通知
- (IBAction)cancelLocalNotice
{
    UIApplication *app = [UIApplication sharedApplication];
    [app cancelAllLocalNotifications];
}
二、應用程式代理中的兩個關鍵方法
- (BOOL)application:(UIApplication *)application
        didFinishLaunchingWithOptions:(NSDictionary *)launchOptions
{
    UITextView *text = [[UITextView alloc] init];
    text.frame = CGRectMake(40, 0, 240, 300);
    text.backgroundColor = [UIColor redColor];
    text.text = [NSString stringWithFormat:@"didLaunchWithOption\n%@", launchOptions];
    [self.window.rootViewController.view addSubview:text];

    // 若使用者是「點擊圖示」進入,launchOptions 為 nil
    // 若是「點擊本地通知」進入,launchOptions 會帶有通知內容
    NSLog(@"didLaunchWithOption");
    return YES;
}

// 應用正在執行(前台或後台存活)時收到通知,才會呼叫這個方法
- (void)application:(UIApplication *)application
        didReceiveLocalNotification:(UILocalNotification *)notification
{
    UILabel *label = [[UILabel alloc] init];
    label.numberOfLines = 0;
    label.frame = CGRectMake(0, 300, 320, 30);
    label.backgroundColor = [UIColor blueColor];
    label.text = @"didReceiveLocalNotification";
    [self.window.rootViewController.view addSubview:label];

    NSLog(@"didReceiveLocalNotification");
}
三、最容易搞錯的地方:兩個方法的分工
很多人以為「收到通知就會走 didReceiveLocalNotification」,其實不盡然。判斷依據只有一個:App 當下是否還活著。

- App 完全結束後,點擊通知進入:只會呼叫
didFinishLaunchingWithOptions:,通知內容透過launchOptions參數帶入。不會呼叫didReceiveLocalNotification:。 - App 仍在執行(前台顯示中或後台存活)時收到通知:會呼叫
didReceiveLocalNotification:。即使 App 正在前景顯示、通知以橫幅形式出現,這個方法一樣會被觸發。

因此實作時必須在兩個方法裡都處理通知內容,才能覆蓋「冷啟動」與「熱啟動」兩種情境。
四、重複間隔的設定

repeatInterval 決定通知要不要週而復始地發出,可搭配 NSCalendarUnit 的各種單位使用:
localNote.repeatInterval = NSCalendarUnitMinute;   // 每分鐘
localNote.repeatInterval = NSCalendarUnitHour;     // 每小時
localNote.repeatInterval = NSCalendarUnitDay;      // 每天
localNote.repeatInterval = NSCalendarUnitWeekday;  // 每週
搭配 fireDate 使用時,系統會以 fireDate 為基準,按設定的單位反覆觸發。
實際效果

整體流程就是:建立 UILocalNotification 物件 → 設定內容與觸發時間 → 透過 scheduleLocalNotification: 排程 → 依 App 當時的狀態決定由哪個代理方法接手處理。釐清這個分工之後,通知功能的行為就完全可控了。