
iOS 表視圖學習筆記(一):實作列表刪除與滑動刪除按鈕
編輯:iOS 開發綜合
前面學的表視圖內容一直沒整理成文章,今天從刪除列開始補齊,希望自己能把這個系列寫完。
刪除列的核心程式碼
- (void)tableView:(UITableView *)tableView
  commitEditingStyle:(UITableViewCellEditingStyle)editingStyle
   forRowAtIndexPath:(NSIndexPath *)indexPath {
    if (editingStyle == UITableViewCellEditingStyleDelete) {
        [a removeObjectAtIndex:indexPath.row];
        [tv deleteRowsAtIndexPaths:[NSArray arrayWithObject:indexPath]
                 withRowAnimation:UITableViewRowAnimationAutomatic];
    }
}
短短幾行,但每一行都有必要:removeObjectAtIndexPath 更新資料來源,deleteRowsAtIndexPaths 讓畫面播出刪除動畫。
別忘了遵守協議
要讓刪除功能生效,必須宣告並遵守 UITableView 的兩個協議:
@interface ViewController : UIViewController <UITableViewDataSource, UITableViewDelegate>
{
    IBOutlet UITableView *tv;
    NSMutableArray *a;
    NSArray *b;
}
@end
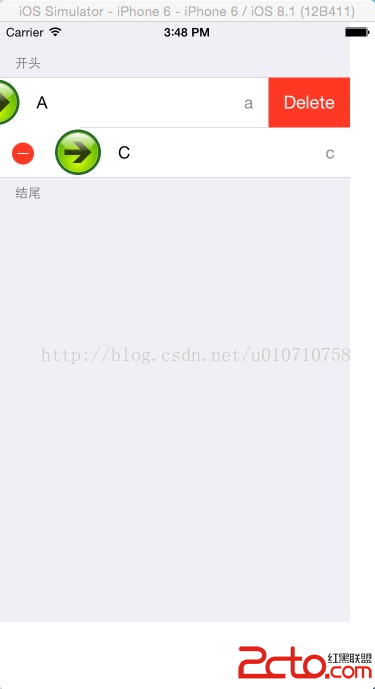
為什麼 commitEditingStyle 會被呼叫
這個方法是 UITableViewDataSource 的協議方法,當使用者左滑某一列並按下「刪除」時,系統就會呼叫它,並把 editingStyle 設為 UITableViewCellEditingStyleDelete。
反過來說,如果你希望左滑時出現的是「新增」而不是「刪除」,只要另外實作 editingStyleForRowAtIndexPath 並回傳 Insert 即可——這正是下一篇的主題。
兩個實務提醒:其一,資料來源與動畫呼叫的順序必須是「先改資料、再呼叫動畫」,反過來會直接崩潰;其二,若想自訂左滑後顯示的按鈕文字或增加多個按鈕,iOS 8 之後應改用 tableView:editActionsForRowAtIndexPath: 或 trailingSwipeActions...,commitEditingStyle 已不適用於自訂按鈕的場景。