
iOS 手勢詳解:六種常用 UIGestureRecognizer
編輯:iOS 開發綜合
iOS 的觸控操作幾乎都建立在 UIGestureRecognizer 之上。以下依序說明點擊、長按、輕掃、拖動、旋轉與捏合六種手勢的實作方式。
一、點擊
UITapGestureRecognizer *tap = [[UITapGestureRecognizer alloc] initWithTarget:self action:@selector(click)];
[tap setNumberOfTapsRequired:1];    // 需要點擊的次數
[tap setNumberOfTouchesRequired:1]; // 需要觸發事件的手指數量
tap.delegate = self;
[_view addGestureRecognizer:tap];

- (void)click {
    NSLog(@"當前視圖被點擊了!");
}
二、長按
UILongPressGestureRecognizer *longPress =
    [[UILongPressGestureRecognizer alloc] initWithTarget:self action:@selector(longPress)];
longPress.minimumPressDuration = 2;  // 長按的最短時長
[longPress setAllowableMovement:2];  // 允許移動的範圍
[_view addGestureRecognizer:longPress];

- (void)longPress {
    NSLog(@"長按事件觸發!");
}
三、輕掃
UISwipeGestureRecognizer *swip =
    [[UISwipeGestureRecognizer alloc] initWithTarget:self action:@selector(swipMethod)];
// 依需求指定單一方向
swip.direction = UISwipeGestureRecognizerDirectionLeft;
// UISwipeGestureRecognizerDirectionRight
// UISwipeGestureRecognizerDirectionUp
// UISwipeGestureRecognizerDirectionDown
[_view addGestureRecognizer:swip];

- (void)swipMethod {
    NSLog(@"輕掃事件觸發!");
}
若要同時支援兩個以上方向,最好的做法是建立多個 UISwipeGestureRecognizer 並分別設定方向,不要用位元或的方式連接,因為每個 recognizer 的 direction 只接受單一值:
// 不建議這樣寫
swip.direction = UISwipeGestureRecognizerDirectionLeft | UISwipeGestureRecognizerDirectionRight;
四、拖動
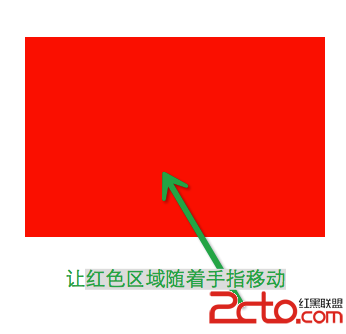
第一步:建立視圖
_view = [[UIView alloc] initWithFrame:CGRectMake(50, 250, 300, 200)];
[_view setBackgroundColor:[UIColor redColor]];
[self.view addSubview:_view];
第二步:添加手勢
UIPanGestureRecognizer *pan = [[UIPanGestureRecognizer alloc] initWithTarget:self action:@selector(paned:)];
[_view addGestureRecognizer:pan];
第三步:實作方法
- (void)paned:(UIPanGestureRecognizer *)pan {
    // 取得移動的位移量
    CGPoint point = [pan translationInView:pan.view];

    // 依位移修改視圖中心點
    CGPoint points = _view.center;
    points.x += point.x;
    points.y += point.y;
    _view.center = points;

    // 每次都要清空,避免座標累加造成速度倍增
    [pan setTranslation:CGPointZero inView:pan.view];
}
五、旋轉
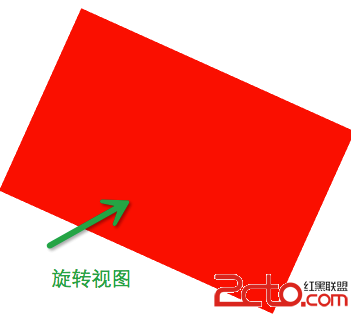
第一步:建立視圖
_view = [[UIView alloc] initWithFrame:CGRectMake(50, 250, 300, 200)];
[_view setBackgroundColor:[UIColor redColor]];
[self.view addSubview:_view];
第二步:添加手勢
UIRotationGestureRecognizer *roate =
    [[UIRotationGestureRecognizer alloc] initWithTarget:self action:@selector(rotate:)];
[_view addGestureRecognizer:roate];
roate.delegate = self;
第三步:實作方法
- (void)rotate:(UIRotationGestureRecognizer *)rote {
    // 取得當前旋轉的角度(弧度)
    CGFloat rotation = rote.rotation;

    // 透過仿射變換套用旋轉
    _view.transform = CGAffineTransformRotate(_view.transform, rotation);

    // 歸零以避免角度累加
    rote.rotation = 0;
}
六、捏合
第一步:建立視圖
_view = [[UIView alloc] initWithFrame:CGRectMake(50, 250, 300, 200)];
[_view setBackgroundColor:[UIColor redColor]];
[self.view addSubview:_view];
第二步:添加手勢
UIPinchGestureRecognizer *pich =
    [[UIPinchGestureRecognizer alloc] initWithTarget:self action:@selector(piches:)];
[_view addGestureRecognizer:pich];
pich.delegate = self;
第三步:實作方法
- (void)piches:(UIPinchGestureRecognizer *)pich {
    // 取得縮放比例
    CGFloat scale = pich.scale;

    // 透過仿射變換套用縮放
    _view.transform = CGAffineTransformScale(_view.transform, scale, scale);

    // 歸 1 以避免比例累加
    pich.scale = 1;
}
補充:讓多個手勢同時生效
預設情況下,同一個視圖上的手勢 recognizer 會互斥。若需要同時辨識(例如旋轉與捏合一起用),實作這個代理方法並回傳 YES:
- (BOOL)gestureRecognizer:(UIGestureRecognizer *)gestureRecognizer
    shouldRecognizeSimultaneouslyWithGestureRecognizer:(UIGestureRecognizer *)otherGestureRecognizer {
    return YES;
}
拖動、旋轉、捏合這三個範例都出現了同一個關鍵動作:用完 translation 或 rotation 之後要歸零,scale 則歸 1。少了這一步,位移與角度會不斷累加,視圖就會飛出畫面或轉個不停。
- 上一篇文章: iOS 歡迎界面 Launch Screen 動態加載廣告
- 下一篇文章: iOS 實現倒計時:以十分鐘為例