iOS 實作:用 UITableView 搭配 plist 完成「省/市/區」三級聯動選單
編輯:iOS 開發綜合
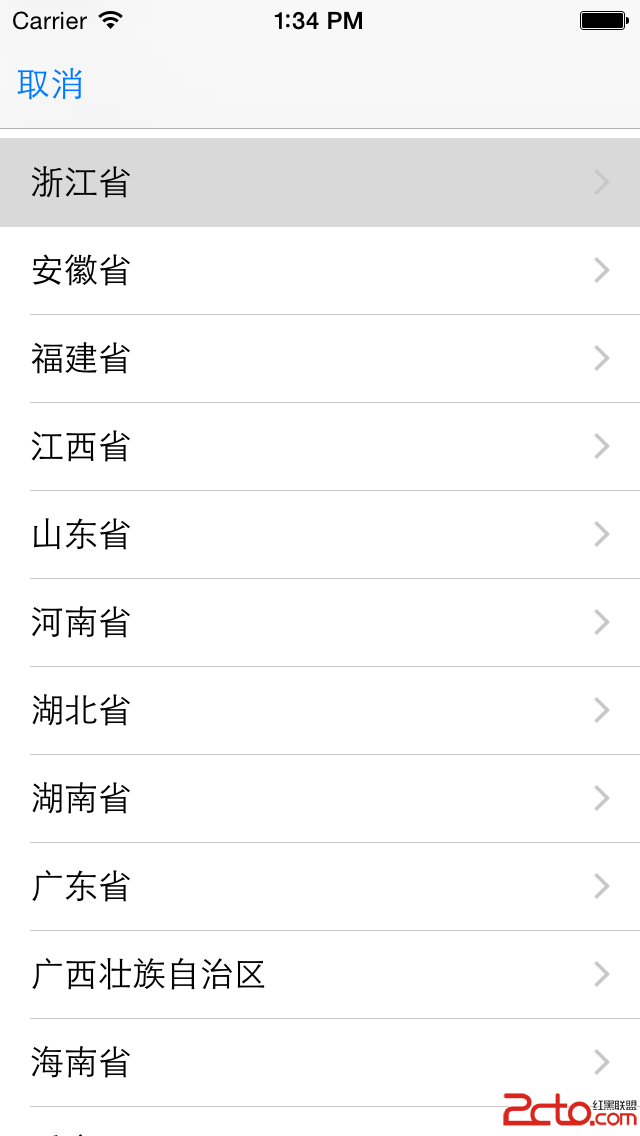
做天氣類 App 時,幾乎都會遇到「請選擇所在城市」這個環節。由於行政區劃資料變動頻率極低,把整份地區資料打包進 App、以 plist 讀取,是最省事也最穩定的做法。本文以一個 UITableView 為基礎,示範如何透過三層 push 完成省、市、區的逐級選擇。
整體設計思路
關鍵在於「一個類別、三種模式」。同一個 AddressViewController 透過 displayType 屬性區分目前顯示的是省、市還是區,三層共用同一份程式碼,省下大量重複工作。
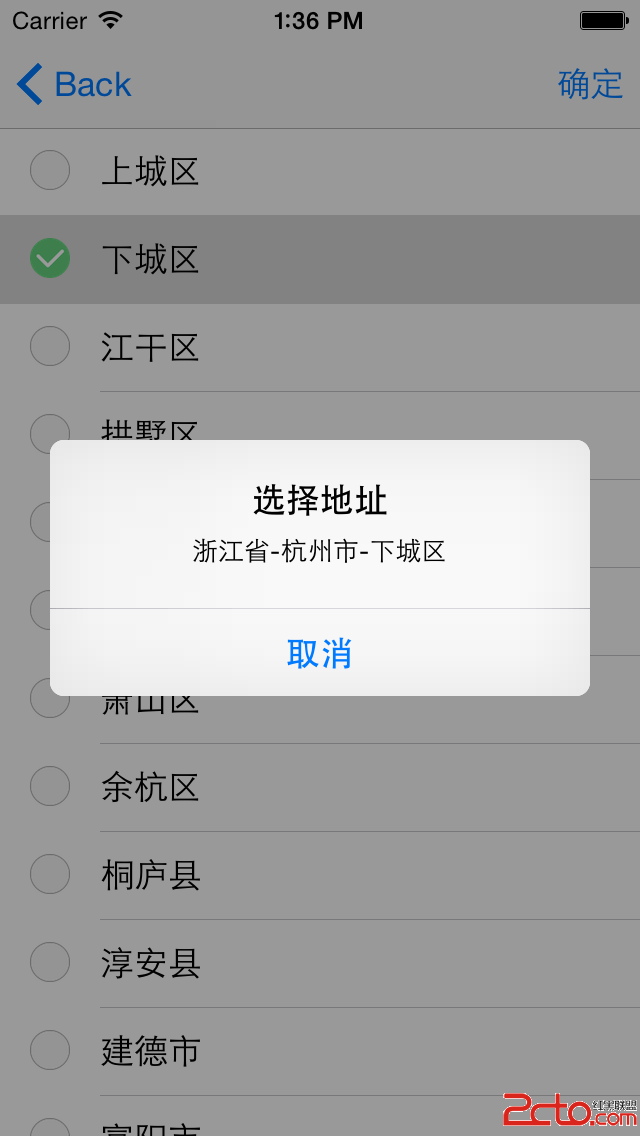
選中省份後,把該省底下的城市陣列與已選省名一起帶進下一層;選中心城市後,再把區域陣列連同省、市名稱往下傳;抵達區這一層就不再往下跳,而是切換勾選圖示,最後由「確定」按鈕彙整三段結果。
標頭檔 AddressViewController.h
#define kDisplayProvince 0
#define kDisplayCity     1
#define kDisplayArea     2

@interface AddressViewController : UIViewController <UITableViewDelegate, UITableViewDataSource>

@property (nonatomic, strong) UITableView *tableView;
@property (nonatomic, assign) int displayType;

@property (nonatomic, strong) NSArray *provinces;
@property (nonatomic, strong) NSArray *citys;
@property (nonatomic, strong) NSArray *areas;

@property (nonatomic, strong) NSString *selectedProvince; // 選中的省
@property (nonatomic, strong) NSString *selectedCity;     // 選中的市
@property (nonatomic, strong) NSString *selectedArea;     // 選中的區

@end
實作檔 AddressViewController.m
@interface AddressViewController ()
@property (nonatomic, strong) NSIndexPath *selectedIndexPath; // 當前選中項
@end

@implementation AddressViewController

- (void)viewDidLoad {
    [super viewDidLoad];
    [self configureData];
    [self configureViews];
}

#pragma mark - 資料

- (void)configureData {
    if (self.displayType == kDisplayProvince) {
        // 從 bundle 讀取地址字典
        NSString *addressPath = [[NSBundle mainBundle] pathForResource:@"address" ofType:@"plist"];
        NSDictionary *dict = [NSDictionary dictionaryWithContentsOfFile:addressPath];
        self.provinces = dict[@"address"];
    }
}

#pragma mark - 版面

- (void)configureViews {
    // 只有省份頁面需要「取消」
    if (self.displayType == kDisplayProvince) {
        self.navigationItem.leftBarButtonItem =
            [[UIBarButtonItem alloc] initWithTitle:@"取消"
                                             style:UIBarButtonItemStylePlain
                                            target:self
                                            action:@selector(cancel)];
    }
    // 只有區域頁面需要「確定」
    if (self.displayType == kDisplayArea) {
        self.navigationItem.rightBarButtonItem =
            [[UIBarButtonItem alloc] initWithTitle:@"確定"
                                             style:UIBarButtonItemStylePlain
                                            target:self
                                            action:@selector(submit)];
    }

    self.tableView = [[UITableView alloc] initWithFrame:self.view.bounds];
    self.tableView.delegate = self;
    self.tableView.dataSource = self;
    [self.view addSubview:self.tableView];
}

#pragma mark - UITableViewDataSource

- (NSInteger)tableView:(UITableView *)tableView numberOfRowsInSection:(NSInteger)section {
    if (self.displayType == kDisplayProvince) return self.provinces.count;
    if (self.displayType == kDisplayCity)     return self.citys.count;
    return self.areas.count;
}

- (UITableViewCell *)tableView:(UITableView *)tableView cellForRowAtIndexPath:(NSIndexPath *)indexPath {
    static NSString *ID = @"cityCell";
    UITableViewCell *cell = [tableView dequeueReusableCellWithIdentifier:ID];
    if (!cell) {
        cell = [[UITableViewCell alloc] initWithStyle:UITableViewCellStyleDefault
                                      reuseIdentifier:ID];
        // 到了區這層改為勾選式,不再顯示右箭頭
        cell.accessoryType = (self.displayType == kDisplayArea)
                           ? UITableViewCellAccessoryNone
                           : UITableViewCellAccessoryDisclosureIndicator;
    }

    if (self.displayType == kDisplayProvince) {
        cell.textLabel.text = self.provinces[indexPath.row][@"name"];
    } else if (self.displayType == kDisplayCity) {
        cell.textLabel.text = self.citys[indexPath.row][@"name"];
    } else {
        cell.textLabel.text = self.areas[indexPath.row];
        cell.imageView.image = [UIImage imageNamed:@"unchecked"];
    }
    return cell;
}

#pragma mark - UITableViewDelegate

- (void)tableView:(UITableView *)tableView didSelectRowAtIndexPath:(NSIndexPath *)indexPath {
    if (self.displayType == kDisplayProvince) {
        NSDictionary *province = self.provinces[indexPath.row];
        self.selectedProvince = province[@"name"];

        AddressViewController *cityVC = [[AddressViewController alloc] init];
        cityVC.displayType = kDisplayCity;
        cityVC.citys = province[@"sub"];
        cityVC.selectedProvince = self.selectedProvince;
        [self.navigationController pushViewController:cityVC animated:YES];

    } else if (self.displayType == kDisplayCity) {
        NSDictionary *city = self.citys[indexPath.row];
        self.selectedCity = city[@"name"];

        AddressViewController *areaVC = [[AddressViewController alloc] init];
        areaVC.displayType = kDisplayArea;
        areaVC.areas = city[@"sub"];
        areaVC.selectedCity = self.selectedCity;
        areaVC.selectedProvince = self.selectedProvince;
        [self.navigationController pushViewController:areaVC animated:YES];

    } else {
        // 先還原上一次的勾選
        UITableViewCell *oldCell = [tableView cellForRowAtIndexPath:self.selectedIndexPath];
        oldCell.imageView.image = [UIImage imageNamed:@"unchecked"];

        // 再勾選目前這筆
        UITableViewCell *newCell = [tableView cellForRowAtIndexPath:indexPath];
        newCell.imageView.image = [UIImage imageNamed:@"checked"];

        self.selectedArea = self.areas[indexPath.row];
        self.selectedIndexPath = indexPath;
    }
}

#pragma mark - 事件

- (void)submit {
    NSString *msg = [NSString stringWithFormat:@"%@-%@-%@",
                     self.selectedProvince, self.selectedCity, self.selectedArea];
    UIAlertView *alert = [[UIAlertView alloc] initWithTitle:@"選擇地址"
                                                    message:msg
                                                   delegate:nil
                                          cancelButtonTitle:@"取消"
                                          otherButtonTitles:nil];
    [alert show];
}

- (void)cancel {
    [self dismissViewControllerAnimated:YES completion:nil];
}

@end
幾個實作細節
plist 的結構建議設計成「name + sub」的巢狀字典:每個省份有 name 與 sub,sub 裡放城市;每個城市同樣有 name 與 sub,sub 裡放區域名稱陣列。這樣三層都能用同一套邏輯取值。
另外,勾選狀態一定要在 didSelectRowAtIndexPath 中「先清舊、再設新」,否則使用者切換選擇時會出現多個勾選同時存在的錯亂情形。
效果如下: