
深度學習實務:把 CNN 跑在 iPhone 上的三種路徑
作為 iOS 開發者,研究深度學習時很自然會想:能不能直接在 iPhone 上跑?無論是訓練還是只做推論,答案都是可以的——關鍵在於 iOS 的開發環境支援 C/C++,因此只要核心程式是 C/C++,本質上就能移植過去。以下整理三條實際可行的路徑。
方法一:用 MATLAB 轉碼產生 C 語言
MATLAB 自帶轉 C 的工具。如果你已經能用 MATLAB 實作 CNN(例如 UFLDL 的教學範例),把 .m 轉成 C 之後放進 Xcode,再把訓練好的參數存成 txt 讀進來分割,就完成了移植。
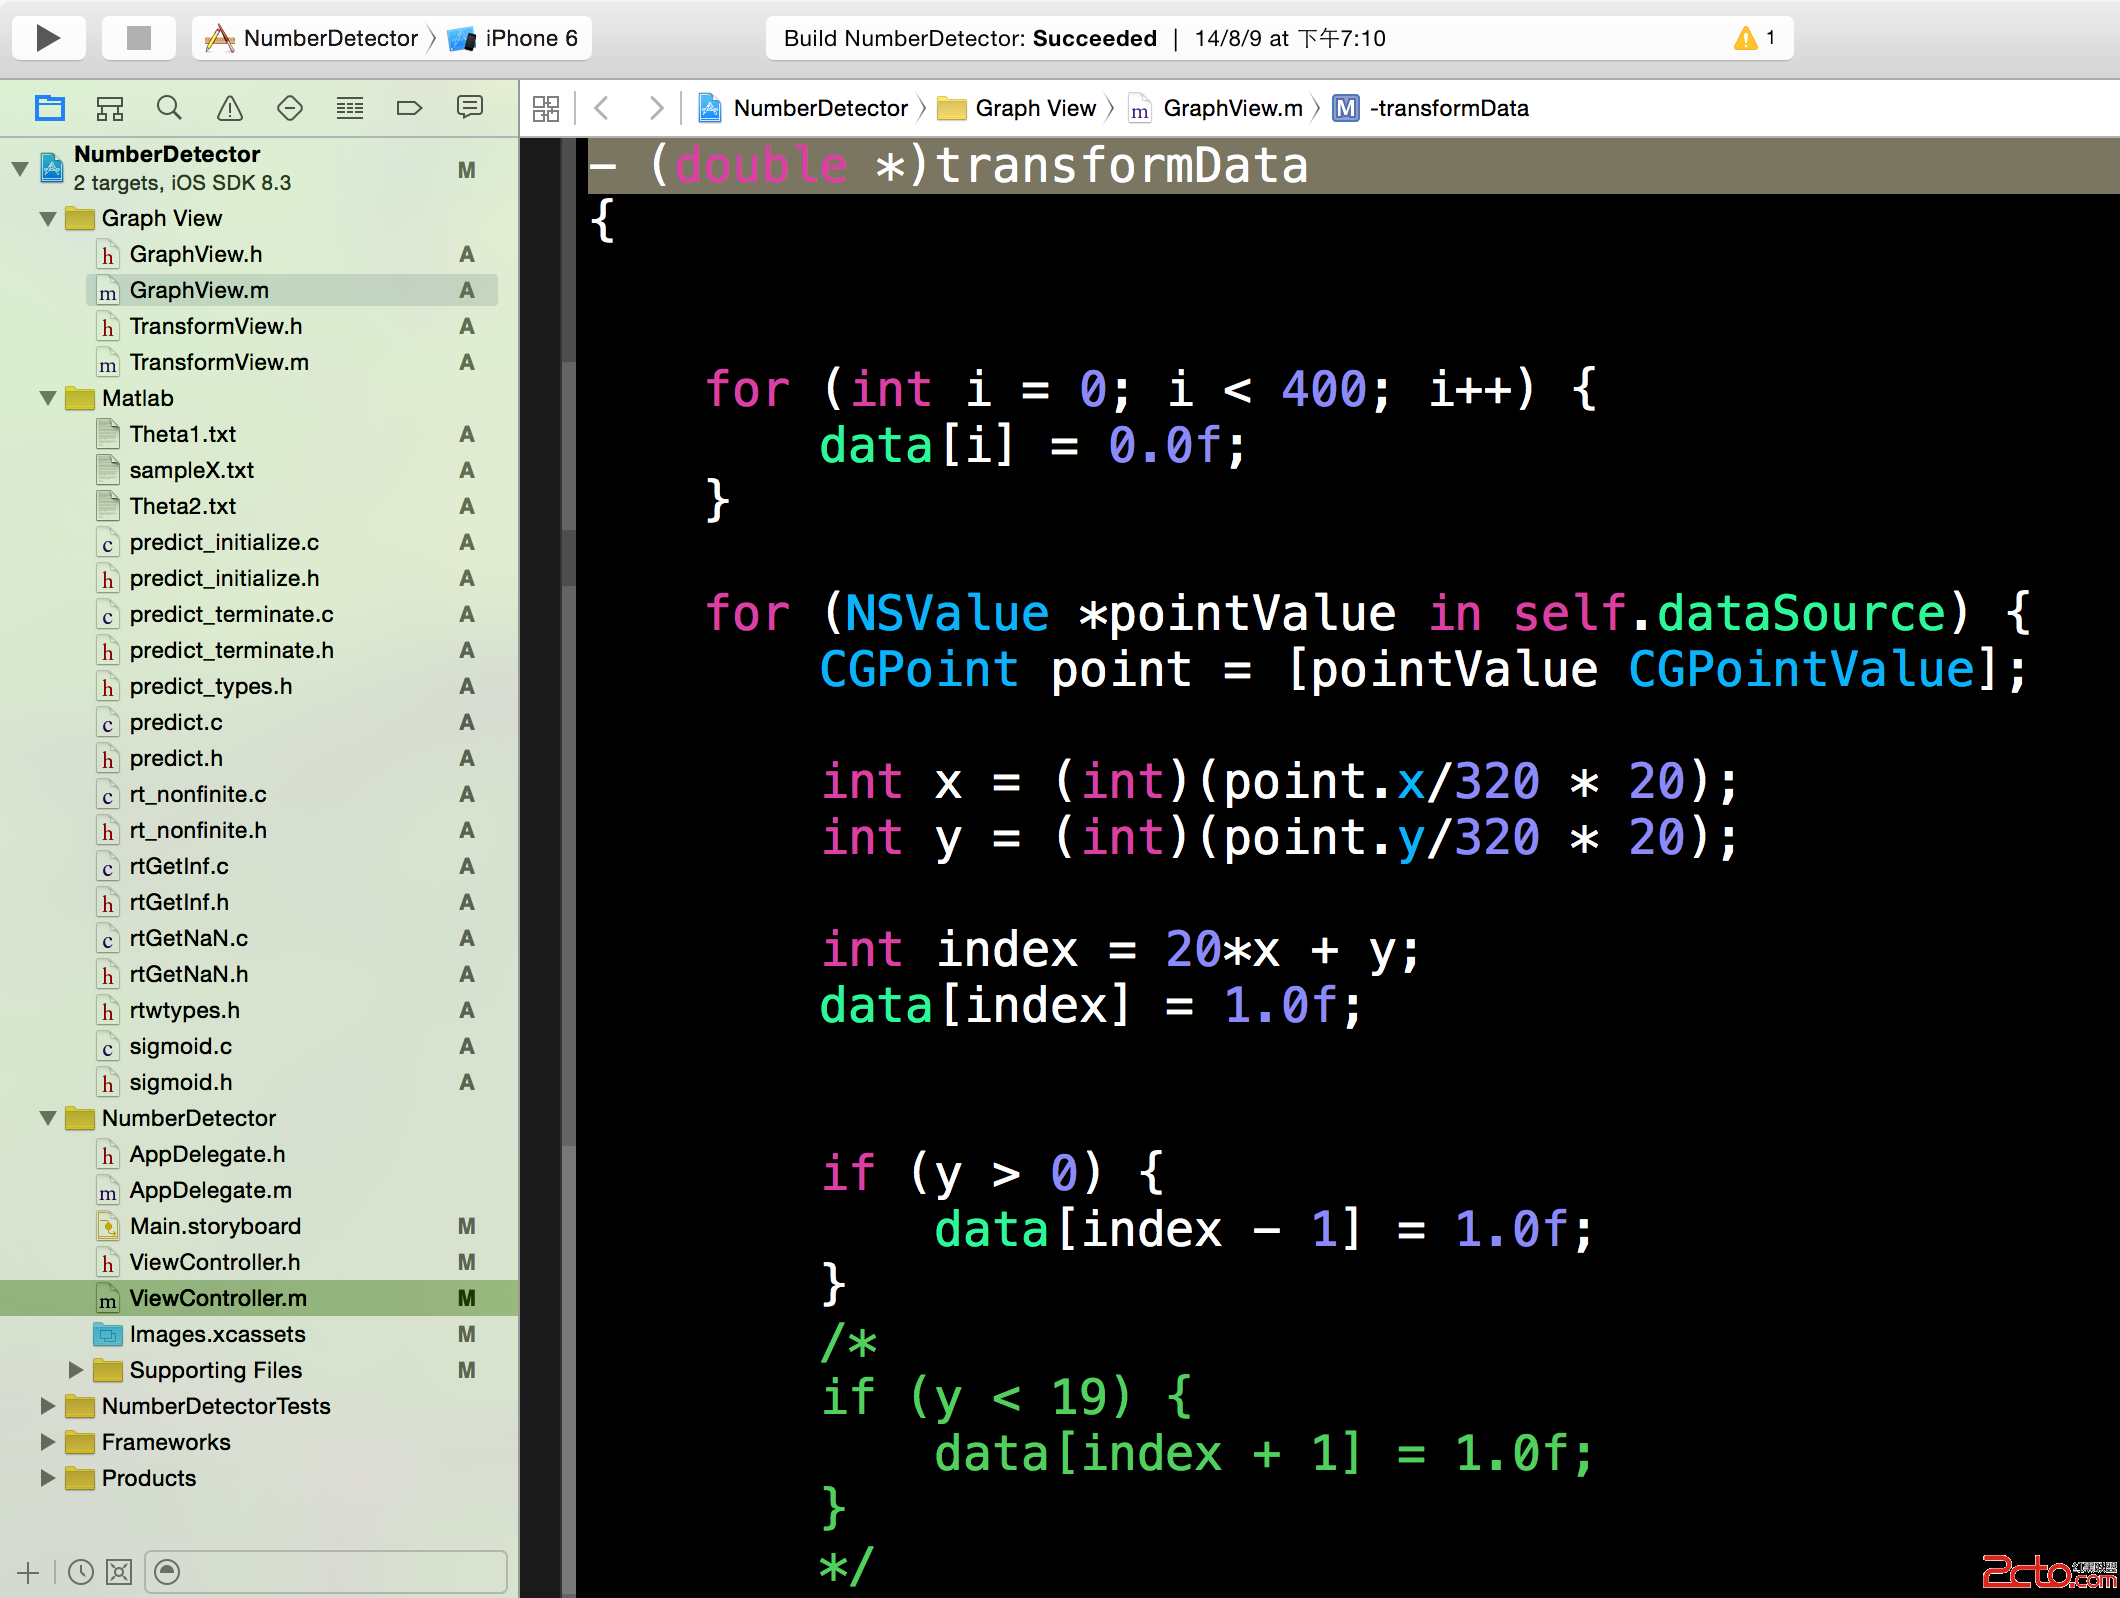
轉換後開啟 predict.h,可以看到可直接呼叫的介面:
/* Function Declarations */
extern real_T predict(const real_T Theta1[10025],
                      const real_T Theta2[260],
                      const real_T X[400]);
這裡是一個用來訓練 MNIST 的網路,我用它來做手寫數字辨識。因此接下來的關鍵是影像前處理:必須把照片轉成 x[400] 的向量格式。做法就是讀取像素再轉換,用 OpenCV 來處理相當方便。
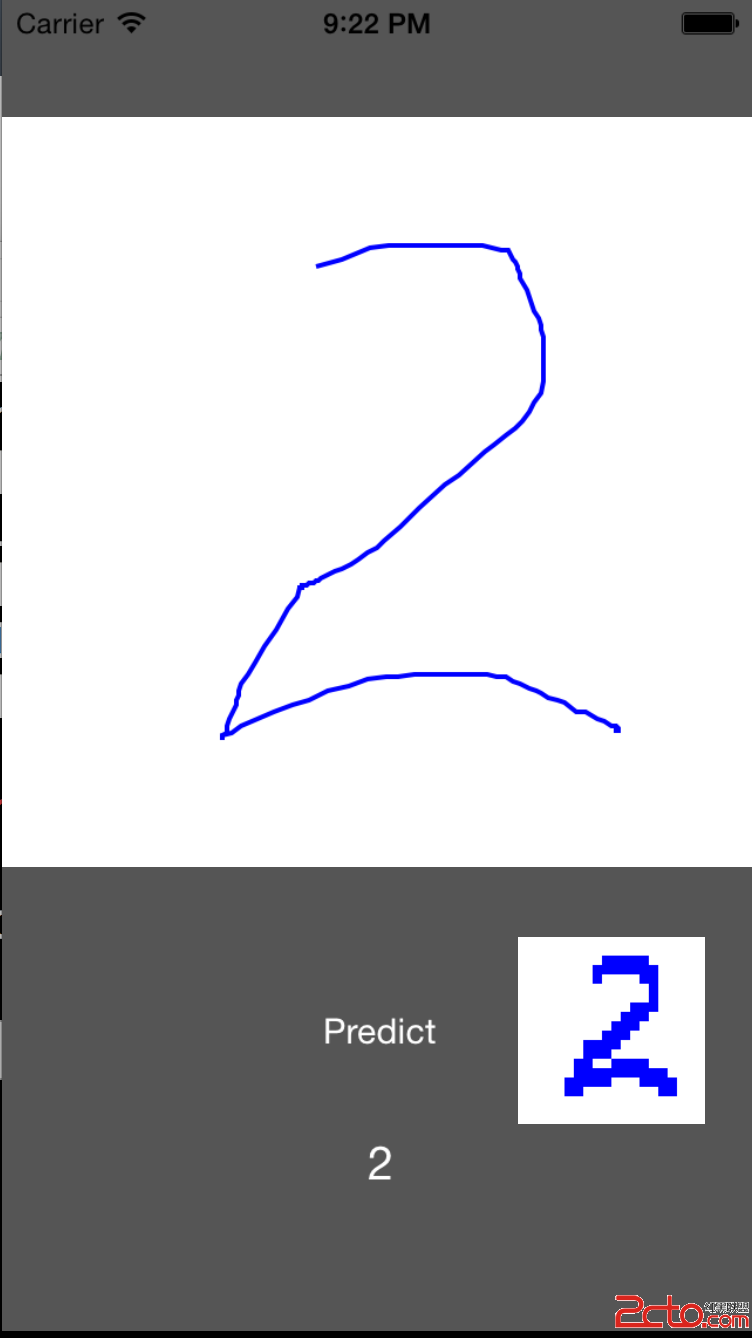
我的作法是:使用者手寫數字後,把圖片正規化成 20×20 像素(如右下角所示),再將這 400 個像素攤平成陣列送入 predict 取得結果。
方法二:使用 DeepBeliefSDK
https://github.com/jetpacapp/DeepBeliefSDK 是專門為 iOS 打造的深度學習 SDK,可以直接取用。缺點是若想訓練自己的模型會很受限,比較適合直接載入既有網路做推論。
方法三:使用 tiny-dnn(tinyCNN)
https://github.com/nyanp/tiny-cnn 這個選擇很不錯。相比 Caffe、Theano 等框架,它最大的特點是免安裝——只要能編 C++11 就能用,範例中的相依性僅為 boost。因此在 Xcode 中需要先準備 iOS 版的 boost。
網路上有現成編好的版本:https://github.com/danoli3/ofxiOSBoost
在 Xcode 中導入 boost
In Xcode Build Settings for your project:
  Add to Library Search Paths (LIBRARY_SEARCH_PATHS):
      $(SRCROOT)/../../../addons/ofxiOSBoost/libs/boost/lib/ios
  Add to Header Search Paths (HEADER_SEARCH_PATHS):
      $(SRCROOT)/../../../addons/ofxiOSBoost/libs/boost/include

In the Target under Build Phases:
  Add to 'Link Binary With Libraries' the boost.a found in
  the ofxiOSBoost/libs/boost/lib/ios directory.

If not openFrameworks, just add libs/boost/include to Header Search Paths
and libs/boost/ios to Library Search Paths.
調整資料集路徑
建立 iOS 專案並套用作者提供的 MNIST 範例時,記得把資料檔案改從 bundle 讀取:
NSString *trainLabels = [[NSBundle mainBundle] pathForResource:@"train-labels" ofType:@"idx1-ubyte"];
NSString *trainImages = [[NSBundle mainBundle] pathForResource:@"train-images" ofType:@"idx3-ubyte"];
NSString *t10kLabels  = [[NSBundle mainBundle] pathForResource:@"t10k-labels"  ofType:@"idx1-ubyte"];
NSString *t10kImages  = [[NSBundle mainBundle] pathForResource:@"t10k-images"  ofType:@"idx3-ubyte"];

parse_mnist_labels([trainLabels cStringUsingEncoding:NSUTF8StringEncoding], &train_labels);
parse_mnist_images([trainImages cStringUsingEncoding:NSUTF8StringEncoding], &train_images);
parse_mnist_labels([t10kLabels  cStringUsingEncoding:NSUTF8StringEncoding], &test_labels);
parse_mnist_images([t10kImages  cStringUsingEncoding:NSUTF8StringEncoding], &test_images);
這樣就能開始訓練了。
想在 Mac 上訓練?
同樣需要 boost。到官網下載(我用的是 1.58),在 terminal 中 cd 到解壓目錄,依序執行 ./bootstrap.sh 與 ./b2 完成安裝,然後在 Xcode 中補上 include 與 library 路徑:
The Boost C++ Libraries were successfully built!
The following directory should be added to compiler include paths:
    /Users/.../boost
The following directory should be added to linker library paths:
    /Users/.../boost/stage/lib
補充:現今更主流的選擇
本文描述的時點,iOS 上跑深度學習還需要自己折騰 C++ 移植。之後的發展已經大幅簡化了這件事:
- Core ML(iOS 11 起):把訓練好的模型轉成
.mlmodel,即可用 Swift/ObjC 直接呼叫,Apple 會自動調用 CPU 與 GPU。 - Metal Performance Shaders / BNNS:需要更底層效能控制時,可用 Apple 的 GPU 加速 API 自行實作運算層。
- TensorFlow Lite / ONNX Runtime:跨平台方案,支援量化與硬體委派(delegate)。
三條老路徑的價值在於理解「模型如何被拆解成 C++ 運算並在裝置上執行」;而真正要上 production,建議優先評估 Core ML 這類官方方案,省下的時間遠大於自己維護移植層。