
iOS 極光推送(JPush)整合全流程:從 APNs 證書到收訊跳頁
編輯:iOS 開發綜合
要在 iOS 上收推送,繞不開兩件事:Apple 的 APNs(Apple Push Notification Service)證書配置,以及一個能幫你搞定後檯管理的第三方服務。本文以極光推送 JPush 為例,把整個流程走一遍。
一、配置 APNs 證書
1. 開發證書
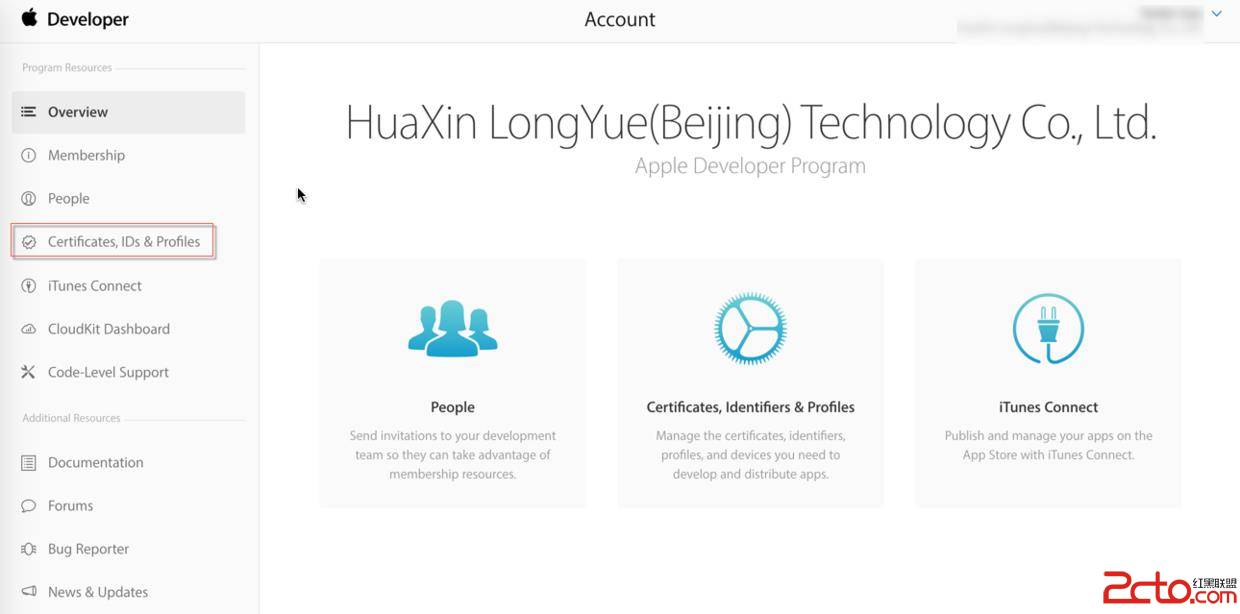
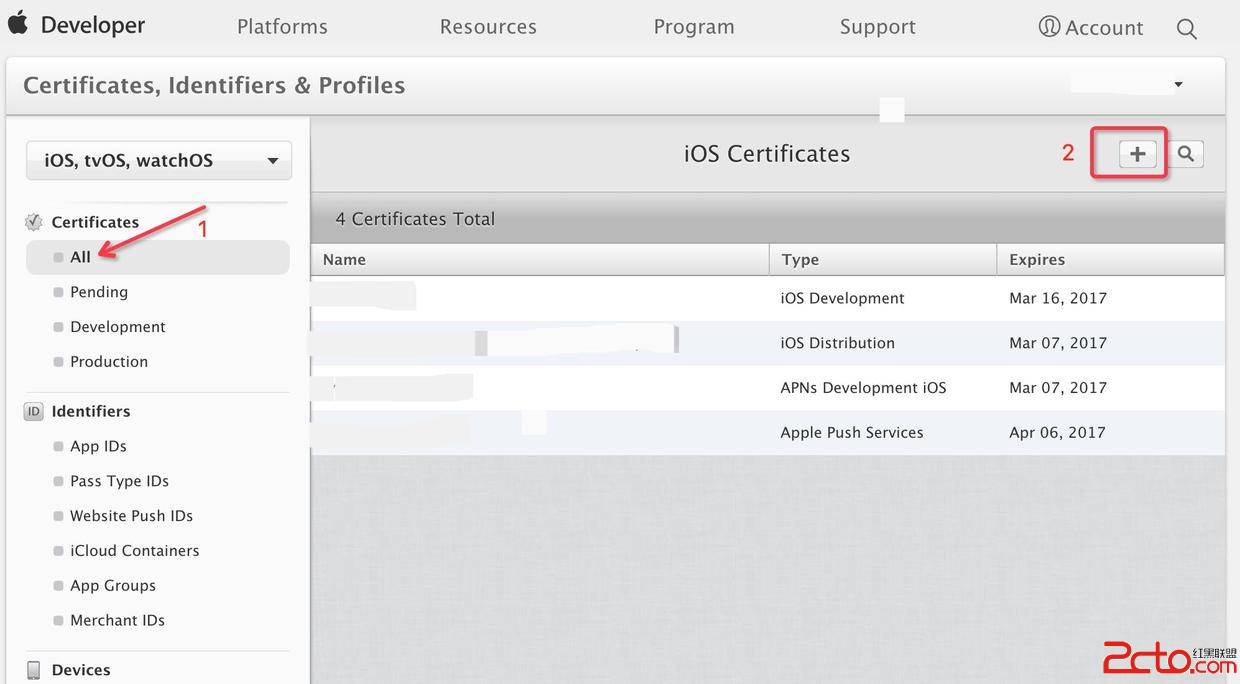
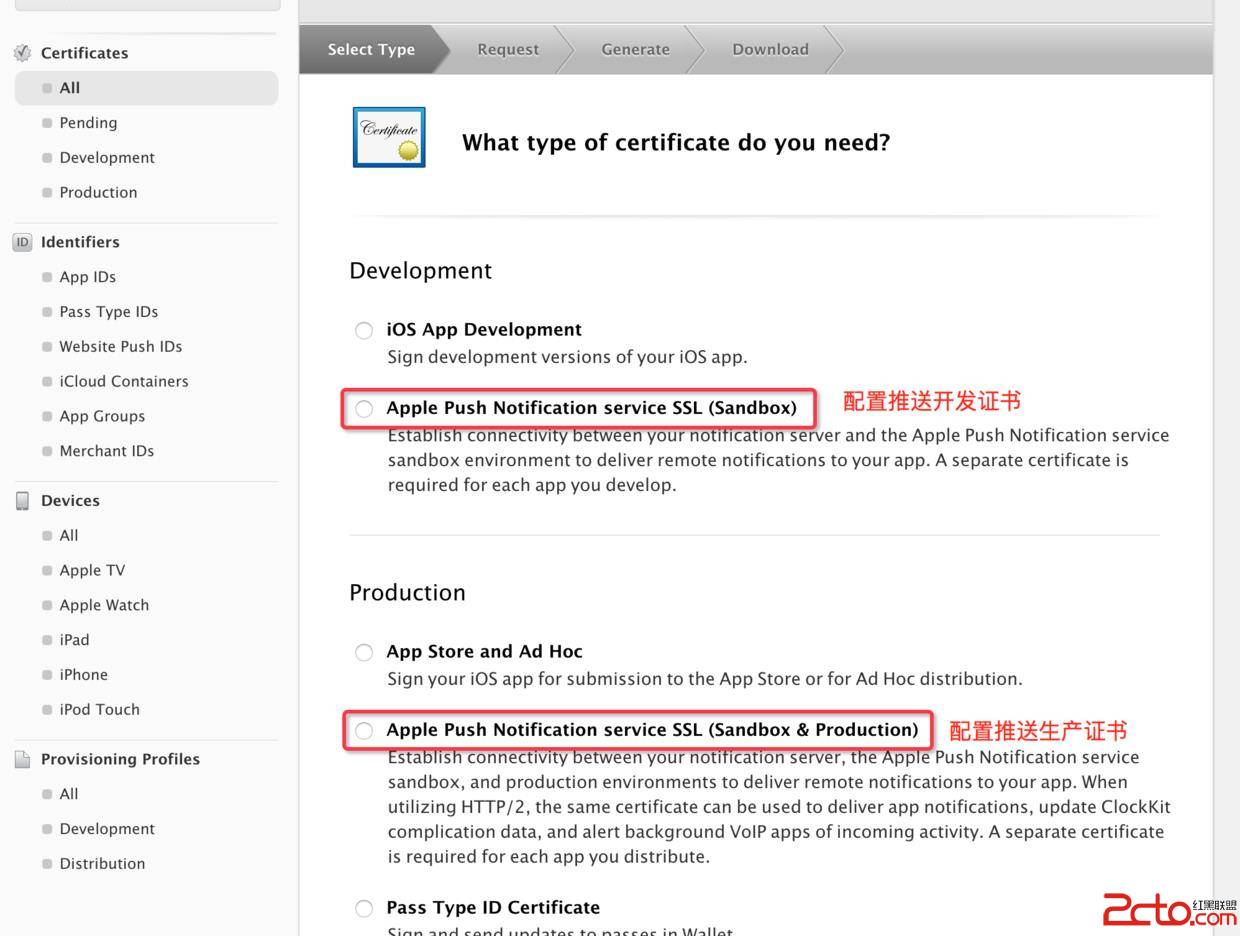
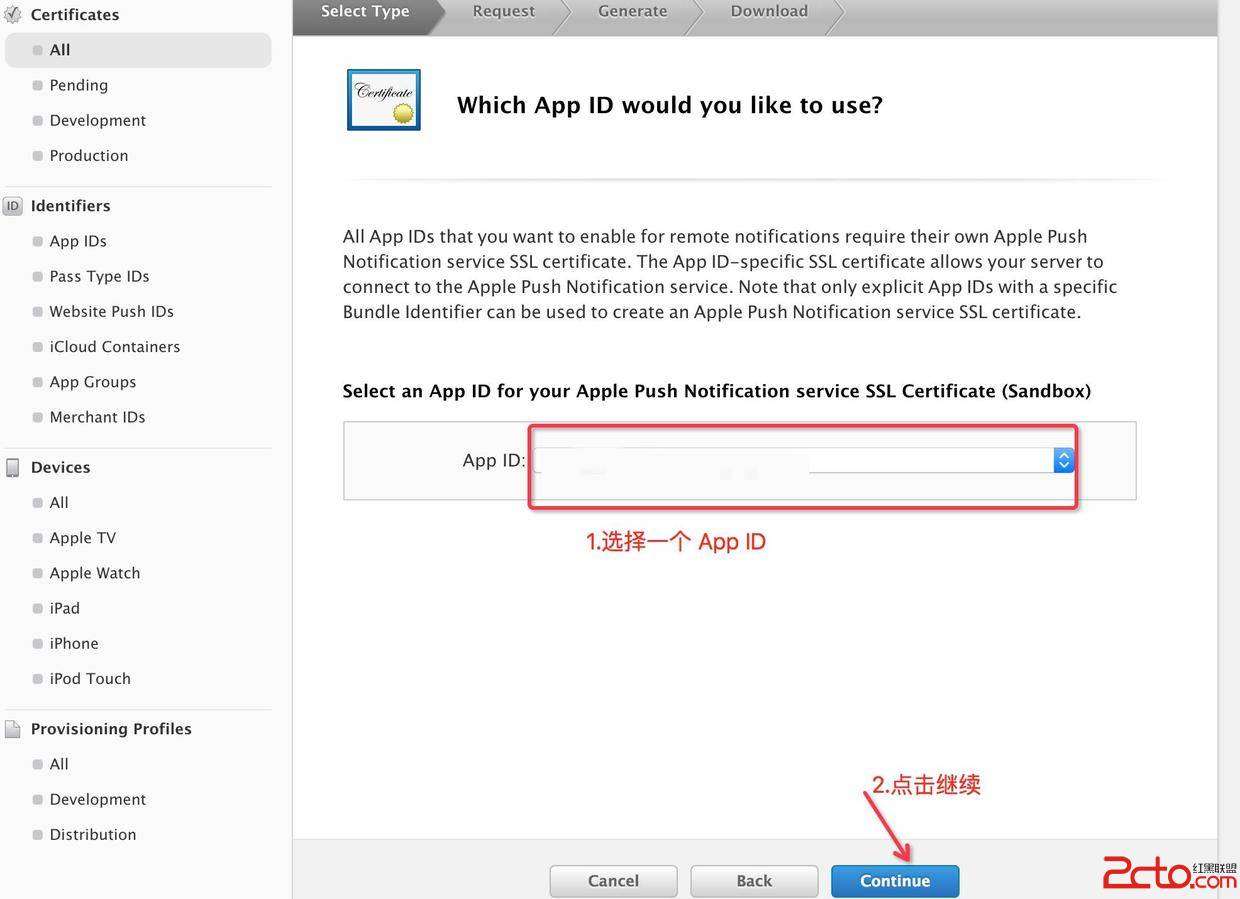
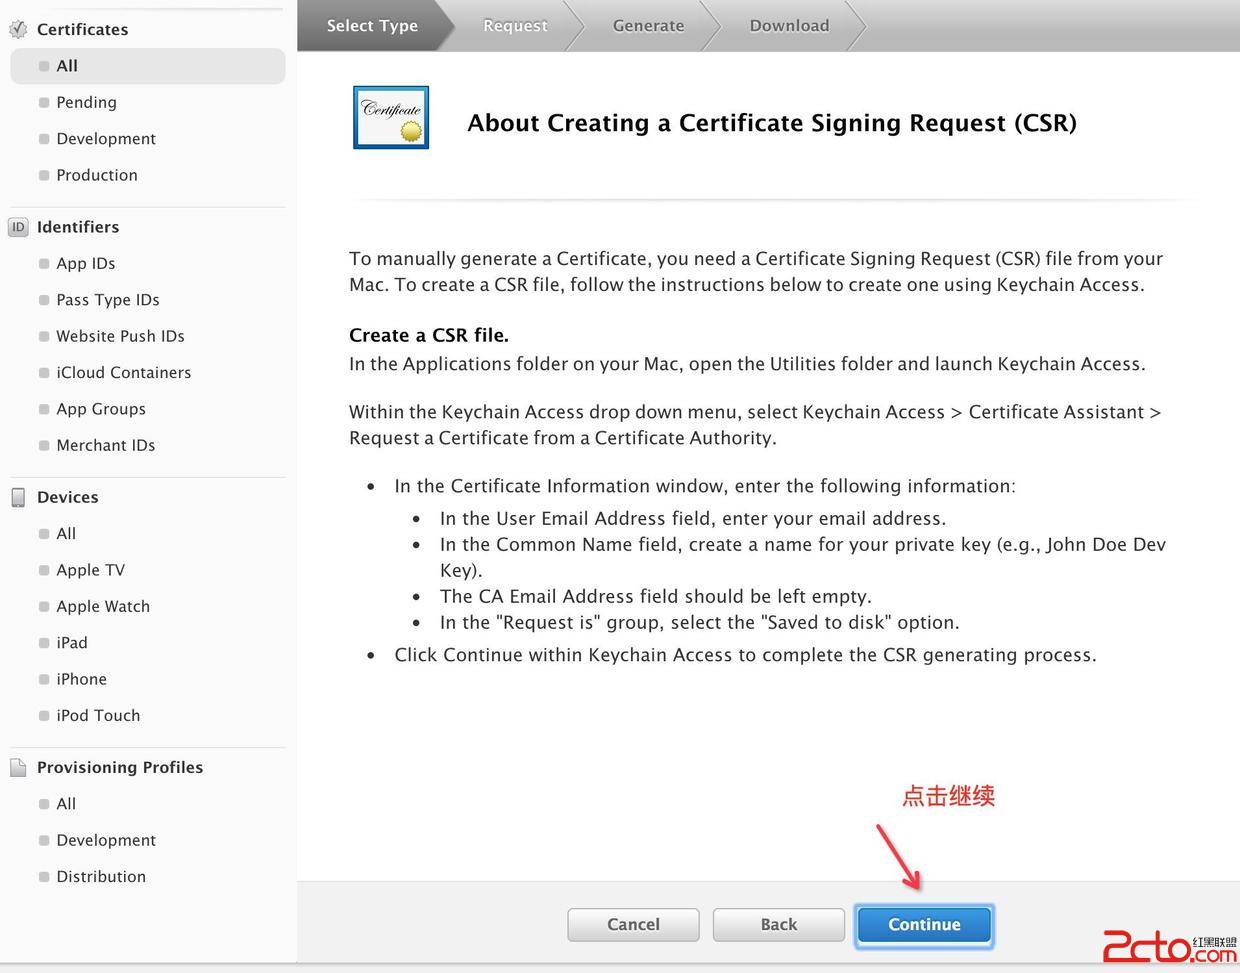
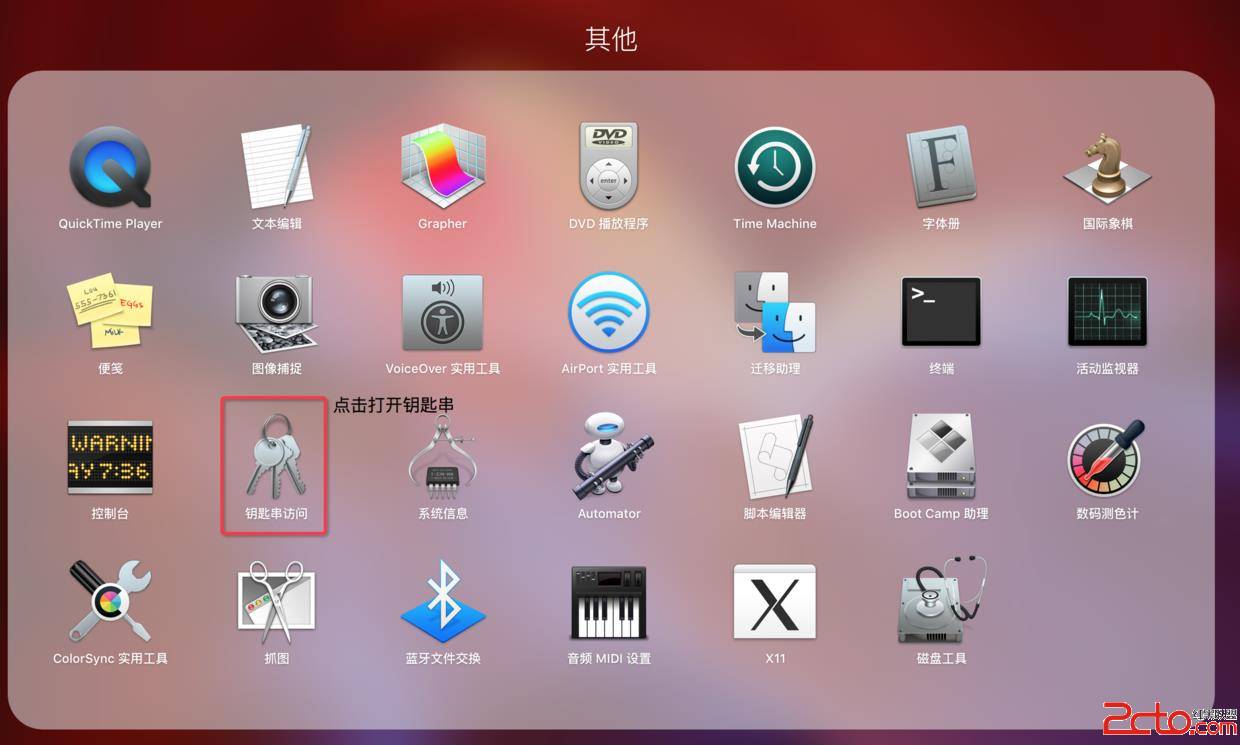
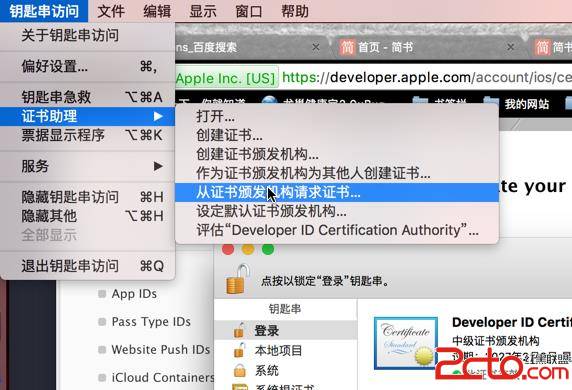
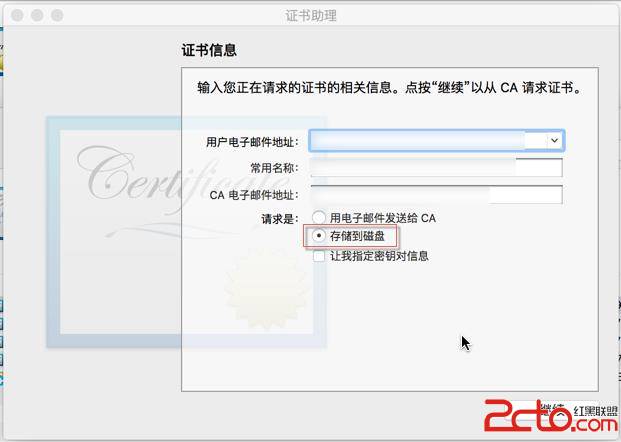
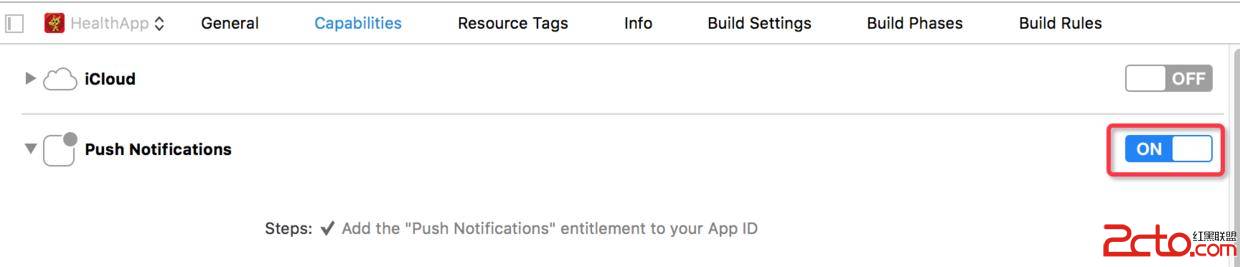
在開發者後台為你的 App ID 開啟 Push Notifications 能力,然後建立並下載對應的憑證。
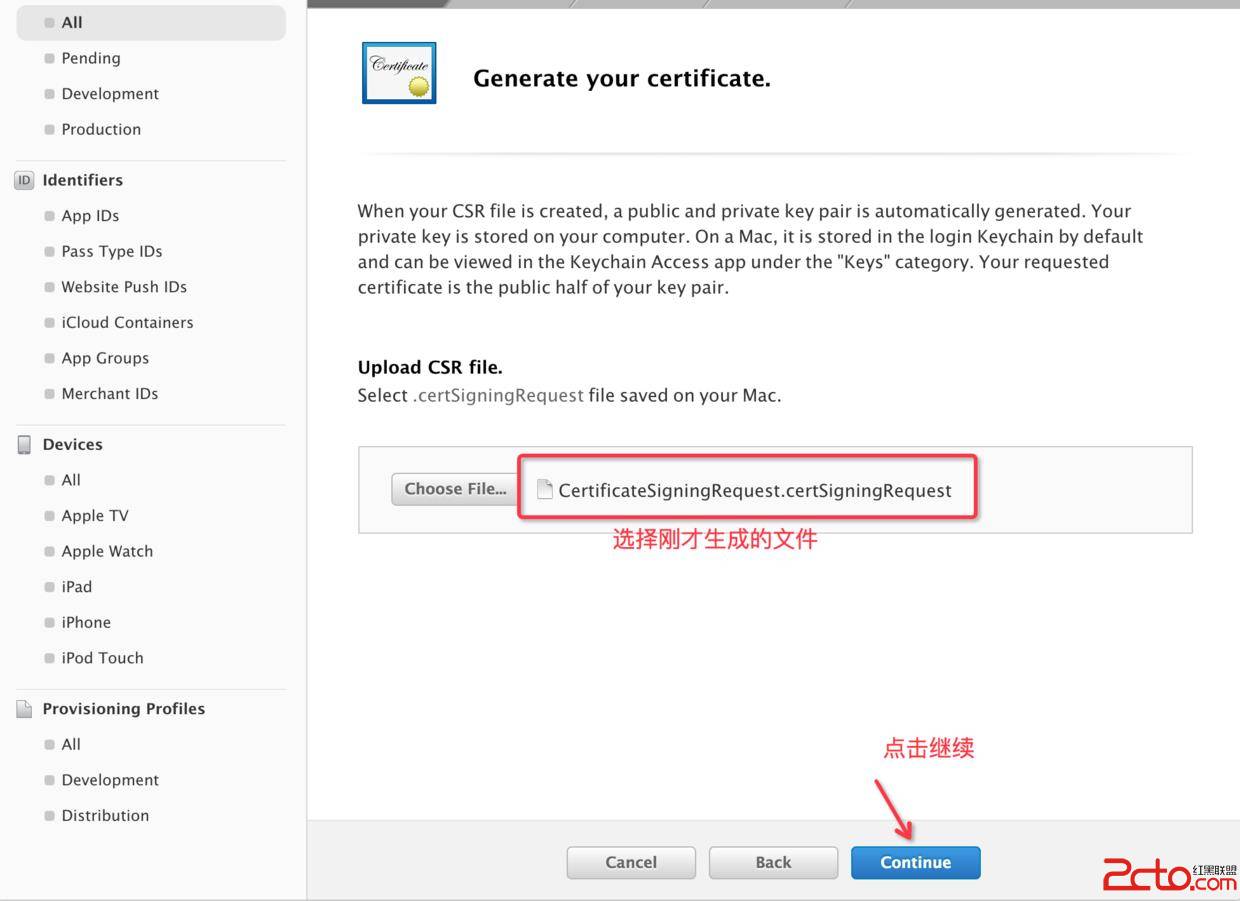
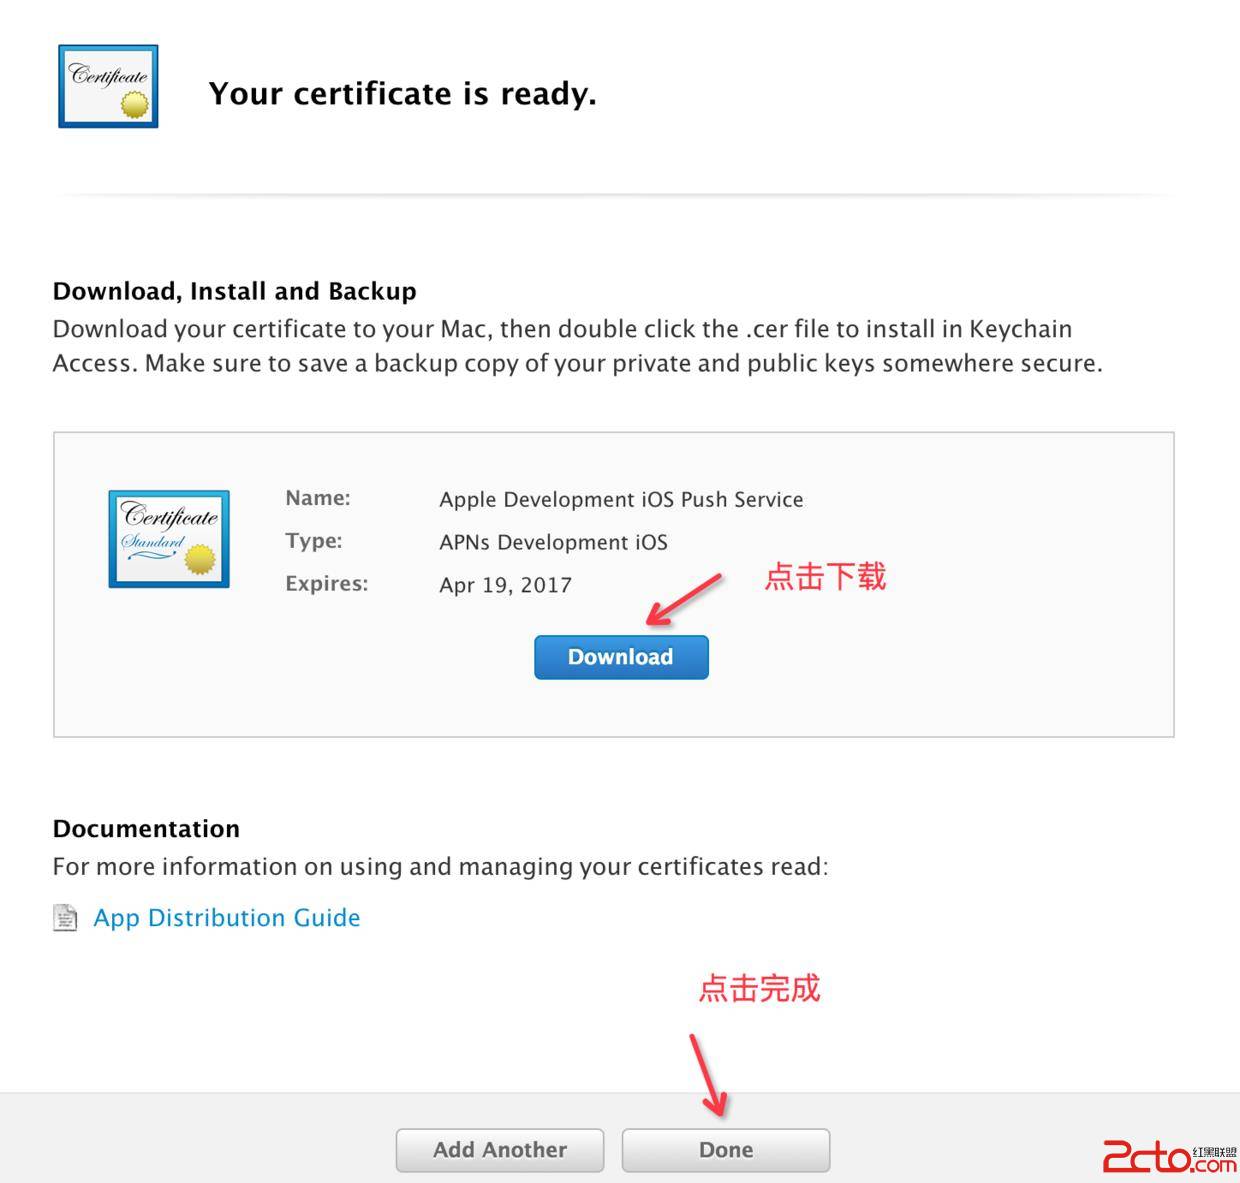
2. 生產證書
步驟與開發證書完全相同,只是環境換成 Production。上線版本用的是這一份,別搞混。
3. 匯出為 .p12
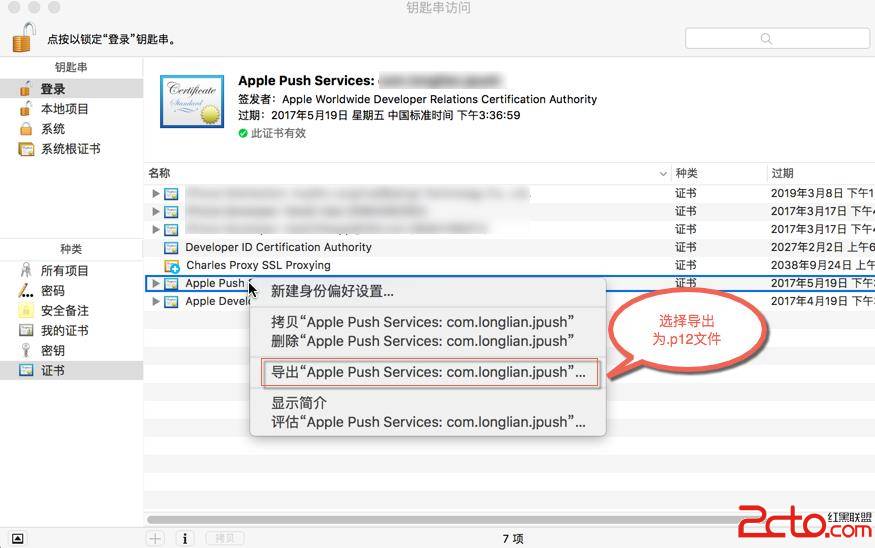
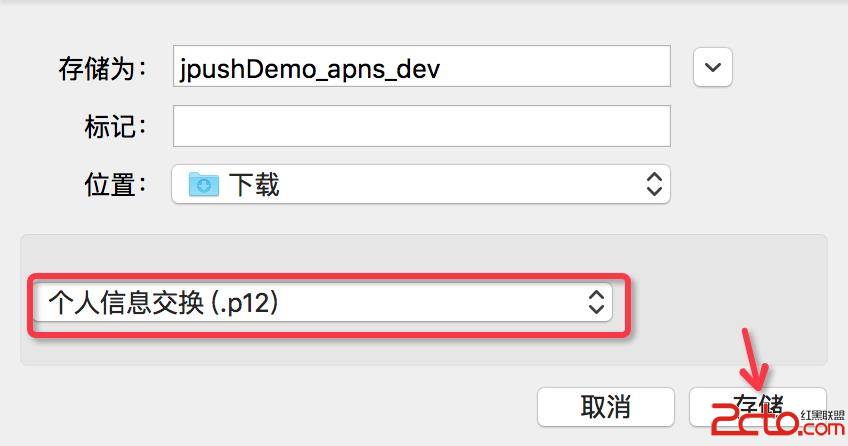
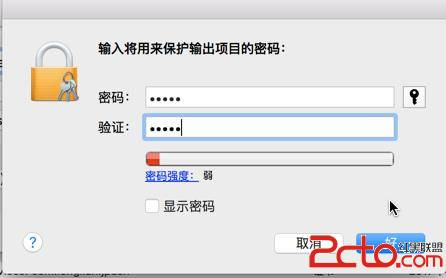
在鑰匙串中把憑證連同私鑰一起匯出成 .p12 檔案,這份檔案稍後要上傳到極光後台。
二、註冊極光推送帳號
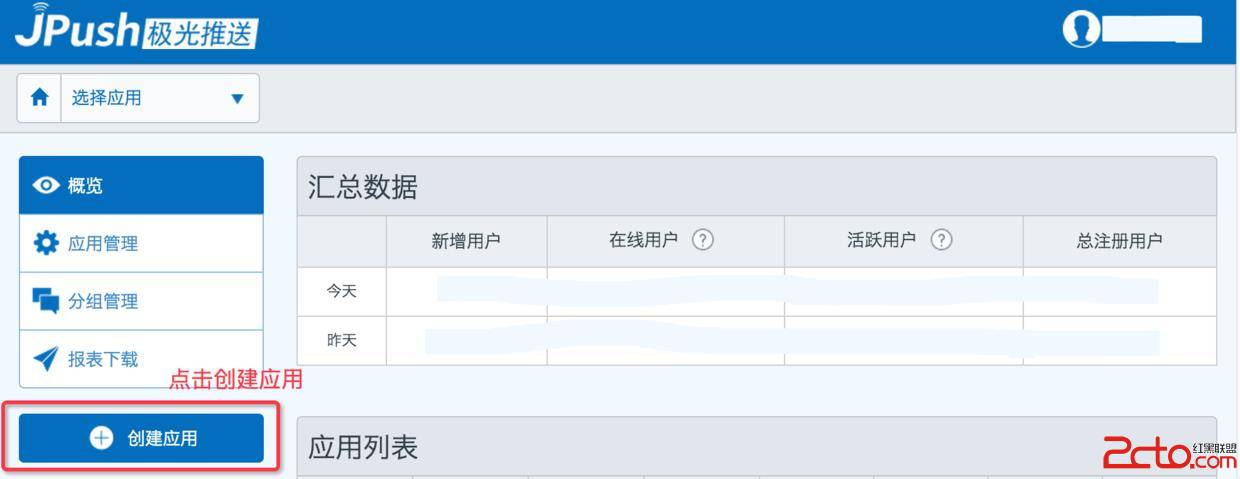
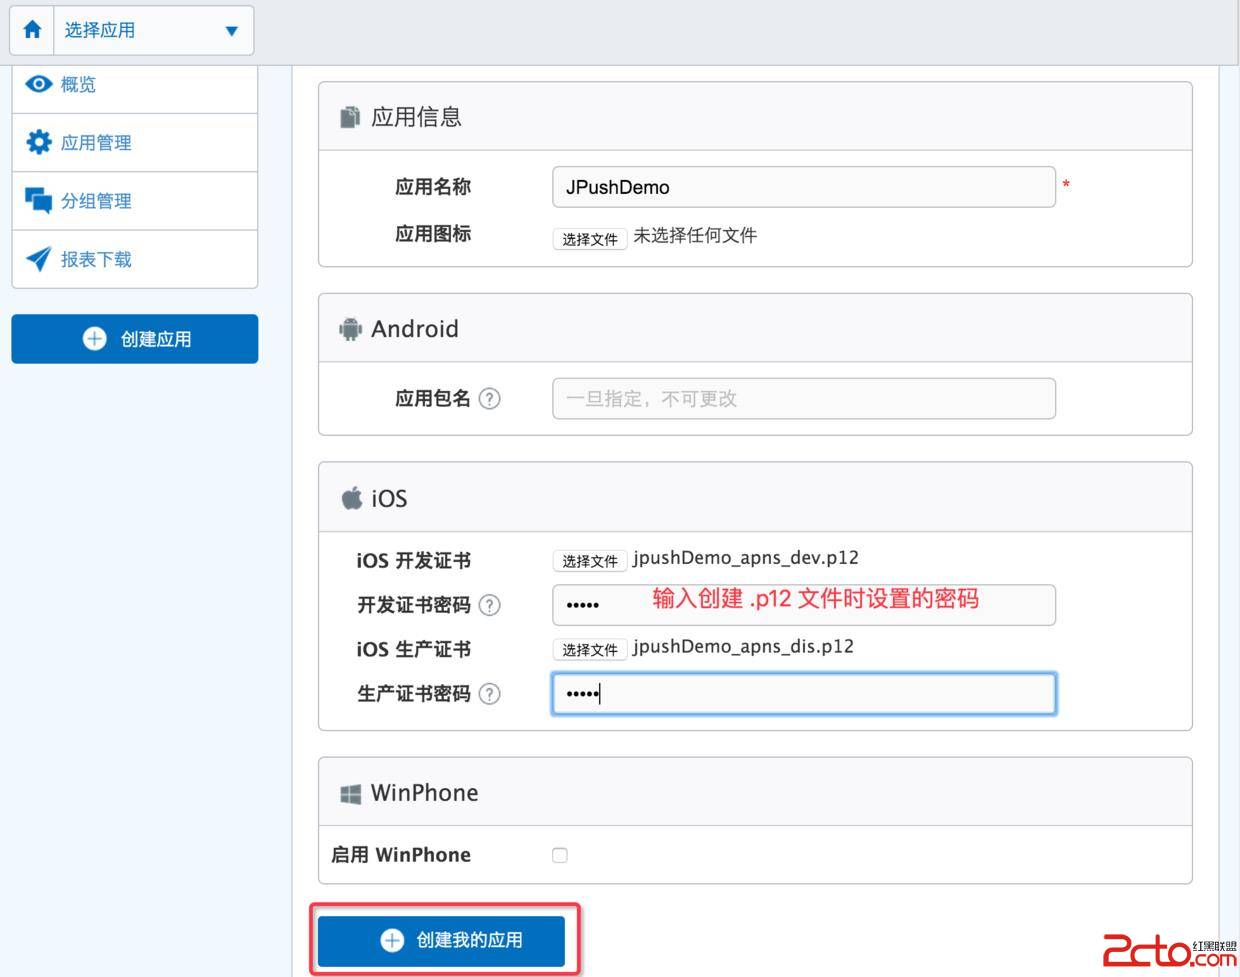
到極光推送官網完成註冊,登入後進入管理控制台,建立一個對應你 App 的應用,填寫應用名稱、包名(Bundle Identifier)等資訊,再把上一節的 .p12 上傳,並選擇環境類型(開發/生產)。
三、整合 JPush SDK
本文使用的是 JPush-iOS-SDK-2.1.0。壓縮檔裡附了一份 iOS SDK Integration Guide 的 PDF,裡頭有完整的整合說明,建議先讀過。
把 SDK 加入專案後,需要進行幾項基本設定(依 SDK 版本而異,通常包含加入對應的 Framework、設定 Other Linker Flags、關閉 Bitcode 等):
AppDelegate 中的推送回呼
-(BOOL)application:(UIApplication *)application
    didFinishLaunchingWithOptions:(NSDictionary *)launchOptions {
    [JPushConfig registerJPush:launchOptions];      // 設定 appKey、環境等
    return YES;
}

// 註冊成功後回傳 deviceToken
-(void)application:(UIApplication *)application
    didRegisterForRemoteNotificationsWithDeviceToken:(NSData *)deviceToken {
    [JPUSHService registerDeviceToken:deviceToken];
}

// iOS 7 之後的靜默推送/Background Fetch 回呼
-(void)application:(UIApplication *)application
    didReceiveRemoteNotification:(NSDictionary *)userInfo
          fetchCompletionHandler:(void (^)(UIBackgroundFetchResult))completionHandler {
    // content-available: 1 是背景執行的必要欄位
    [JPUSHService resetBadge];                      // 清掉角標
    if (!userInfo) {
        completionHandler(UIBackgroundFetchResultNoData);
        return;
    }
    completionHandler(UIBackgroundFetchResultNewData);
    // 此處可依後端約定的 userInfo 格式做解析
}

// 一般遠程通知
-(void)application:(UIApplication *)application
    didReceiveRemoteNotification:(NSDictionary *)userInfo {
    [JPUSHService handleRemoteNotification:userInfo];
    application.applicationIconBadgeNumber = 0;
}

// 本地通知
-(void)application:(UIApplication *)application
    didReceiveLocalNotification:(UILocalNotification *)notification {
    [JPUSHService showLocalNotificationAtFront:notification identifierKey:nil];
}
封裝註冊流程
把初始化細節收進一個類別方法,AppDelegate 保持乾淨:
+(void)registerJPush:(NSDictionary *)launchOptions {
    if ([[UIDevice currentDevice].systemVersion floatValue] >= 8.0) {
        // iOS 8 之後可自訂 categories
        [JPUSHService registerForRemoteNotificationTypes:
            (UIUserNotificationTypeBadge |
             UIUserNotificationTypeSound |
             UIUserNotificationTypeAlert)
                                          categories:nil];
    } else {
        [JPUSHService registerForRemoteNotificationTypes:
            (UIUserNotificationTypeBadge |
             UIUserNotificationTypeSound |
             UIUserNotificationTypeAlert)
                                          categories:nil];
    }

    NSString *appKey = @"極光後台取得的 AppKey";
    NSString *channel = @"App Store";   // 發布渠道,可自訂
    // 這裡必須與極光控制台設定的環境一致:開發環境 false,生產環境 true
    BOOL isProduction = NO;

    [JPUSHService setupWithOption:launchOptions
                          appKey:appKey
                         channel:channel
                apsForProduction:isProduction];
}
apsForProduction 這個旗標最容易出錯:它必須和你在極光後台選擇的環境相符,否則會出現「程式碼看起來都對,就是收不到通知」的狀況。
收到通知後跳到指定頁面
解析完 userInfo 之後,直接換掉根視圖或用 present 導向目標頁面:
UIViewController *vc = [[UIViewController alloc] init];
[self.window.rootViewController presentViewController:vc animated:YES completion:nil];
完成以上三步,用真機(模擬器收不到 APNs)測試一次,能收到通知就代表整條鏈路已經打通。