
淺談 UIAlertView 與 UIAlertController:差異、遷移與實作要點
Apple 在 iOS 8 推出了 UIAlertController 作為 UIAlertView 的後繼者,而 UIAlertView 也在 iOS 9 之後被正式標記為 deprecated。實務上的結論很簡單:iOS 8 以後應該用 UIAlertController,iOS 8 以前只能用 UIAlertView。若你的 App 需要同時支援 iOS 7 與 iOS 8,就先判斷系統版本再分流:
if ([[[UIDevice currentDevice] systemVersion] floatValue] >= 8.0) {
    // iOS 8 以上
    UIAlertController *alertController =
        [UIAlertController alertControllerWithTitle:@"是否結束行程?"
                                           message:nil
                                    preferredStyle:UIAlertControllerStyleAlert];

    UIAlertAction *cancelAction =
        [UIAlertAction actionWithTitle:@"取消"
                                 style:UIAlertActionStyleCancel
                               handler:^(UIAlertAction * _Nonnull action) {
            [self.navigationController dismissViewControllerAnimated:alertController
                                                        completion:nil];
        }];

    UIAlertAction *okAction =
        [UIAlertAction actionWithTitle:@"確定"
                                 style:UIAlertActionStyleDefault
                               handler:^(UIAlertAction * _Nonnull action) {
            [self upload];
        }];

    [alertController addAction:cancelAction];
    [alertController addAction:okAction];
    [self.navigationController presentViewController:alertController
                                           animated:YES
                                         completion:nil];
} else {
    // iOS 7
    self.uploadAlertView =
        [[UIAlertView alloc] initWithTitle:@"是否結束行程?"
                                 message:nil
                                delegate:self
                       cancelButtonTitle:@"取消"
                       otherButtonTitles:@"確定", nil];
    [self.uploadAlertView show];
}
值得一提的是,Apple 其實並沒有真正把 UIAlertView 拿掉,只是在 iOS 8 之後它可能出現一些異常行為,而且誰也說不準哪天它會被徹底停用。所以做一層版本判斷,仍然是比較保險的做法。
iOS 8 的其中一項重點,是讓介面元件更有適應性、更靈活,因此不少視圖控制器的實作方式都出現了大幅變動。全新的 UIPresentationController 在處理視圖控制器之間的過場動畫、以及自適應尺寸變化(例如旋轉)時扮演了關鍵角色,替開發者省下不少工時。同時,Alert View、Action Sheet、Popover 與 Search Bar Controller 這些舊有 UIKit 元件也都有變化。以下就以 Objective-C 與 Swift 兩種語言並行說明。
UIAlertView
自從 iOS 5 發表對話框視圖樣式以來,它的外觀幾乎沒什麼變。下面的程式碼示範如何建立並顯示一個帶有「取消」與「好的」兩個按鈕的警示框。
Objective-C 版本:
UIAlertView *alertview =
    [[UIAlertView alloc] initWithTitle:@"標題"
                              message:@"這個是 UIAlertView 的預設樣式"
                             delegate:self
                    cancelButtonTitle:@"取消"
                    otherButtonTitles:@"好的", nil];
[alertview show];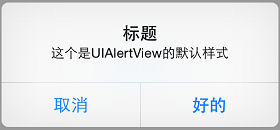
UIAlertView 的預設樣式
Swift 版本有個限制:初始化時只允許建立帶有一個取消按鈕的警示框。你或許會看到帶有 otherButtonTitles 的那個 init 方法,可惜它無法通過編譯。
var alertView = UIAlertView(title: "標題",
                          message: "這個是 UIAlertView 的預設樣式",
                         delegate: self,
                cancelButtonTitle: "取消")
alertView.show()
Swift 版本的 UIAlertView
要在 Swift 中做出與 Objective-C 版本相同的對話框,得繞一條路——麻煩歸麻煩,但目的能達到就好:
var alertView = UIAlertView()
alertView.delegate = self
alertView.title = "標題"
alertView.message = "這個是 UIAlertView 的預設樣式"
alertView.addButtonWithTitle("取消")
alertView.addButtonWithTitle("好的")
alertView.show()
另外,透過調整 alertViewStyle 屬性,你還能做出文字輸入、密碼輸入,甚至登入表單的效果。

UIAlertView 文字對話框

UIAlertView 密碼對話框

UIAlertView 登入對話框
UIAlertViewDelegate 協議提供了回應按鈕動作的回呼方法;此外,實作 alertViewShouldEnableOtherButton: 就能依文字框內容動態決定按鈕是否可用。
不過 Apple 官方目前並不建議在 iOS 8 中繼續使用 UIAlertView,取而代之的是 UIAlertController。
UIAlertController
在功能上,UIAlertController 等價於 UIAlertView 加上 UIActionSheet 的總和,以模組化的方式一次取代兩者。到底呈現為對話框還是上拉選單(Action Sheet),取決於你建立控制器時設定的 preferredStyle。
一個簡單的警示框
建立 UIAlertController 的寫法和 UIAlertView 非常相似:
Objective-C 版本:
UIAlertController *alertController =
    [UIAlertController alertControllerWithTitle:@"標題"
                                       message:@"這個是 UIAlertController 的預設樣式"
                                preferredStyle:UIAlertControllerStyleAlert];
Swift 版本:
var alertController = UIAlertController(title: "標題",
                                     message: "這個是 UIAlertController 的預設樣式",
                              preferredStyle: UIAlertControllerStyle.Alert)
和 UIAlertView 相比,你不需要指定代理,也不必在初始化時就把按鈕塞進去。但要特別注意第三個參數——它決定你要的是警示框還是上拉選單。
按鈕是透過建立 UIAlertAction 實例再加入控制器的。每個 UIAlertAction 由標題字串、樣式,以及使用者選取時要執行的程式碼區塊組成。UIAlertActionStyle 有三種:一般(default)、取消(cancel)與警示破壞性(destructive)。要還原前面那兩個按鈕,只要建立對應的 action 並加入即可:
Objective-C 版本:
UIAlertAction *cancelAction =
    [UIAlertAction actionWithTitle:@"取消" style:UIAlertActionStyleCancel handler:nil];
UIAlertAction *okAction =
    [UIAlertAction actionWithTitle:@"好的" style:UIAlertActionStyleDefault handler:nil];
[alertController addAction:cancelAction];
[alertController addAction:okAction];
Swift 版本:
var cancelAction = UIAlertAction(title: "取消",
                                style: UIAlertActionStyle.Cancel,
                              handler: nil)
var okAction = UIAlertAction(title: "好的",
                            style: UIAlertActionStyle.Default,
                          handler: nil)
alertController.addAction(cancelAction)
alertController.addAction(okAction)
最後把這個視圖控制器顯示出來:
Objective-C 版本:
[self presentViewController:alertController animated:YES completion:nil];Swift 版本:
self.presentViewController(alertController, animated: true, completion: nil)
UIAlertController 預設樣式
按鈕的排列順序取決於加入的順序。依 Apple《iOS 使用者介面指南》的建議,在只有兩個按鈕的警示框中,取消按鈕應該放在左側。另外要注意,取消樣式的按鈕只能有一個;若你加了第二個,就會得到這樣的執行期例外:
* Terminating app due to uncaught exception 'NSInternalInconsistencyException', reason: 'UIAlertController can only have one action with a style of UIAlertActionStyleCancel'
「警示」樣式
把前面的「好的」按鈕換成「重置」按鈕,就能看出差別:
Objective-C 版本:
UIAlertAction *resetAction =
    [UIAlertAction actionWithTitle:@"重置"
                            style:UIAlertActionStyleDestructive
                          handler:nil];
[alertController addAction:resetAction];
Swift 版本:
var resetAction = UIAlertAction(title: "重置",
                                style: UIAlertActionStyle.Destructive,
                              handler: nil)
alertController.addAction(resetAction)
「警示」樣式
新增的「重置」按鈕變成了紅色。依 Apple 的定義,警示樣式用在可能修改或刪除資料的操作上,藉由醒目的紅色提醒使用者三思而後行。
文字輸入對話框
UIAlertController 的靈活性意味著你不必受限於內建樣式。以前只能在預設、文字輸入、密碼輸入、登入輸入這幾種之間挑,現在你可以加入任意數量的 UITextField,並使用它全部的屬性。加入文字框時,你需要提供一個用來配置它的程式碼區塊。
要重建原本的登入/密碼樣式,只要加入兩個文字框、設定合適的 placeholder,再把密碼欄設為安全輸入即可。
Objective-C 版本:
UIAlertController *alertController =
    [UIAlertController alertControllerWithTitle:@"文字對話框"
                                       message:@"登入和密碼對話框示例"
                                preferredStyle:UIAlertControllerStyleAlert];

[alertController addTextFieldWithConfigurationHandler:^(UITextField *textField) {
    textField.placeholder = @"登入";
}];

[alertController addTextFieldWithConfigurationHandler:^(UITextField *textField) {
    textField.placeholder = @"密碼";
    textField.secureTextEntry = YES;
}];
Swift 版本:
alertController.addTextFieldWithConfigurationHandler { (textField: UITextField!) -> Void in
    textField.placeholder = "登入"
}
alertController.addTextFieldWithConfigurationHandler { (textField: UITextField!) -> Void in
    textField.placeholder = "密碼"
    textField.secureTextEntry = true
}
按下「好的」時,讀取文字框內容:
Objective-C 版本:
UIAlertAction *okAction =
    [UIAlertAction actionWithTitle:@"好的" style:UIAlertActionStyleDefault handler:^(UIAlertAction *action) {
        UITextField *login = alertController.textFields.firstObject;
        UITextField *password = alertController.textFields.lastObject;
        ...
    }];
Swift 版本:
var okAction = UIAlertAction(title: "好的", style: UIAlertActionStyle.Default) {
    (action: UIAlertAction!) -> Void in
    var login = alertController.textFields?.first as UITextField
    var password = alertController.textFields?.last as UITextField
}
想還原 UIAlertView 的 alertViewShouldEnableOtherButton: 就稍微麻煩一些。假設我們要求「登入」欄至少輸入 3 個字元才能啟用「好的」按鈕——UIAlertController 並沒有對應的委派方法,因此得靠 Observer 幫忙。Observer 模式定義了物件之間一對多的依賴關係,當某個物件狀態改變時,所有依賴它的物件都會收到通知並自動更新。做法是在配置文字框的程式碼區塊中註冊通知:
Objective-C 版本:
[alertController addTextFieldWithConfigurationHandler:^(UITextField *textField) {
    ...
    [[NSNotificationCenter defaultCenter] addObserver:self
                                            selector:@selector(alertTextFieldDidChange:)
                                                name:UITextFieldTextDidChangeNotification
                                              object:textField];
}];
Swift 版本:
alertController.addTextFieldWithConfigurationHandler { (textField: UITextField!) -> Void in
    ...
    NSNotificationCenter.defaultCenter().addObserver(self,
        selector: Selector("alertTextFieldDidChange:"),
        name: UITextFieldTextDidChangeNotification,
        object: textField)
}
視圖控制器釋放時記得要移除 Observer,做法是在每個按鈕動作的 handler 區塊(以及其他任何可能釋放視圖控制器的地方)補上移除的程式碼。以 okAction 為例:
Objective-C 版本:
UIAlertAction *okAction =
    [UIAlertAction actionWithTitle:@"好的" style:UIAlertActionStyleDefault handler:^(UIAlertAction *action) {
        ...
        [[NSNotificationCenter defaultCenter] removeObserver:self
                                                       name:UITextFieldTextDidChangeNotification
                                                     object:nil];
    }];
Swift 版本:
var okAction = UIAlertAction(title: "好的", style: UIAlertActionStyle.Default) {
    (action: UIAlertAction!) -> Void in
    ...
    NSNotificationCenter.defaultCenter().removeObserver(self,
        name: UITextFieldTextDidChangeNotification,
        object: nil)
}
顯示對話框之前,先把「好的」按鈕凍結:
Objective-C 版本:
okAction.enabled = NO;Swift 版本:
okAction.enabled = false接著在通知觀察者中,於啟用按鈕前先檢查「登入」欄的內容:
Objective-C 版本:
- (void)alertTextFieldDidChange:(NSNotification *)notification {
    UIAlertController *alertController = (UIAlertController *)self.presentedViewController;
    if (alertController) {
        UITextField *login = alertController.textFields.firstObject;
        UIAlertAction *okAction = alertController.actions.lastObject;
        okAction.enabled = login.text.length > 2;
    }
}
Swift 版本:
func alertTextFieldDidChange(notification: NSNotification) {
    var alertController = self.presentedViewController as? UIAlertController
    if (alertController != nil) {
        var login = alertController!.textFields?.first as UITextField
        var okAction = alertController!.actions.last as UIAlertAction
        okAction.enabled = countElements(login.text) > 2
    }
}
UIAlertController 的登入與密碼對話框示例
現在「好的」按鈕會保持停用,直到「登入」欄輸入超過 3 個字元。
上拉選單(Action Sheet)
當你要讓使用者從一串選項中挑一個時,上拉選單非常合適。它與警示框最大的差別在於呈現形式與裝置尺寸有關:在 iPhone(緊湊寬度)上,它從螢幕底部升起;在 iPad(常規寬度)上,則以彈出框的形式出現。
建立方式與警示框幾乎一樣,唯一不同的是樣式:
Objective-C 版本:
UIAlertController *alertController =
    [UIAlertController alertControllerWithTitle:@"保存或刪除數據"
                                       message:@"刪除數據將不可恢復"
                                preferredStyle:UIAlertControllerStyleActionSheet];
Swift 版本:
var alertController = UIAlertController(title: "保存或刪除數據",
                                     message: "刪除數據將不可恢復",
                              preferredStyle: UIAlertControllerStyle.ActionSheet)
加入按鈕的方式和警示框相同:
Objective-C 版本:
UIAlertAction *cancelAction =
    [UIAlertAction actionWithTitle:@"取消" style:UIAlertActionStyleCancel handler:nil];
UIAlertAction *deleteAction =
    [UIAlertAction actionWithTitle:@"刪除" style:UIAlertActionStyleDestructive handler:nil];
UIAlertAction *archiveAction =
    [UIAlertAction actionWithTitle:@"保存" style:UIAlertActionStyleDefault handler:nil];
[alertController addAction:cancelAction];
[alertController addAction:deleteAction];
[alertController addAction:archiveAction];
Swift 版本:
var cancelAction = UIAlertAction(title: "取消",
                                style: UIAlertActionStyle.Cancel,
                              handler: nil)
var deleteAction = UIAlertAction(title: "刪除",
                                style: UIAlertActionStyle.Destructive,
                              handler: nil)
var archiveAction = UIAlertAction(title: "保存",
                                 style: UIAlertActionStyle.Default,
                               handler: nil)
alertController.addAction(cancelAction)
alertController.addAction(deleteAction)
alertController.addAction(archiveAction)上拉選單不能加入文字框。若硬要加,就會得到這樣的執行期例外:
* Terminating app due to uncaught exception 'NSInternalInconsistencyException', reason: 'Text fields can only be added to an alert controller of style UIAlertControllerStyleAlert'
在 iPhone 等緊湊寬度裝置上呈現:
Objective-C 版本:
[self presentViewController:alertController animated:YES completion:nil];Swift 版本:
self.presentViewController(alertController, animated: true, completion: nil)
iPhone 上的上拉選單效果
只要選單中有「取消」按鈕,它就一定被固定在最底部,不管加入順序如何;其餘按鈕則依加入順序由上而下排列。而《iOS 使用者介面指南》要求破壞性樣式的按鈕必須排在最前面。
但在 iPad 或其他常規寬度裝置上執行時,你會遇到一個隱藏得比較深的執行期例外:
Terminating app due to uncaught exception 'NSGenericException', reason: 'UIPopoverPresentationController (…) should have a non-nil sourceView or barButtonItem set before the presentation occurs.'
原因前面提過:常規寬度裝置上的上拉選單以彈出框呈現,而彈出框必須有一個作為定位點(anchor point)的來源視圖或列按鈕項目。既然這裡是用一般的 UIButton 觸發選單,就把它當成定位點。
好消息是 iOS 8 之後你不再需要自己計算彈出框大小,UIAlertController 會依裝置自動調整;在 iPhone 或緊湊寬度裝置上,這個屬性會是 nil。設定程式碼如下:
Objective-C 版本:
UIPopoverPresentationController *popover = alertController.popoverPresentationController;
if (popover) {
    popover.sourceView = sender;
    popover.sourceRect = sender.bounds;
    popover.permittedArrowDirections = UIPopoverArrowDirectionAny;
}
Swift 版本:
var popover = alertController.popoverPresentationController
if (popover != nil) {
    popover?.sourceView = sender
    popover?.sourceRect = sender.bounds
    popover?.permittedArrowDirections = UIPopoverArrowDirection.Any
}
iPad 上的上拉選單效果
UIPopoverPresentationController 同樣是 iOS 8 新增的類別,用來取代 UIPopoverController。此時選單會以固定在來源按鈕上的彈出框形式顯示。
另外要注意,使用彈出框時 UIAlertController 會自動移除取消按鈕——使用者點擊彈出框外圍即可取消,因此取消按鈕變得多餘。
釋放對話框控制器
一般情況下,使用者選完動作後對話框控制器會自行釋放。但你也可以在需要時以程式方式關掉它,就像關掉其他視圖控制器一樣。特別是當 App 進入背景時,應該主動把警示框或上拉選單收起來。假設你有在監聽 UIApplicationDidEnterBackgroundNotification,就能在 observer 中把眼前顯示的視圖控制器關掉(記得在 viewDidLoad 裡註冊 observer):
Objective-C 版本:
- (void)didEnterBackground:(NSNotification *)notification {
    [[NSNotificationCenter defaultCenter] removeObserver:self
                                                   name:UITextFieldTextDidChangeNotification
                                                 object:nil];
    [self.presentedViewController dismissViewControllerAnimated:NO completion:nil];
}
Swift 版本:
func didEnterBackground(notification: NSNotification) {
    NSNotificationCenter.defaultCenter().removeObserver(self,
        name: UITextFieldTextDidChangeNotification,
        object: nil)
    self.presentedViewController?.dismissViewControllerAnimated(false, completion: nil)
}
同樣地,為了執行安全,別忘了把所有文字框的 observer 一併移除。
總結
原本 UIAlertView 與 UIActionSheet 在 iOS 8 中仍能正常運作,所以不必急著全面改寫程式碼(何況本文用到的許多 API 只在 iOS 8 才支援)。真正該優先處理的,是那些涉及資料刪除、需要動態輸入驗證,或必須在 iPad 上呈現的情境——這些正是 UIAlertController 明顯勝出的地方。遷移時最值得注意的三件事:取消樣式的按鈕只能有一個、Action Sheet 不能加文字框、常規寬度裝置上的彈出框一定要設定來源視圖。