
iOS 通知中心快速回覆實作教學:不離開當前畫面也能處理推播
iOS 8 徹底改變了通知中心的互動邏輯:推播不再只是「看到之後點進 App」的提示,而是一個可以直接操作的工作入口。當畫面頂端滑出通知橫幅時,往下拉就能展開操作列;鎖屏狀態下也同樣能針對通知項目做處理。設計目標很清楚——讓使用者盡量不離開手上正在做的事,就能把訊息處理完,效率自然提高。
哪些通知可以直接互動
只要事先為通知註冊好一組「動作」,使用者就能在橫幅或鎖屏上完成下列操作:
- 直接在通知橫幅上回覆簡訊,不必切換進訊息 App
- 對郵件邀請直接按下接受或婉拒
- 把提醒事項標記為完成,或設定延後提醒
- 第三方 App 只要更新介面,也能提供同樣的快捷操作
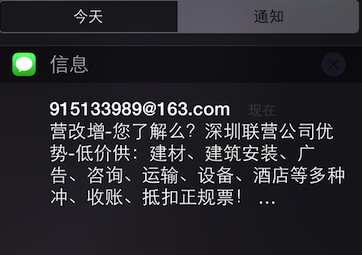
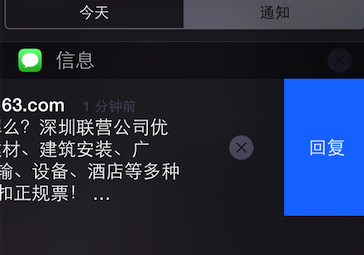
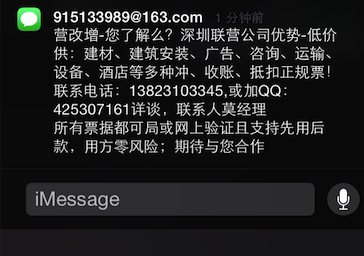
下面用最常見的簡訊通知當例子,看看快速回覆實際長什麼樣子:
實作步驟
整體流程都在 AppDelegate 的 didFinishLaunchingWithOptions 裡完成,分成註冊動作、打包類別、設定通知樣式、向系統註冊四個階段。
1. 建立通知上要顯示的按鈕
每個按鈕都是一個 UIMutableUserNotificationAction,透過 activationMode 決定點下去之後要不要把 App 拉到前景:
// 接受按鈕:點擊後進入前景
UIMutableUserNotificationAction *acceptAction = [[UIMutableUserNotificationAction alloc] init];
acceptAction.identifier = @"acceptAction";
acceptAction.title = @"接受";
acceptAction.activationMode = UIUserNotificationActivationModeForeground;

// 拒絕按鈕:點擊後留在背景處理
UIMutableUserNotificationAction *rejectAction = [[UIMutableUserNotificationAction alloc] init];
rejectAction.identifier = @"rejectAction";
rejectAction.title = @"拒絕";
rejectAction.activationMode = UIUserNotificationActivationModeBackground;
// 需要解鎖後才能處理;若 activationMode 為 Foreground,這個屬性會被忽略
rejectAction.authenticationRequired = YES;
rejectAction.destructive = YES;
2. 把按鈕收進同一個類別
類別(Category)是「一組按鈕」的容器,推播攜帶的 category 欄位就是靠它對應:
UIMutableUserNotificationCategory *categorys = [[UIMutableUserNotificationCategory alloc] init];
categorys.identifier = @"alert";
NSArray *actions = @[acceptAction, rejectAction];
[categorys setActions:actions forContext:UIUserNotificationActionContextMinimal];
3. 建立通知設定並指定顯示樣式
UIUserNotificationSettings *settings = [UIUserNotificationSettings settingsForTypes:(UIUserNotificationTypeAlert | UIUserNotificationTypeBadge | UIUserNotificationTypeSound) categories:[NSSet setWithObjects:categorys, nil]];
4. 向系統註冊
[[UIApplication sharedApplication] registerForRemoteNotifications];
[[UIApplication sharedApplication] registerUserNotificationSettings:settings];
使用遠端推播時,記得在 payload 裡帶上對應的 category 欄位,這個字串必須由前端與後端共同約定並保持一致,App 端收到後才會顯示你在程式碼裡設定好的那組按鈕:
{"aps":{"alert":"測試推送的快捷回復", "sound":"default", "badge": 1, "category":"alert"}}
順帶一提,舊版推播 payload 的容量上限是 256 位元組,Apple 後來將它放寬到 2KB,能承載的資訊量大了不少。
按鈕點擊事件的處理
以本地通知為例,先送出一則帶有 category 的通知:
UILocalNotification *notification = [[UILocalNotification alloc] init];
notification.fireDate = [NSDate dateWithTimeIntervalSinceNow:10];
notification.timeZone = [NSTimeZone defaultTimeZone];
notification.alertBody = @"測試推送的快捷回復";
notification.category = @"alert";
[[UIApplication sharedApplication] scheduleLocalNotification:notification];
接著在 AppDelegate 實作兩個代理方法。第一個是註冊成功後的回呼:
- (void)application:(UIApplication *)application didRegisterUserNotificationSettings:(UIUserNotificationSettings *)notificationSettings {
    NSLog(@"%@", notificationSettings);
}
第二個才是真正的按鈕事件入口。當 App 不在前景時收到通知,下拉或左滑會出現你註冊的按鈕,點下去就走進這個方法,再用 identifier 判斷使用者按了哪一個:
- (void)application:(UIApplication *)application handleActionWithIdentifier:(NSString *)identifier forLocalNotification:(UILocalNotification *)notification completionHandler:(void (^)())completionHandler {
    NSLog(@"%@----%@", identifier, notification);
    // 處理完畢後,一定要呼叫這個 block,否則系統會認為你還沒做完
    completionHandler();
}
遠端推播的版本大同小異,只是把參數換成 userInfo 字典:
- (void)application:(UIApplication *)application handleActionWithIdentifier:(NSString *)identifier forRemoteNotification:(NSDictionary *)userInfo completionHandler:(void (^)())completionHandler {
    // identifier 指出被點擊的按鈕,userInfo 是推播內容
    completionHandler();
}
怎麼驗證效果
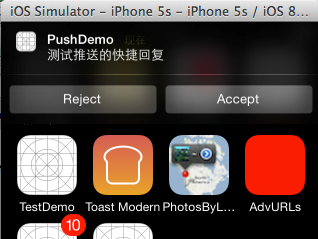
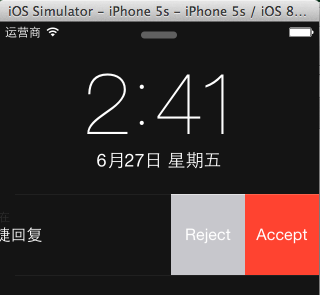
直接在前台跑是不會看到互動按鈕的,模擬器上請用 shift + command + H 把 App 推到背景,或用 command + L 鎖定螢幕。App 在背景時收到通知,下拉通知就會出現你新增的兩個按鈕;如果是鎖屏狀態,左滑通知也會帶出同一組按鈕。
成果如下:


補充提醒
因為遠端推播需要伺服器端配合,設定起來較繁瑣,所以示範時用本地通知代替;兩者要呼叫的代理方法幾乎一一對應,學會一邊就能類推到另一邊。
另外要留意版本差異:UIUserNotificationSettings、UILocalNotification 這一套 API 從 iOS 10 起已被 UserNotifications 框架取代(UNNotificationAction、UNNotificationCategory、UNUserNotificationCenter 等)。若你維護的是新專案,建議直接採用新框架;上面這套寫法則仍適用於舊版 iOS 的相容性維護。