
Weex iOS SDK 整合指南:從依賴到頁面渲染
若要把 Weex SDK 整合到現有 iOS 專案,常見方式有兩種:源碼依賴與 CocoaPods 依賴。本文以 CocoaPods 為例,說明從安裝、編譯、導入到頁面渲染的流程。
安裝 CocoaPods
若尚未安裝 CocoaPods,可先移除舊 Ruby 源,加入新源,再安裝 CocoaPods。
gem sources --remove https://rubygems.org/
gem sources -a https://ruby.taobao.org/
gem sources -l
sudo gem install cocoapods
加入 Weex 依賴
在專案的 Podfile 中加入 WeexSDK 依賴。若使用正式版本,可直接引用 CocoaPods 的 Specs 來源。
source 'https://github.com/CocoaPods/Specs.git'
target 'YourTarget' do
  platform :ios, '7.0'
  pod 'WeexSDK', '0.6.1'
end
儲存 Podfile 後,在專案目錄執行 pod install。完成後打開 xcworkspace,即可進入開發環節。
編譯 WeexSDK.framework
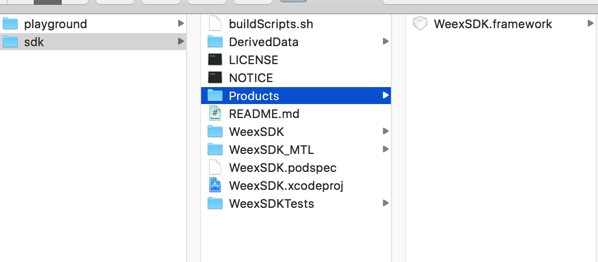
若要自行編譯,可下載 Weex 專案,開啟 ios/sdk 目錄下的 WeexSDK.xcodeproj,切換 target 後編譯。

編譯完成後,可在 Products 目錄看到 WeexSDK.framework。
導入 SDK 到工程
將 framework 導入專案,並加入所需系統庫。
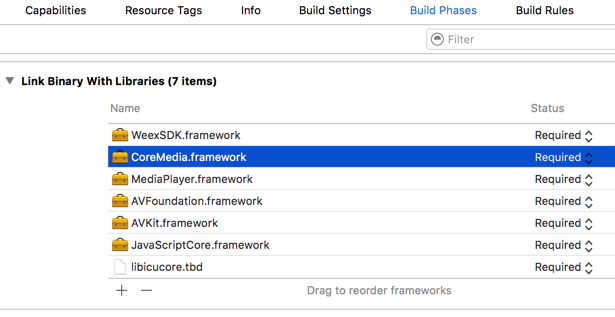
若需要 WebSocket 支援,可加入 SocketRocket 依賴,或將 SRWebSocket 相關檔案加入專案。
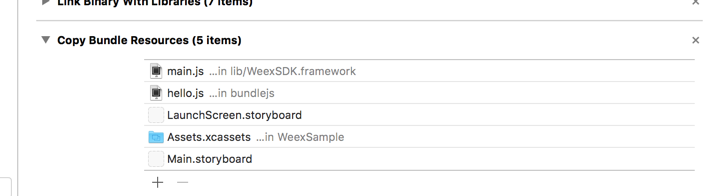
加入 main.js
WeexSDK.framework 中包含 main.js,請確認已正確加入。
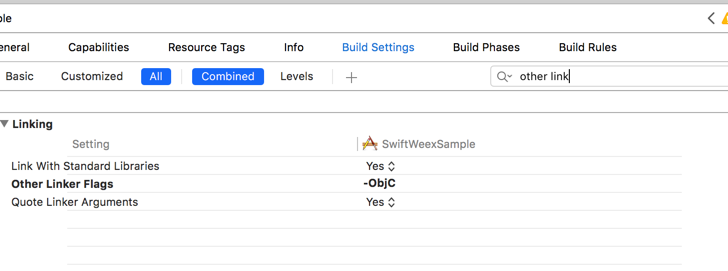
重要提示
在 Build Settings 的 Other Link Flags 中加入 -ObjC,注意大小寫。
環境初始化
在 AppDelegate 中完成應用配置、SDK 初始化、註冊自定義 Module 與 Component,以及設定 Log 等級。
[WXAppConfiguration setAppName:@"WeexDemo"];
[WXAppConfiguration setAppVersion:@"1.0.0"];
[WXSDKEngine initSDKEnviroment];
[WXSDKEngine registerComponent:@"MyView" withClass:[MyViewComponent class]];
[WXSDKEngine registerModule:@"event" withClass:[WXEventModule class]];
[WXLog setLogLevel:WXLogLevelVerbose];
頁面渲染
使用 WXSDKInstance 渲染 Weex 頁面。設定 viewController 與 frame,呼叫 renderWithURL,並在 onCreate 中把 view 加入父容器,在 renderFinish 處理完成,在 onFailed 處理失敗。
頁面銷毀時,記得呼叫 destroyInstance,避免記憶體洩漏。
- 上一篇文章: Swift 自訂視圖:用 Core Graphics 繪製斜線背景
- 下一篇文章: 百度地圖 iOS SDK 接入流程與常見坑整理