
Swift 3.0 整合極光推送 JPush 2.2:iOS 10 最新寫法
編輯:iOS 開發綜合
iOS 10 改動了通知的註冊方式,要同時相容 iOS 8/9/10,AppDelegate 裡必須做版本分支。以下是 Swift 3.0 搭配 JPush 2.2 的完整寫法。
AppDelegate.swift
import UIKit

@UIApplicationMain
class AppDelegate: UIResponder, UIApplicationDelegate {

    var window: UIWindow?

    func application(_ application: UIApplication,
                     didFinishLaunchingWithOptions launchOptions:
                     [UIApplicationLaunchOptionsKey: Any]?) -> Bool {

        if #available(iOS 10.0, *) {
            let entity = JPUSHRegisterEntity()
            entity.types = Int(UNAuthorizationOptions.alert.rawValue
                             | UNAuthorizationOptions.badge.rawValue
                             | UNAuthorizationOptions.sound.rawValue)
            JPUSHService.register(forRemoteNotificationConfig: entity, delegate: self)

        } else if #available(iOS 8.0, *) {
            let types = UIUserNotificationType.badge.rawValue
                      | UIUserNotificationType.sound.rawValue
                      | UIUserNotificationType.alert.rawValue
            JPUSHService.register(forRemoteNotificationTypes: types, categories: nil)

        } else {
            let type = UIRemoteNotificationType.badge.rawValue
                     | UIRemoteNotificationType.sound.rawValue
                     | UIRemoteNotificationType.alert.rawValue
            JPUSHService.register(forRemoteNotificationTypes: type, categories: nil)
        }

        JPUSHService.setup(withOption: launchOptions,
                              appKey: "YOUR_APP_KEY",
                             channel: "App Store",
                    apsForProduction: false)
        return true
    }

    func application(_ application: UIApplication,
      didRegisterForRemoteNotificationsWithDeviceToken deviceToken: Data) {
        JPUSHService.registerDeviceToken(deviceToken)
    }

    func application(_ application: UIApplication,
       didReceiveRemoteNotification userInfo: [AnyHashable: Any],
       fetchCompletionHandler completionHandler:
       @escaping (UIBackgroundFetchResult) -> Void) {
        JPUSHService.handleRemoteNotification(userInfo)
        completionHandler(.newData)
    }

    func application(_ application: UIApplication,
       didReceiveRemoteNotification userInfo: [AnyHashable: Any]) {
        JPUSHService.handleRemoteNotification(userInfo)
    }
}
提醒:AppKey 請替換成你在極光後台申請到的值,切勿把正式環境的 AppKey 硬編進公開程式碼或版本庫。
遵循 JPUSHRegisterDelegate
iOS 10 的通知需要在前台顯示時自行決定行為,因此要實作兩個 delegate 方法。
extension AppDelegate : JPUSHRegisterDelegate {

    func jpushNotificationCenter(_ center: UNUserNotificationCenter!,
                willPresent notification: UNNotification!,
                withCompletionHandler completionHandler: ((Int) -> Void)!) {
        print(">JPUSHRegisterDelegate jpushNotificationCenter willPresent")
        let userInfo = notification.request.content.userInfo

        if notification.request.trigger?.isKind(of: UNPushNotificationTrigger.self)! {
            JPUSHService.handleRemoteNotification(userInfo)
        }

        // 需要呼叫此 callback,決定是否提醒使用者
        // 可選 Badge、Sound、Alert 三種
        completionHandler(Int(UNAuthorizationOptions.alert.rawValue))
    }

    func jpushNotificationCenter(_ center: UNUserNotificationCenter!,
                  didReceive response: UNNotificationResponse!,
                  withCompletionHandler completionHandler: (() -> Void)!) {
        print(">JPUSHRegisterDelegate jpushNotificationCenter didReceive")
        let userInfo = response.notification.request.content.userInfo

        if response.notification.request.trigger?.isKind(of: UNPushNotificationTrigger.self)! {
            JPUSHService.handleRemoteNotification(userInfo)
        }

        completionHandler()
    }
}
執行後可在 console 看到類似以下的日誌,代表 SDK 已成功啟動並完成連線:
| JPUSH | I - [JPUSHService] ----------- JPush Log ------------
--------------------JPush SDK Version:2.2.0--build:44----------
-----------------AppKey:***----------------
| JPUSH | I - [JPUSHClientController] Action - setup
| JPUSH | I - [JPUSHSessionController] connecting with coreAddr ..., port 7001
| JPUSH | I - [JPUSHLogin] ----- login result ----- uid:... registrationID:...
| JPUSH | I - [JPUSHDeviceTokenReport] try to upload device token:...
| JPUSH | I - [JPUSHDeviceTokenReport] upload device token success
整合步驟補充
- 下載 SDK 套件,把包中的 Lib 拖進專案。
- 設定依賴的 framework 與函式庫。
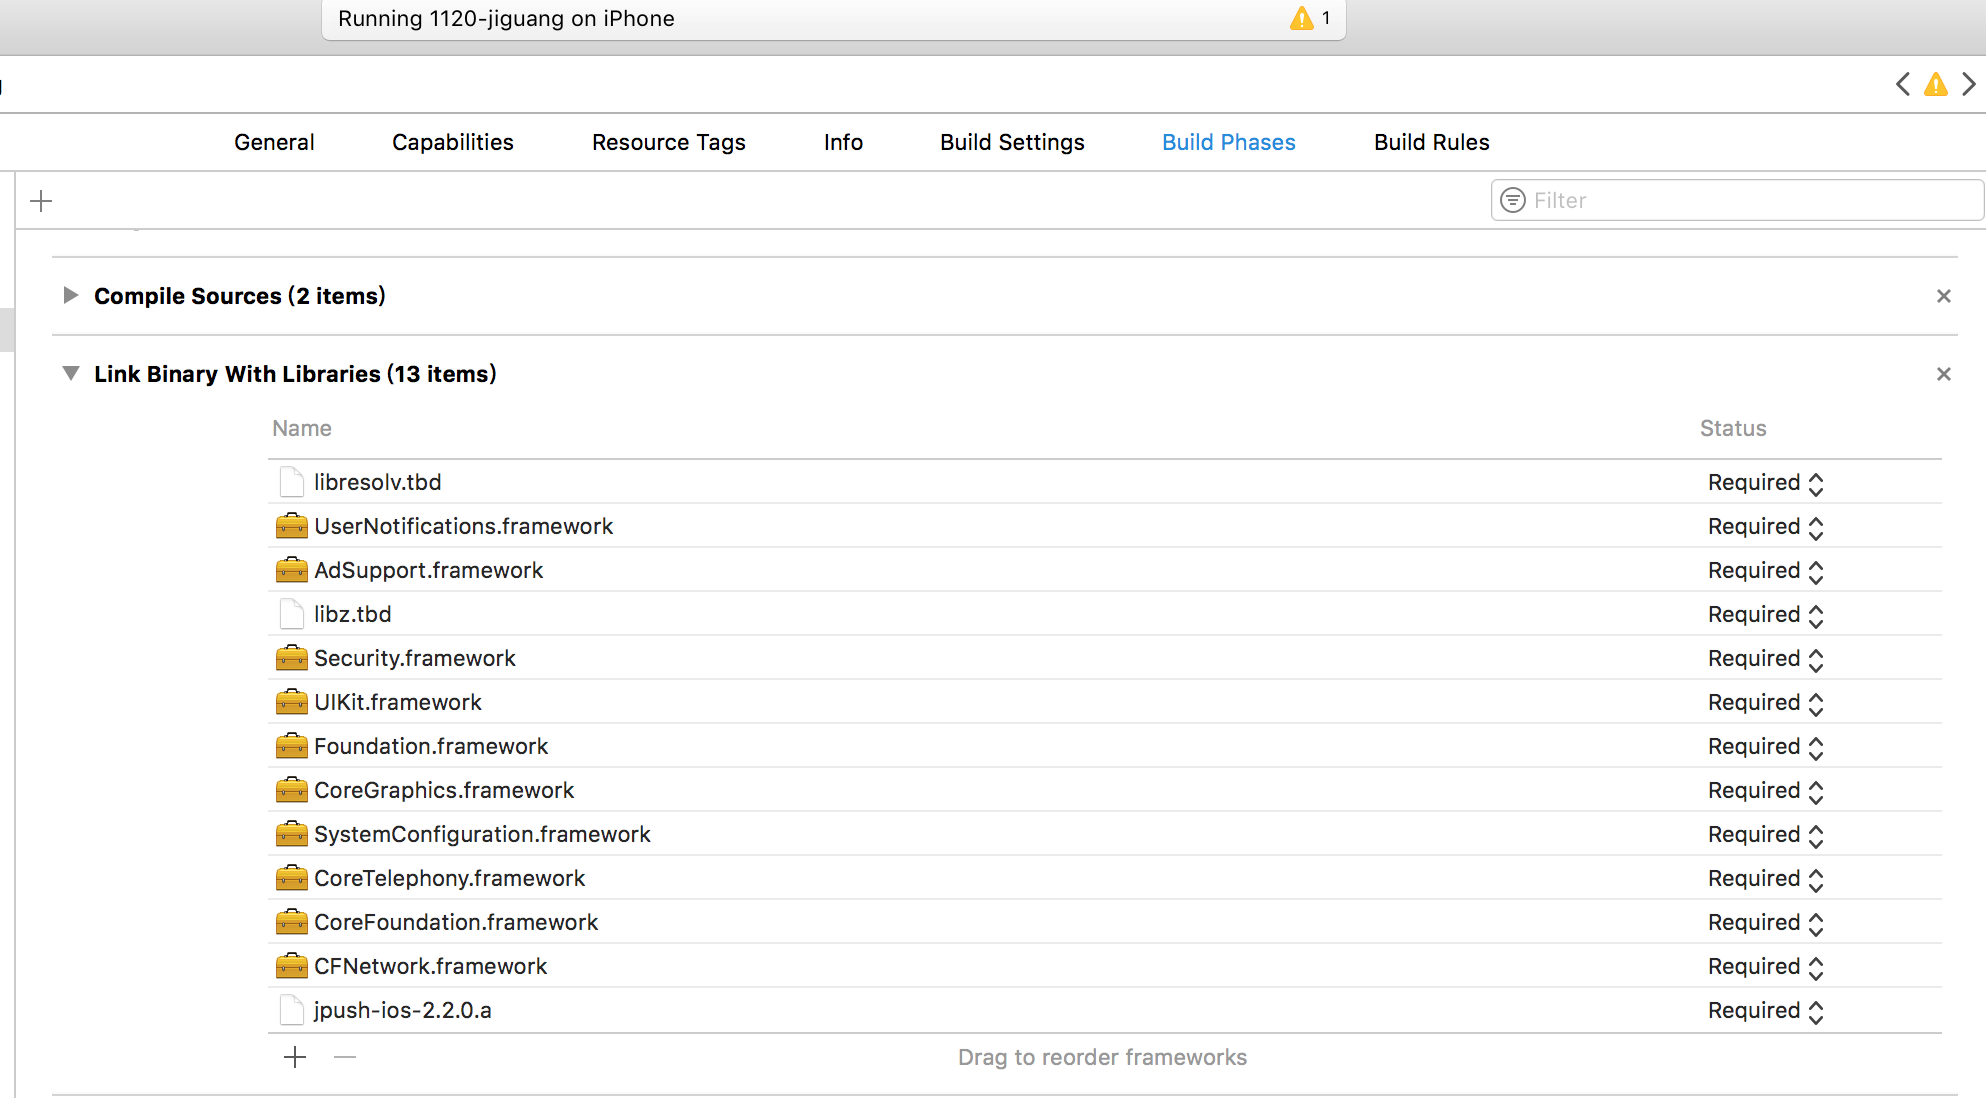
- 依需求加入 ATS 相關設定。
- 建立橋接檔(bridging header)並在 Build Settings 中指定路徑。
橋接檔內容如下:
// bridge.h
#ifndef bridge_h
#define bridge_h

// 引入 JPush 功能所需頭文件
#import "JPUSHService.h"

// iOS 10 註冊 APNs 所需頭文件
#ifdef NSFoundationVersionNumber_iOS_9_x_Max
#import <UserNotifications/UserNotifications.h>
#endif

// 如需使用 IDFA 功能,再引入對應頭文件(可選)

#endif /* bridge_h */
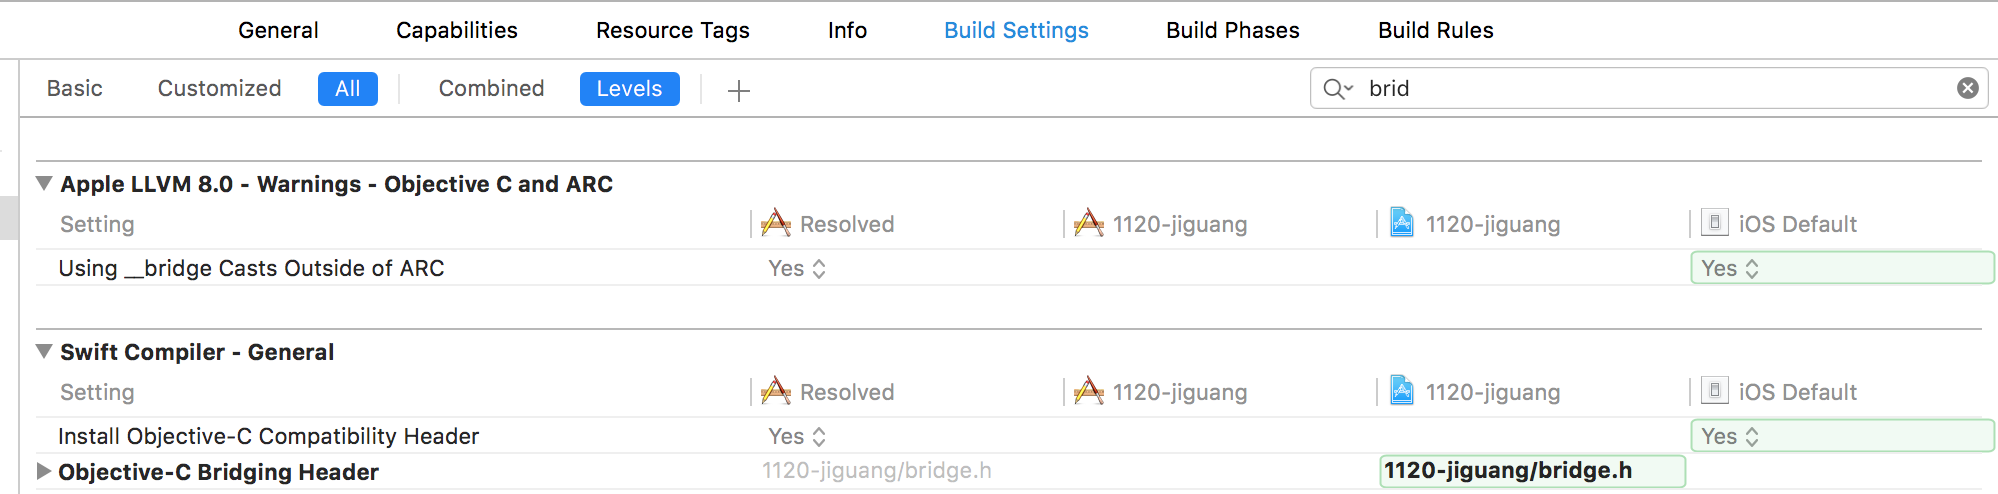
- 開啟相關 Capabilities(Push Notifications、Remote Notifications 背景模式)。

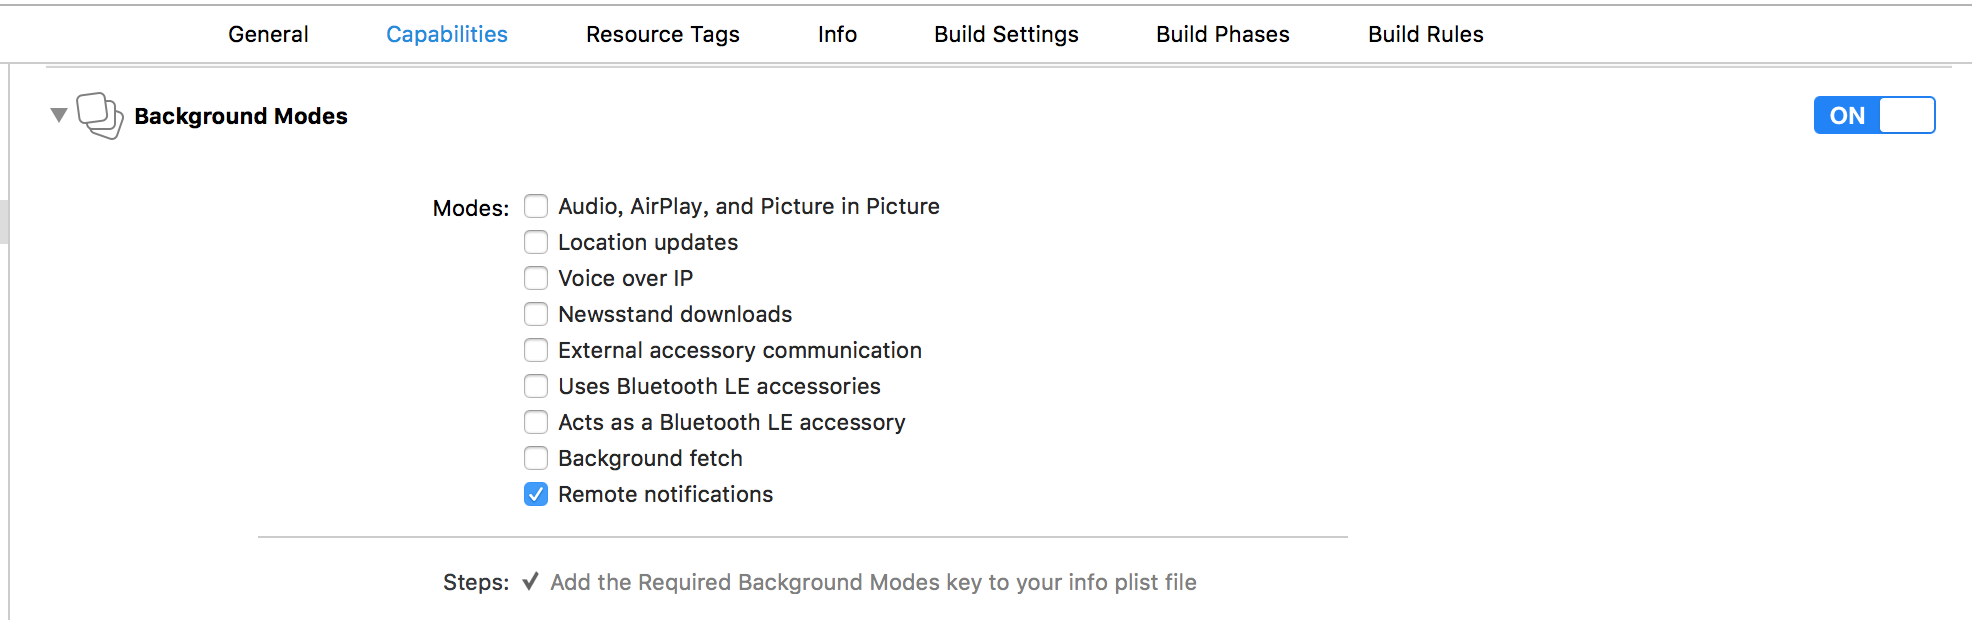
- 完成上述程式碼,然後用真機執行(推送功能在模擬器上無法正常運作)。

