
iOS 實戰:在一個 App 中實現雙 UITabBarController 的切換方案
在某些業務場景下,我們會遇到「一級頁面有四個 Tab,點進子頁面後底部還想再放一排 Tab」的需求。也就是說,一個 App 裡出現了兩個 UITabBarController。老實說,這種交互在業界普遍被認為不夠友好,也不太符合蘋果的人機交互指南,但如果是客戶的硬性要求,我們還是需要找到可行的實現方式。
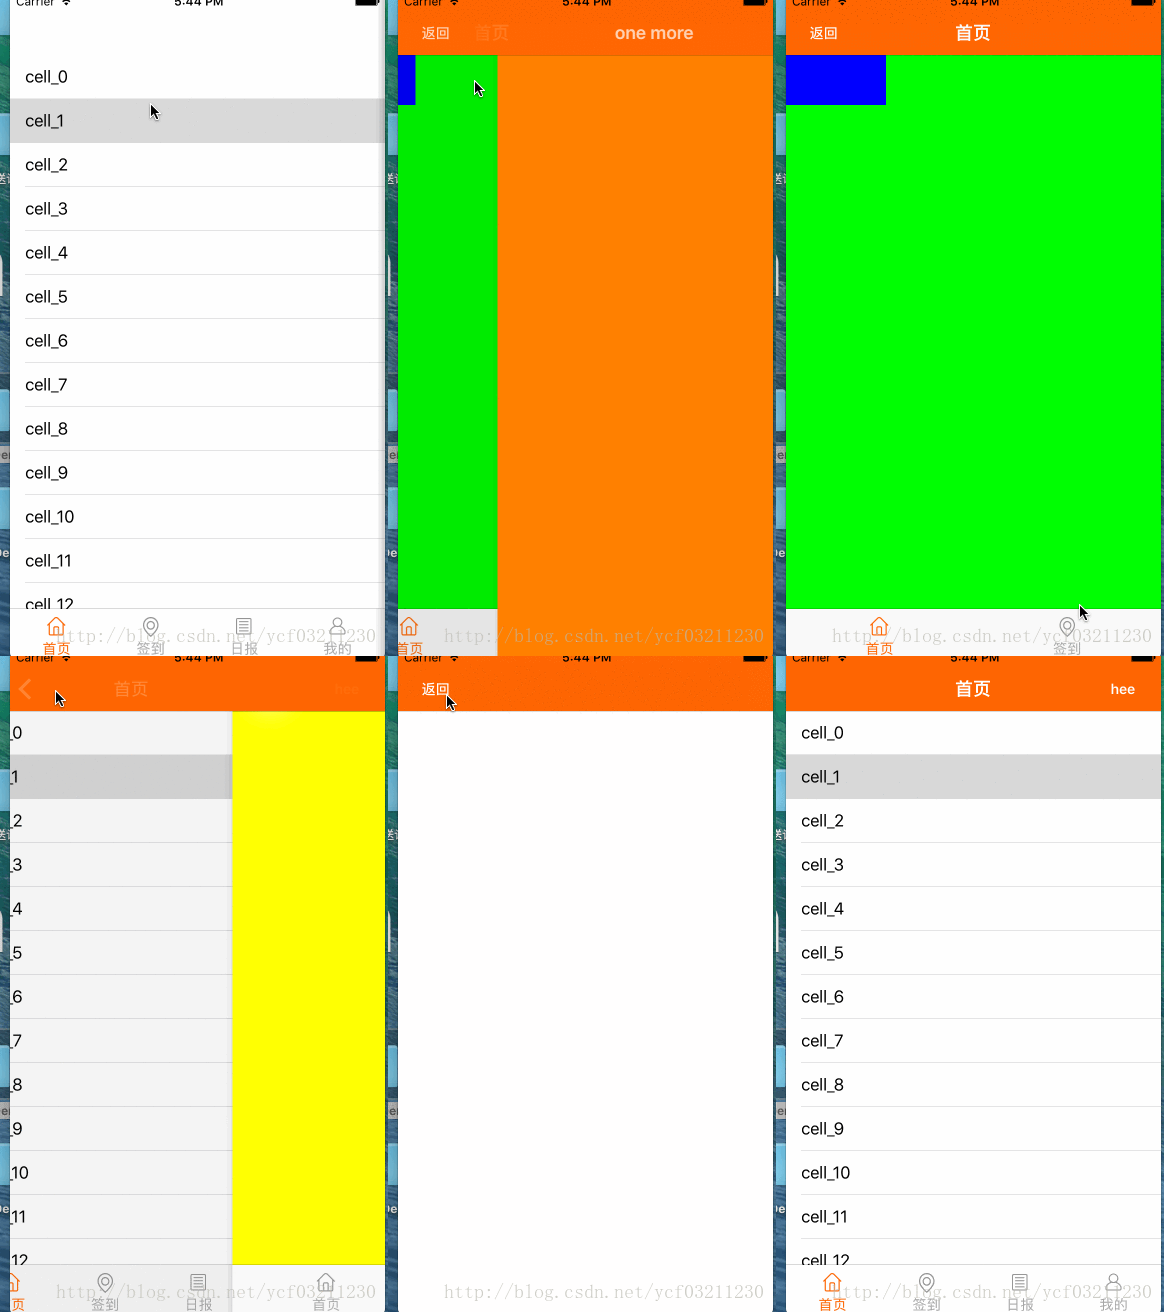
兩種可行的思路
面對這個需求,通常有以下兩種解決方案:
- 子頁面底部不用真正的 TabBar,而是改用普通按鈕組合來模擬;或者參考在導航欄上使用
UISegmentedControl來切換顯示不同的 VC。 - 直接在 App 中佈置兩個 TabBar。
方案一在此不再展開,這裡重點看看方案二的完整實現。
步驟一:構建第一個 TabBar
新建一個繼承自 UITabBarController 的類,在其中初始化各個 Tab:
/* 初始化 Tabbar */
- (void)initTabBar{
    HomeOneViewController *h1 = [[HomeOneViewController alloc] init];
    HomeTwoViewController *h2 = [[HomeTwoViewController alloc] init];
    HomeThreeViewController *h3 = [[HomeThreeViewController alloc] init];
    HomeFourViewController *h4 = [[HomeFourViewController alloc] init];
    NSArray *rootArray = [NSArray arrayWithObjects:h1,h2,h3,h4, nil];
    NSArray *nameArray = [NSArray arrayWithObjects:@"首頁",@"簽到",@"日報",@"我的", nil];
    h1.title = nameArray[0];
    h2.title = nameArray[1];
    h3.title = nameArray[2];
    h4.title = nameArray[3];
    NSMutableArray *vcArray = [NSMutableArray array];
    for (int index = 0; index < rootArray.count; index++) {
        UINavigationController *nav = [[UINavigationController alloc] initWithRootViewController:rootArray[index]];
        // tabBar 未選中的 image
        UIImage *normalImg = [[UIImage imageNamed:[NSString stringWithFormat:@"tabBar%d_no.png",index + 1]] imageWithRenderingMode:UIImageRenderingModeAlwaysOriginal];
        // tabBar 已選中的 image
        UIImage *selectImg = [[UIImage imageNamed:[NSString stringWithFormat:@"tabBar%d_yes.png",index+1]] imageWithRenderingMode:UIImageRenderingModeAlwaysOriginal];
        // 設置 tabBar 顯示的文字
        nav.tabBarItem = [[UITabBarItem alloc] initWithTitle:nameArray[index] image:normalImg selectedImage:selectImg];
        nav.tabBarItem.tag = index +1;
        nav.tabBarItem.title = nameArray[index];
        [vcArray addObject:nav];
    }
    // tabbar 未選中時文字的顏色、字體大小
    [[UITabBarItem appearance] setTitleTextAttributes:[NSDictionary dictionaryWithObjectsAndKeys:[UIColor lightGrayColor],NSForegroundColorAttributeName,[UIFont systemFontOfSize:14.0],NSFontAttributeName, nil] forState:UIControlStateNormal];
    [[UITabBarItem appearance] setTitleTextAttributes:[NSDictionary dictionaryWithObjectsAndKeys:RColor,NSForegroundColorAttributeName,[UIFont systemFontOfSize:14.0],NSFontAttributeName, nil] forState:UIControlStateSelected];
    self.viewControllers = vcArray;
    self.view.backgroundColor = [UIColor whiteColor];
}
步驟二:點擊 Cell 進入第二個 TabBar
在 HomeOneViewController 的 cell 點擊事件中,跳轉到第二個 TabBar 頁面,並借助 hidesBottomBarWhenPushed 隱藏當前 TabBar:
-(void)tableView:(UITableView *)tableView didSelectRowAtIndexPath:(NSIndexPath *)indexPath{
    flag = 0;
    OneSubViewController *ycf = [[OneSubViewController alloc] init];
    ycf.hidesBottomBarWhenPushed = YES; // 進入後隱藏 tabbar
    [self.navigationController pushViewController:ycf animated:YES];
}
這裡的 OneSubViewController 就是第二個 TabBar,同樣繼承自 UITabBarController,初始化方式與上面一致。
步驟三:解決雙導航欄問題
運行後你會發現一個尷尬的現象:子頁面的控制器出現了兩條導航欄,因為第一個 TabBar 有導航欄,第二個 TabBar 也有。這時前面代碼裡預留的 flag 變量就派上用場了——它用來控制是否隱藏第一層的 navigationController:
- (void)viewWillAppear:(BOOL)animated{
    [super viewWillAppear:animated];
    self.navigationController.navigationBar.hidden = NO;
}
- (void)viewWillDisappear:(BOOL)animated{
    [super viewWillDisappear:animated];
    if (flag == 0) {
        self.navigationController.navigationBar.hidden = YES;
    }
}
步驟四:返回事件如何處理
普通子頁面返回父 VC,直接調用即可:
[self.navigationController popViewControllerAnimated:YES];
但如果是從第二個 TabBar 返回上一個 TabBar,就需要換一種寫法:
[self.tabBarController.navigationController popViewControllerAnimated:YES];
踩坑提醒
需要注意的是,這裡的子 VC 都繼承了一個 BaseViewController,裡面對導航欄和頁面樣式做了統一配置:
self.navigationController.navigationBar.translucent = NO; // 1、導航欄不模糊;2、view 的高度從導航欄底部開始
self.edgesForExtendedLayout = UIRectEdgeNone; // 指定邊緣要延伸的方向,默認值為 UIRectEdgeAll,四周邊緣均延伸
self.extendedLayoutIncludesOpaqueBars = NO;
self.modalPresentationCapturesStatusBarAppearance = NO;
筆者當初就沒設置 self.edgesForExtendedLayout,默認值 UIRectEdgeAll 導致底部的 TabBar 遮住了子 VC 底部約 49 的高度。這個坑一定要銘記!
另一種實現思路
除了上述做法,也可以在 AppDelegate 中先初始化兩個 TabBar,默認 rootViewController 為第一個 TabBar。點擊 cell 跳轉到第二個 TabBar 時,把 rootViewController 重新賦值為第二個;從第二個返回第一個時,再重新設置 rootViewController 即可。