
告別 UIAlertView:UIAlertController 完整用法與進階技巧
你知道 UIAlertView 與 UIActionSheet(連同它們各自的 delegate 協定)在 iOS 8 中已經被標記為廢棄了嗎?
在程式碼裡按住 Option 點擊 UIAlertView,就會看到最上方的註解:
UIAlertView is deprecated. Use UIAlertController with a preferredStyle
of UIAlertControllerStyleAlert instead.
那為什麼 Xcode 沒有直接跳出警告?往下看:
@availability(iOS, introduced=2.0)
也就是說,雖然類別已被廢棄,availability 屬性裡並沒有把這件事表達出來,UIAlertView 目前依然照常可用。
回頭看,UIAlertView 的設計幾乎是一連串無底線的妥協:犧牲格式與設計正確性來遷就開發者的方便。delegate 型別乾脆寫在初始化參數的註解裡(delegate:(id /*<UIAlertViewDelegate>*/ )delegate);協定方法用了「clicked」而非「tapped」這種耐人尋味的字眼;otherButtonTitles 接受不限數量的參數,於是按鈕索引的維護變成一場噩夢;-show 更是完全不管視圖階層關係。問題不勝枚舉。UIActionSheet 的情況也差不多,只是大家實在很少有機會想起那些糟糕用法,相關抱怨自然也少。
因此 UIAlertController 的登場,有點像派軍隊去解放一座長期被佔領的城市:它不只清理了那些令人頭痛的 API,也為 UIKit 在最新設備上的特性適配開闢了一條新路徑。
它取代了什麼
UIAlertController 同時取代 UIAlertView 與 UIActionSheet,從系統層級統一了「提示」的概念——以 modal 或 popover 的方式呈現。它本身是 UIViewController 的子類,因此新的提示框得以受益於 view controller 的呈現與配置機制。
不論以 alert 還是 action sheet 樣式呈現,初始化時都會傳入 title 與 message。Alert 會在當前畫面中央以模態方式出現,action sheet 則從底部滑出。Alert 可同時容納按鈕與輸入框,action sheet 只支援按鈕。
另一個關鍵改變是:按鈕不再塞進初始化函數,而是透過新類別 UIAlertAction 在初始化之後逐一加入。這個重構讓按鈕的數量、樣式與順序都變得可控,同時也把 delegate 那套回撥換成了更簡潔的 completion 閉包。
新舊寫法對照
標準 Alert 樣式
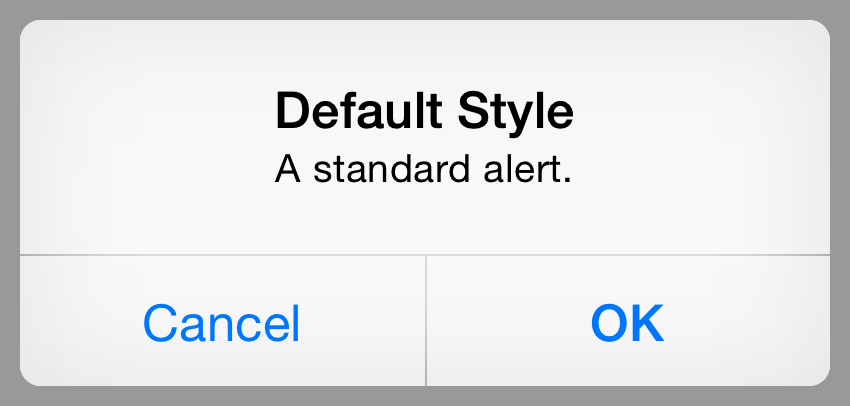
舊方法:
let alertView = UIAlertView(title: "Default Style", message: "A standard alert.",
    delegate: self, cancelButtonTitle: "Cancel", otherButtonTitles: "OK")
alertView.alertViewStyle = .Default
alertView.show()

// MARK: UIAlertViewDelegate
func alertView(alertView: UIAlertView, clickedButtonAtIndex buttonIndex: Int) {
    switch buttonIndex {
        // ...
    }
}
新方法:
let alertController = UIAlertController(title: "Default Style", message: "A standard alert.",
    preferredStyle: .Alert)
let cancelAction = UIAlertAction(title: "Cancel", style: .Cancel) { (action) in
    // ...
}
alertController.addAction(cancelAction)
let OKAction = UIAlertAction(title: "OK", style: .Default) { (action) in
    // ...
}
alertController.addAction(OKAction)
self.presentViewController(alertController, animated: true) {
    // ...
}
標準 Action Sheet 樣式
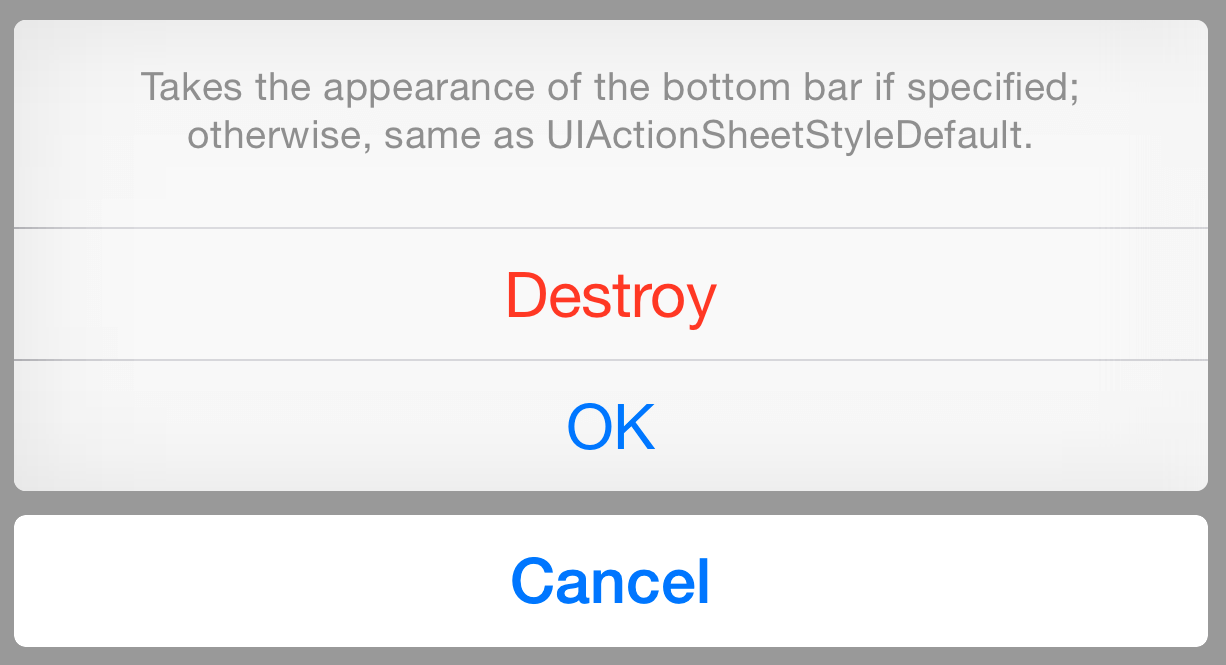
舊方法:
let actionSheet = UIActionSheet(title: "Takes the appearance of the bottom bar if specified;
    otherwise, same as UIActionSheetStyleDefault.", delegate: self,
    cancelButtonTitle: "Cancel", destructiveButtonTitle: "Destroy", otherButtonTitles: "OK")
actionSheet.actionSheetStyle = .Default
actionSheet.showInView(self.view)

// MARK: UIActionSheetDelegate
func actionSheet(actionSheet: UIActionSheet, clickedButtonAtIndex buttonIndex: Int) {
    switch buttonIndex {
        // ...
    }
}
新方法:
let alertController = UIAlertController(title: nil,
    message: "Takes the appearance of the bottom bar if specified; otherwise,
    same as UIActionSheetStyleDefault.", preferredStyle: .ActionSheet)
let cancelAction = UIAlertAction(title: "Cancel", style: .Cancel) { (action) in
    // ...
}
alertController.addAction(cancelAction)
let OKAction = UIAlertAction(title: "OK", style: .Default) { (action) in
    // ...
}
alertController.addAction(OKAction)
let destroyAction = UIAlertAction(title: "Destroy", style: .Destructive) { (action) in
    println(action)
}
alertController.addAction(destroyAction)
self.presentViewController(alertController, animated: true) {
    // ...
}
新 API 帶來的新能力
UIAlertController 不只是把舊 API 清理乾淨,而是做了標準化與一般化。以往開發者被限制在系統提供的預設樣式中(想加功能就得 swizzling,風險自負),現在許多事情开箱即用。
帶警示樣式的按鈕
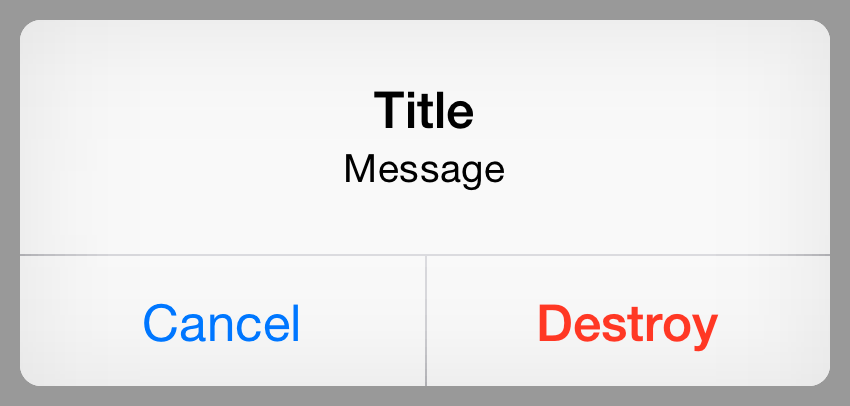
這由 UIAlertActionStyle 涵蓋,共三種:
Default:套用標準樣式。
Cancel:套用取消樣式,代表放棄操作、不做任何改變。
Destructive:套用警示性樣式,提醒使用者此動作可能會修改或刪除資料。
所以想加一個警示按鈕,只要多加入一個 .Destructive 風格的 action:
let alertController = UIAlertController(title: "Title", message: "Message", preferredStyle: .Alert)
let cancelAction = UIAlertAction(title: "Cancel", style: .Cancel) { (action) in
    println(action)
}
alertController.addAction(cancelAction)
let destroyAction = UIAlertAction(title: "Destroy", style: .Destructive) { (action) in
    println(action)
}
alertController.addAction(destroyAction)
self.presentViewController(alertController, animated: true) { /* ... */ }
超過兩個按鈕的 Alert
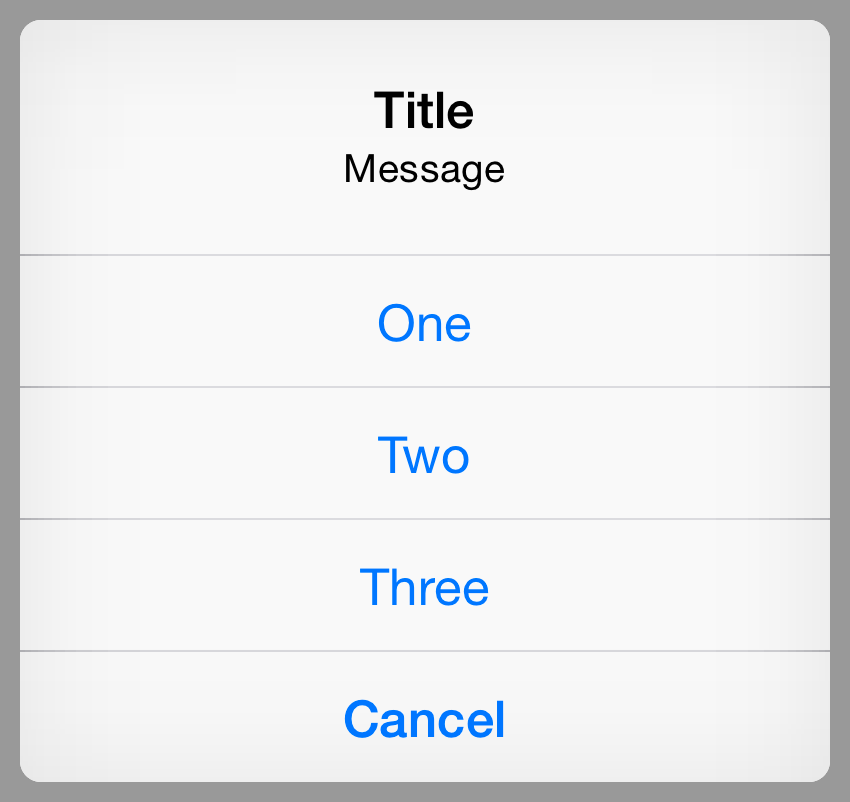
只有一兩個操作時,按鈕會水平並排;一旦數量更多,版面就會自動轉為類似 action sheet 的縱向排列:
let oneAction   = UIAlertAction(title: "One",   style: .Default) { (_) in }
let twoAction   = UIAlertAction(title: "Two",   style: .Default) { (_) in }
let threeAction = UIAlertAction(title: "Three", style: .Default) { (_) in }
let cancelAction = UIAlertAction(title: "Cancel", style: .Cancel) { (_) in }
alertController.addAction(oneAction)
alertController.addAction(twoAction)
alertController.addAction(threeAction)
alertController.addAction(cancelAction)
做一個登入表單
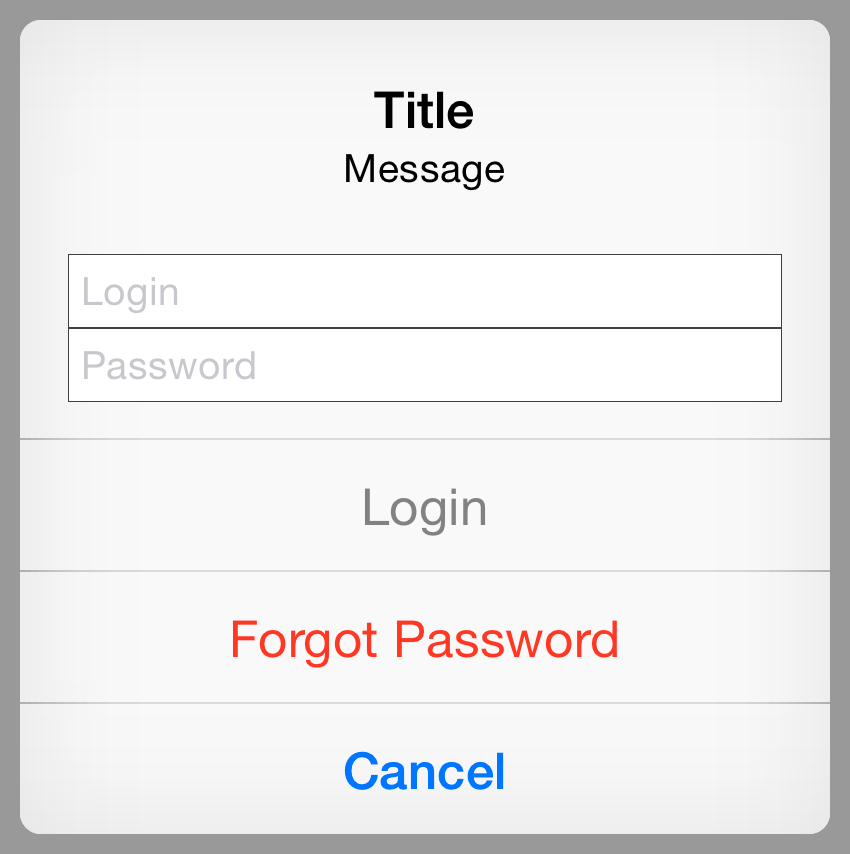
iOS 5 時,UIAlertView 開放了 alertViewStyle 屬性,讓開發者也能像部分系統內建應用那樣,在提示框裡擺出帳號與密碼欄位。iOS 8 的 UIAlertController 則提供 addTextFieldWithConfigurationHandler:
let loginAction = UIAlertAction(title: "Login", style: .Default) { (_) in
    let loginTextField    = alertController.textFields![0] as UITextField
    let passwordTextField = alertController.textFields![1] as UITextField
    login(loginTextField.text, passwordTextField.text)
}
loginAction.enabled = false
let forgotPasswordAction = UIAlertAction(title: "Forgot Password", style: .Destructive) { (_) in }
let cancelAction = UIAlertAction(title: "Cancel", style: .Cancel) { (_) in }

alertController.addTextFieldWithConfigurationHandler { (textField) in
    textField.placeholder = "Login"
    NSNotificationCenter.defaultCenter().addObserverForName(
        UITextFieldTextDidChangeNotification, object: textField,
        queue: NSOperationQueue.mainQueue()) { (notification) in
        loginAction.enabled = textField.text != ""
    }
}
alertController.addTextFieldWithConfigurationHandler { (textField) in
    textField.placeholder = "Password"
    textField.secureTextEntry = true
}
alertController.addAction(loginAction)
alertController.addAction(forgotPasswordAction)
alertController.addAction(cancelAction)
做一個註冊表單
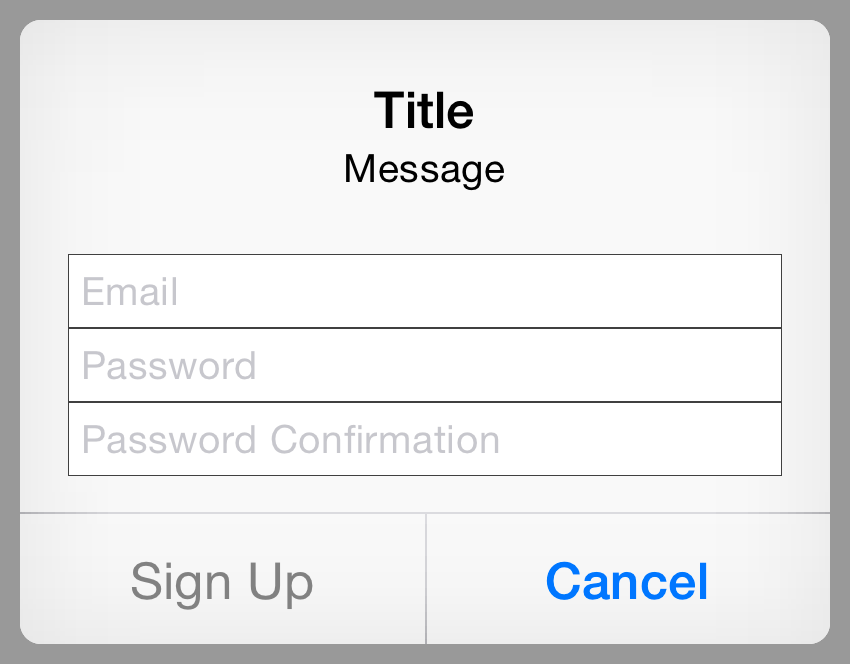
UIAlertController 允許加入任意數量的輸入框,且每個都能個別客製,於是在單一模態框裡完成完整註冊流程成為可能:
alertController.addTextFieldWithConfigurationHandler { (textField) in
    textField.placeholder = "Email"
    textField.keyboardType = .EmailAddress
}
alertController.addTextFieldWithConfigurationHandler { (textField) in
    textField.placeholder = "Password"
    textField.secureTextEntry = true
}
alertController.addTextFieldWithConfigurationHandler { (textField) in
    textField.placeholder = "Password Confirmation"
    textField.secureTextEntry = true
}
不過話說回來,能做到不等於應該做。註冊這種流程,還是老實交給一個專門的 view controller 比較合適——這本來就是它的職責所在。
兩個會丟例外的地雷
若試圖對 .ActionSheet 樣式的 controller 加入輸入框,會直接拋出例外:
Terminating app due to uncaught exception 'NSInternalInconsistencyException',
reason: 'Text fields can only be added to an alert controller of style
UIAlertControllerStyleAlert'
同樣地,加入超過一個 .Cancel 按鈕也會炸:
Terminating app due to uncaught exception 'NSInternalInconsistencyException',
reason: 'UIAlertController can only have one action with a style of
UIAlertActionStyleCancel'
(本文由 Croath Liu 譯自 NSHipster。)