
用 Runtime 遍歷 Model 屬性,並優雅處理字典 Key 不一致

上一篇《iOS 開發之使用 Runtime 給 Model 類賦值》講了怎麼在基類裡封裝一套賦值方法,前提條件是字典的 key 必須與實體類的屬性名完全一致,然後靠 Runtime 動態生成並執行 Setter。
用 Runtime 做映射的好處很明顯:後期維護省心,開發效率高。拿到解析好的字典後,你不必一個 key 一個 key 地手寫賦值。
這篇接著往下走兩步:一是如何遍歷出 Model 的所有屬性並讀取它們的值;二是當字典 key 與屬性名對不上時該怎麼辦。
一、拿到 Model 的所有屬性
Model 的屬性輸出可不像遍歷 Dictionary 和 Array 那樣一個 for 循環搞定,得先借助 Runtime 把屬性名撈出來。
/// 通過運行時獲取當前對象的所有屬性名稱,以數組形式返回
- (NSArray *)allPropertyNames {
    /// 存儲所有屬性名稱
    NSMutableArray *allNames = [[NSMutableArray alloc] init];

    /// 屬性個數
    unsigned int propertyCount = 0;

    /// 通過運行時獲取當前類的屬性列表
    objc_property_t *propertys = class_copyPropertyList([self class], &propertyCount);

    for (int i = 0; i < propertyCount; i++) {
        objc_property_t property = propertys[i];
        const char *propertyName = property_getName(property);
        [allNames addObject:[NSString stringWithUTF8String:propertyName]];
    }

    /// 用完記得釋放
    free(propertys);

    return allNames;
}
拿到屬性名之後,下一步是執行對應的 getter 去取值。好消息是,OC 裡屬性的 getter 方法名與屬性名完全一致,所以生成 selector 非常省事。
#pragma mark -- 通過屬性名生成 getter 的 selector
- (SEL)creatGetterWithPropertyName:(NSString *)propertyName {
    // OC 中 getter 方法名就是屬性名本身
    return NSSelectorFromString(propertyName);
}
二、執行 Getter 取值
要動態執行方法並接收返回值,需要走「方法簽名 + NSInvocation」這條路。下面的方法把前面兩步串起來,遍歷所有屬性並打印它們的值。
- (void)displayCurrentModleProperty {
    // 1. 取出實體類的所有屬性名
    NSArray *array = [self allPropertyNames];

    NSMutableString *resultString = [[NSMutableString alloc] init];

    for (int i = 0; i < array.count; i++) {
        // 2. 由屬性名拿到 getter
        SEL getSel = [self creatGetterWithPropertyName:array[i]];

        if ([self respondsToSelector:getSel]) {
            // 3. 取得方法簽名
            NSMethodSignature *signature = [self methodSignatureForSelector:getSel];
            // 4. 由簽名創建調用對象
            NSInvocation *invocation = [NSInvocation invocationWithMethodSignature:signature];
            [invocation setTarget:self];
            [invocation setSelector:getSel];

            // 5. 調用並接收返回值
            NSObject *__unsafe_unretained returnValue = nil;
            [invocation invoke];
            [invocation getReturnValue:&returnValue];

            [resultString appendFormat:@"%@\n", returnValue];
        }
    }

    NSLog(@"%@", resultString);
}
調用方式很直觀——先賦值,再打印:
BeautifulGirlModel *beautifulGirl = [BeautifulGirlModel modelWithDictionary:data];
[beautifulGirl displayCurrentModleProperty];
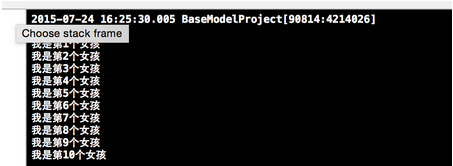
運行後控制台會輸出 Model 中每個屬性的當前值。
三、字典 Key 與屬性名不一致怎麼辦
真實項目裡,後端返回的字段名和你的屬性名對不上是常態(下劃線命名、縮寫、關鍵字衝突等)。最簡單的解法:讓每個實體類自己維護一份映射表。
#pragma mark 返回「字典 key → 屬性名」的映射關係
- (NSDictionary *)propertyMapDic {
    return nil;
}
然後改寫便利初始化方法,按「有沒有映射表」分流:
- (instancetype)initWithDictionary:(NSDictionary *)data {
    self = [super init];
    if (self) {
        if ([self propertyMapDic] == nil) {
            [self assginToPropertyWithDictionary:data];
        } else {
            [self assginToPropertyWithNoMapDictionary:data];
        }
    }
    return self;
}
核心思路:先把字典的 key 換成與屬性名一致,再複用原來的賦值方法。
#pragma mark 根據映射關係給 Model 屬性賦值
- (void)assginToPropertyWithNoMapDictionary:(NSDictionary *)data {
    /// 取得映射關係
    NSDictionary *propertyMapDic = [self propertyMapDic];

    NSArray *dicKey = [data allKeys];
    NSMutableDictionary *tempDic = [[NSMutableDictionary alloc] initWithCapacity:dicKey.count];

    for (int i = 0; i < dicKey.count; i++) {
        NSString *key = dicKey[i];
        [tempDic setObject:data[key] forKey:propertyMapDic[key]];
    }

    // 轉換完成後,複用原有邏輯
    [self assginToPropertyWithDictionary:tempDic];
}
接著建一個 BadBoyModel 來驗證。屬性定義如下:
#import "BaseModelObject.h"

@interface BadBoyModel : BaseModelObject
@property (nonatomic, copy) NSString *boy1;
@property (nonatomic, copy) NSString *boy2;
@property (nonatomic, copy) NSString *boy3;
@property (nonatomic, copy) NSString *boy4;
@end
重寫映射方法——字典的 key 是要轉換的源字段,value 是對應的屬性名:
#import "BadBoyModel.h"

@implementation BadBoyModel

#pragma mark 返回屬性與字典 key 的映射關係
- (NSDictionary *)propertyMapDic {
    return @{@"keyBoy1": @"boy1",
             @"keyBoy2": @"boy2",
             @"keyBoy3": @"boy3",
             @"keyBoy4": @"boy4"};
}

@end
構造測試數據,key 故意與屬性名不同:
// 生成 key 與 Model 屬性不一致的字典
NSMutableDictionary *data1 = [[NSMutableDictionary alloc] init];

for (int i = 1; i <= 4; i++) {
    NSString *key   = [NSString stringWithFormat:@"keyBoy%d", i];
    NSString *value = [NSString stringWithFormat:@"我是第%d個壞男孩", i];
    [data1 setObject:value forKey:key];
}
實例化並輸出(之前的方法照樣可用):
BadBoyModel *badBoyModel = [BadBoyModel modelWithDictionary:data1];
[badBoyModel displayCurrentModleProperty];
輸出結果如圖,四個屬性都拿到了正確的值。

小結
到這裡,Model 基類最核心的能力就齊了:屬性枚舉、動態取值、key 映射。剩下的按具體項目需求繼續往上疊加即可——比如嵌套模型、數組模型、日期格式化、空值兜底等。
一句提醒:Runtime 的能力很強,但「字典裡有、Model 裡沒有」的 key 一定要靜默忽略,否則一旦後端加字段就會崩在 setValue:forKey: 上。上面的實現只遍歷 Model 自身的屬性列表,天然规避了這個問題。
作者:青玉伏案 出處:https://www.cnblogs.com/ludashi/
本文版權歸作者和博客園共有,歡迎轉載,但未經作者同意必須保留此段聲明,且在文章頁面顯著位置給出原文鏈接,否則保留追究法律責任的權利。
如果文中有錯誤,歡迎指出,以免更多人被誤導。