
動手實現一個頂部滾動標籤欄
前言
最近參考了一些開源源碼,自己寫了一個標籤頁組件並傳到了 CocoaPods 上。大家可以評估是否適合集成進專案,也歡迎直接看源碼自己實作一個更好的版本;若有改進意見也請告訴我,我會持續完善。專案地址:https://github.com/cbsfly/CBSSegmentView。
成果
我做了兩種形態的 Demo:一種是類似網易雲音樂的固定標籤欄,一種是類似愛奇藝、今日頭條的可捲動標籤欄。起初寫得比較隨意,後來經師傅提醒才補上優化——只有捲到該頁時才去載入對應的 ViewController,這樣即使頁面很複雜、要發很多網絡請求,也不容易卡頓。
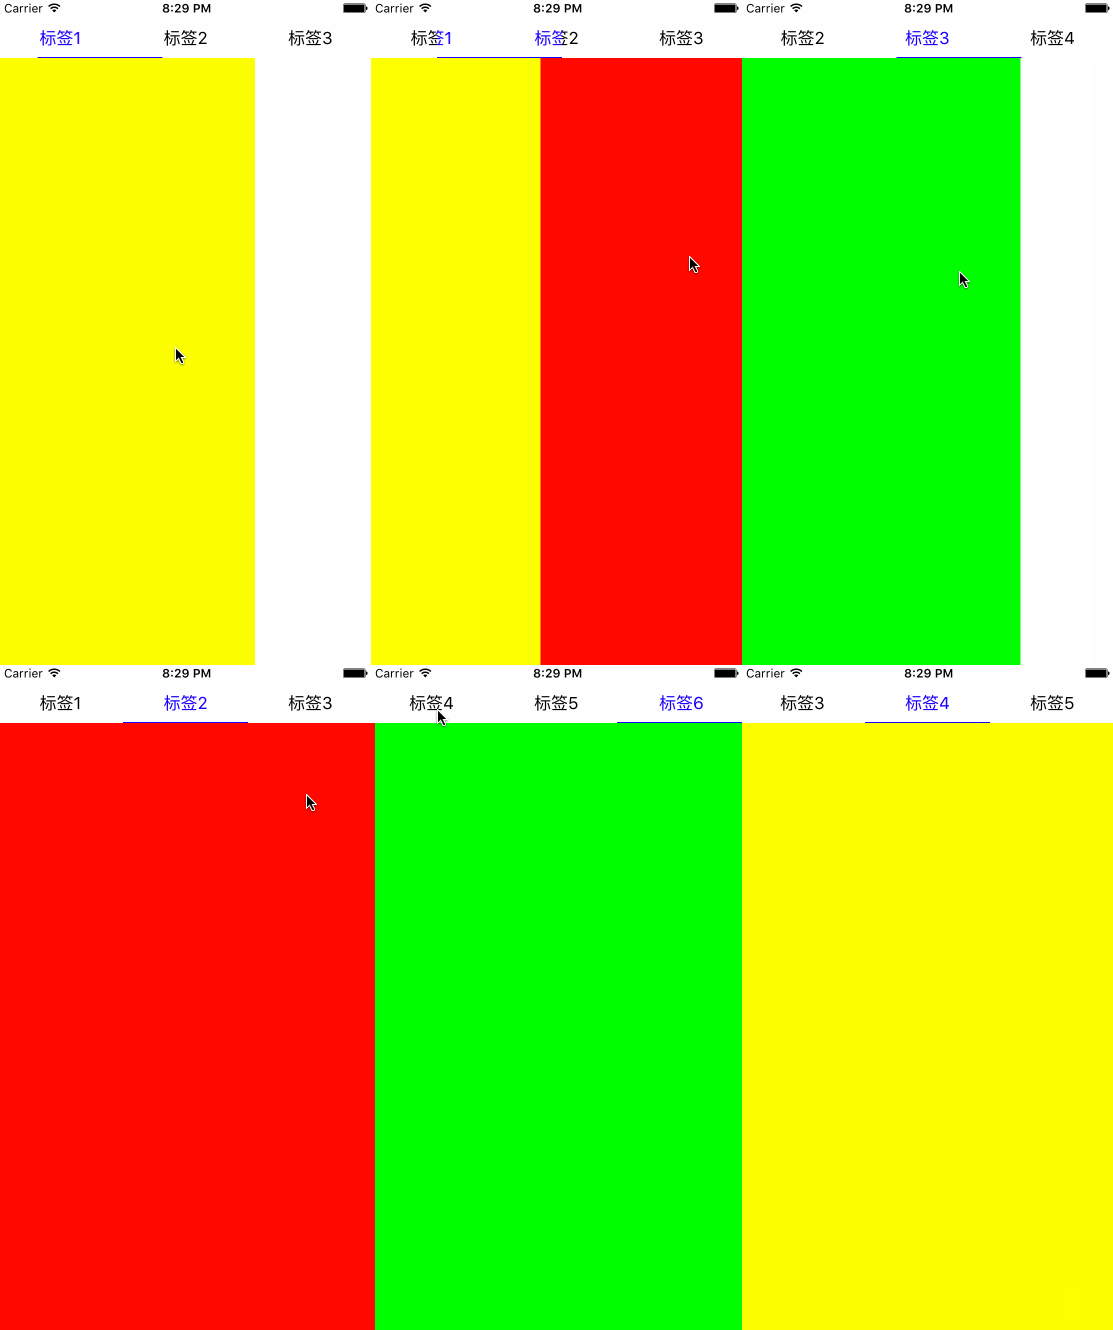
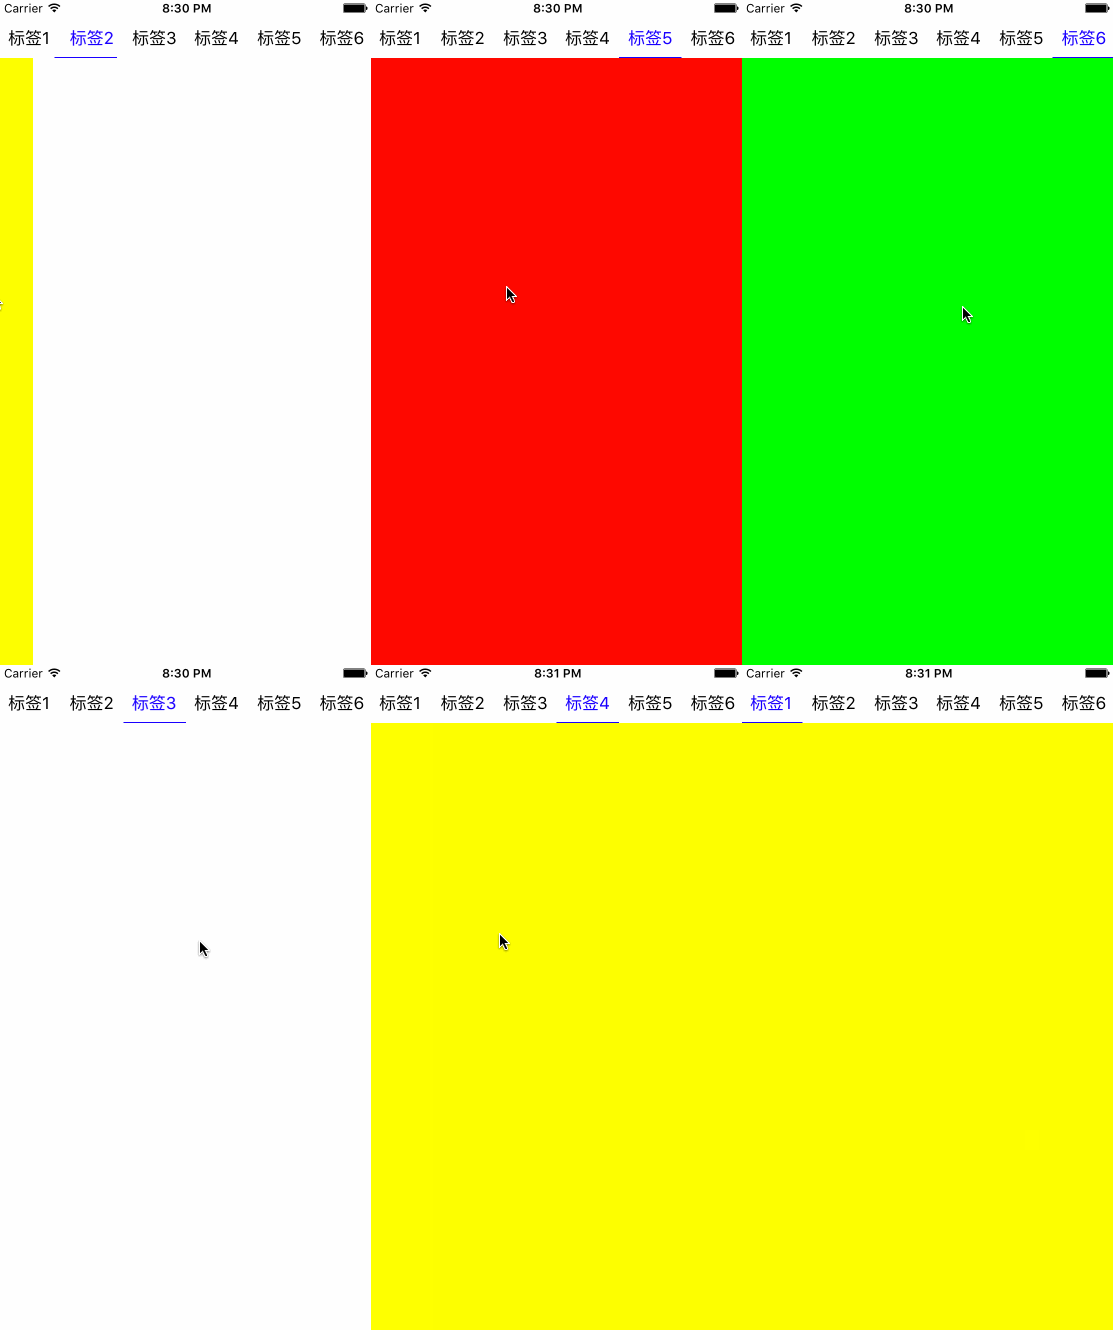
想集成使用的同學可以直接用 CocoaPods,具體用法我放在 GitHub 上了;也可以下載 zip 看示範。下面簡單說說實作原理。
實作原理
講白了就是:頂部放一個 UIScrollView 當標籤欄,下面再放一個 UIScrollView 承載內容,把各個 ViewController.view 依序擺到合適的位置,並與頂部標籤一一對應;再給頂部標籤加上點擊事件,控制下方 ScrollView 捲到對應位置就可以了。
部分源碼解析
整體難點不多,最需要花心思的應該是「頂部標籤欄隨下方 ScrollView 滑動」這一段,包含文字顏色與下劃線的移動。我針對這部分說明,其他細節有興趣的同學可以抓源碼來看。
先看頂部標籤欄的初始化。這段比較繁瑣,應該還有簡化空間,時間比較緊就先這樣了。
- (void)addScrollHeader:(NSArray *)titleArray { self.headerView.frame = CGRectMake(0, 0, self.width, self.buttonHeight); self.headerView.contentSize = CGSizeMake(self.buttonWidth*titleArray.count, self.buttonHeight); [self addSubview:self.headerView]; for (NSInteger index = 0; index < titleArray.count; index++) { _titleLabel = [[UILabel alloc] initWithFrame:CGRectMake(self.buttonWidth*index, 0, self.buttonWidth, self.buttonHeight)]; _titleLabel.textColor = [UIColor blackColor]; _titleLabel.text = titleArray[index]; _titleLabel.textAlignment = NSTextAlignmentCenter; _titleLabel.adjustsFontSizeToFitWidth = YES; [self.headerView addSubview:_titleLabel]; _segmentBtn = [[UIButton alloc] initWithFrame:CGRectMake(self.buttonWidth*index, 0, self.buttonWidth, self.buttonHeight)]; _segmentBtn.tag = index; [_segmentBtn setBackgroundColor:[UIColor clearColor]]; [_segmentBtn addTarget:self action:@selector(btnClick:) forControlEvents:UIControlEventTouchUpInside]; [self.headerView addSubview:_segmentBtn]; } self.headerSelectedSuperView = [[UIView alloc] initWithFrame:CGRectMake(0, 0, self.buttonWidth, self.buttonHeight)]; [self.headerView addSubview:self.headerSelectedSuperView]; self.headerSelectedView.frame =CGRectMake(0, 0, self.buttonWidth, self.buttonHeight); self.headerSelectedView.contentSize = CGSizeMake(self.buttonWidth*titleArray.count, self.buttonHeight); [self.headerSelectedSuperView addSubview:self.headerSelectedView]; for (NSInteger index = 0; index < titleArray.count; index++) { _titleLabel = [[UILabel alloc] initWithFrame:CGRectMake(self.buttonWidth*index, 0, self.buttonWidth, self.buttonHeight)]; _titleLabel.textColor = [UIColor blueColor]; _titleLabel.text = titleArray[index]; _titleLabel.textAlignment = NSTextAlignmentCenter; _titleLabel.adjustsFontSizeToFitWidth = YES; [self.headerSelectedView addSubview:_titleLabel]; } UIImageView *bottomLine = [[UIImageView alloc] initWithFrame:CGRectMake(0, self.headerSelectedView.contentSize.height - self.lineHeight, self.headerSelectedView.contentSize.width, self.lineHeight)]; bottomLine.backgroundColor = [UIColor blueColor]; [self.headerSelectedView addSubview:bottomLine]; }這裡分成三個步驟。第一步在最頂層放一個 self.headerView,它是 UIScrollView,屬於標籤欄視圖的最底層,所以要先 add 上去。在 headerView 上放若干個 UILabel,這是未選中狀態的標籤樣式(就是 gif 裡黑色的字);再疊上幾個透明 Button 方便掛點擊事件,用手勢也一樣可以。
第二步加一個 UIView 作為「父視圖」self.headerSelectedSuperView,它的作用在後面說明。
第三步再加一個 UIScrollView:self.headerSelectedView,用來呈現選中標籤的外觀。在裡面放若干個 UILabel,差別是顏色改成選中態(我這裡設為藍色),並額外加一條藍色下劃線。
第三步有個關鍵,就是在 headerSelectedView 的 getter 裡寫上 _headerSelectedView.clipsToBounds = YES;。這個屬性表示子視圖超出父視圖的部分會被裁掉,預設是 NO。不太確定的同學建議查一下,它是實現上面那個效果的核心。
接著看 UIScrollView 的代理方法。
- (void)scrollViewDidScroll:(UIScrollView *)scrollView { if (scrollView == _backView) { self.headerSelectedSuperView.frame = CGRectMake(scrollView.contentOffset.x * (self.buttonWidth/self.width), self.headerSelectedSuperView.frame.origin.y, self.headerSelectedSuperView.frame.size.width, self.headerSelectedSuperView.frame.size.height); self.headerSelectedView.contentOffset = CGPointMake(scrollView.contentOffset.x * (self.buttonWidth/self.width), 0); } }backView 就是承載各 ViewController 的 ScrollView。當它捲動時,我們同步改變 headerSelectedSuperView 的 frame 與 headerSelectedView 的 contentOffset:前者移動到合適位置,後者則露出其子視圖中應該顯示的那一段。兩者配合 clipsToBounds = YES,就得到了 gif 中標籤欄跟著滑動的效果。程式碼本身其實很簡單。
其他部分就不逐段解析了,還是推薦大家直接讀源碼。若有改進建議歡迎告訴我,互相切磋一起進步。
- 上一篇文章: iOS 網絡層架構設計實踐分享
- 下一篇文章: 源碼推薦(05.09):漫畫 App、頭像滾動特效、自定義支付密碼框