
iOS 動畫篇:從 drawRect 到 CALayer 的自定義動畫實作
前言
上一篇〈iOS 動畫篇:自定義 View〉講了怎麼在 view 裡畫一個圓。本文在這個基礎上幫它加上弧度變化的動畫,做成一個簡單的 Loading 動畫,完整呈現自定義動畫的實作過程。
先來看要達成的效果:
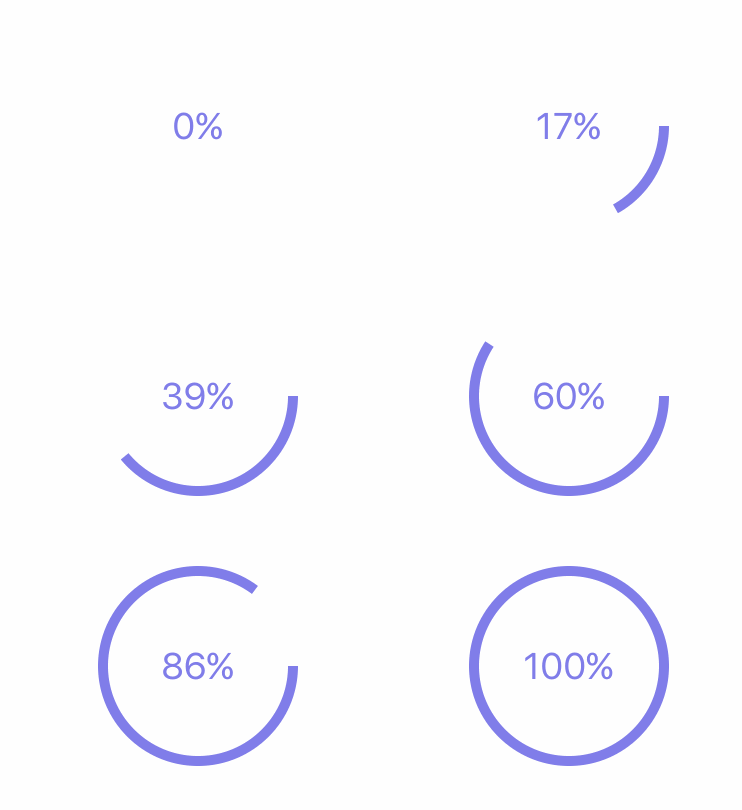
CustomAnimation - preview.gif
條條大路通羅馬:在 UIView 上實作
1. 畫一段圓弧。上一篇的路徑方法只能畫整圓,這次改用下面的方式畫出部分圓弧:
- (void)drawRect:(CGRect)rect {
    CGFloat radius = self.bounds.size.width / 2;
    CGFloat lineWidth = 10.0;

    UIBezierPath *path =
        [UIBezierPath bezierPathWithArcCenter:CGPointMake(radius, radius)
                                       radius:radius - lineWidth / 2
                                   startAngle:0.f
                                     endAngle:M_PI
                                    clockwise:YES];

    [[UIColor colorWithRed:0.5 green:0.5 blue:0.9 alpha:1.0] setStroke];
    [path setLineWidth:lineWidth];
    [path stroke];
}
效果是半個圓弧:
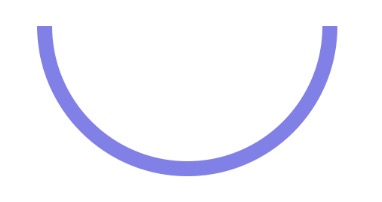
Circle - half.png
2. 讓弧度可控。弧度當然不能寫死,否則無法形成動畫。我們加一個 progress 屬性來控制它:
@interface CircleProgressView : UIView

@property (nonatomic, assign) CGFloat progress;

@end

- (void)drawRect:(CGRect)rect {
    CGFloat radius = self.bounds.size.width / 2;
    CGFloat lineWidth = 10.0;

    UIBezierPath *path =
        [UIBezierPath bezierPathWithArcCenter:CGPointMake(radius, radius)
                                       radius:radius - lineWidth / 2
                                   startAngle:0.f
                                     endAngle:M_PI * 2 * self.progress
                                    clockwise:YES];

    [[UIColor colorWithRed:0.5 green:0.5 blue:0.9 alpha:1.0] setStroke];
    [path setLineWidth:lineWidth];
    [path stroke];
}
3. 加到視圖上。
- (void)viewDidLoad {
    [super viewDidLoad];

    self.circleProgressView =
        [[CircleProgressView alloc] initWithFrame:CGRectMake(100, 100, 200, 200)];
    self.circleProgressView.progress = 0.2;
    [self.view addSubview:self.circleProgressView];
}
4. 由外部事件改變弧度並重繪。這裡的例子是點擊螢幕時改變 progress:
- (void)touchesBegan:(NSSet *)touches withEvent:(UIEvent *)event {
    self.circleProgressView.progress = 0.5;
    [self.circleProgressView setNeedsDisplay];
}
效果圖:
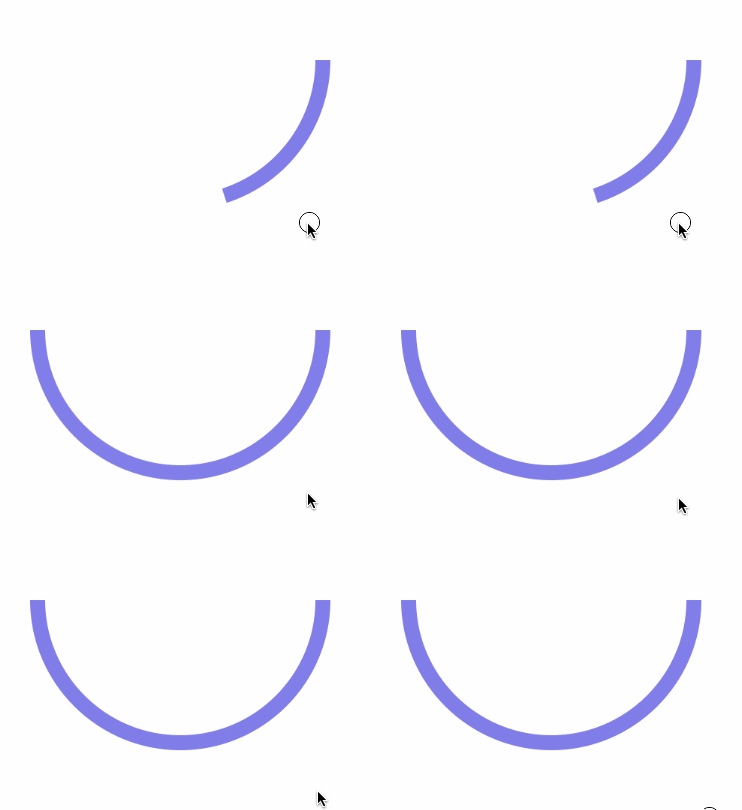
CustomAnimation - setNeedsDisplay.gif
小結:
1)drawRect 會執行 view 的重繪,但它不能被手動呼叫(手動呼叫也無效),必須透過 setNeedsDisplay 讓系統自行觸發。
2)自定義動畫的閉環是:透過屬性控制 view 的形狀 → 改變屬性 → 呼叫重繪方法 → 形狀改變。
接著建立一個 slider 來模擬進度變化:
UISlider *slider = [[UISlider alloc] initWithFrame:CGRectMake(50, 400, 275, 10)];
[slider addTarget:self
           action:@selector(changeProgress:)
 forControlEvents:UIControlEventValueChanged];
slider.maximumValue = 1.0;
slider.minimumValue = 0.f;
slider.value = self.circleProgressView.progress;
[self.view addSubview:slider];

- (void)changeProgress:(UISlider *)slider {
    self.circleProgressView.progress = slider.value;
    [self.circleProgressView setNeedsDisplay];
}
效果圖:
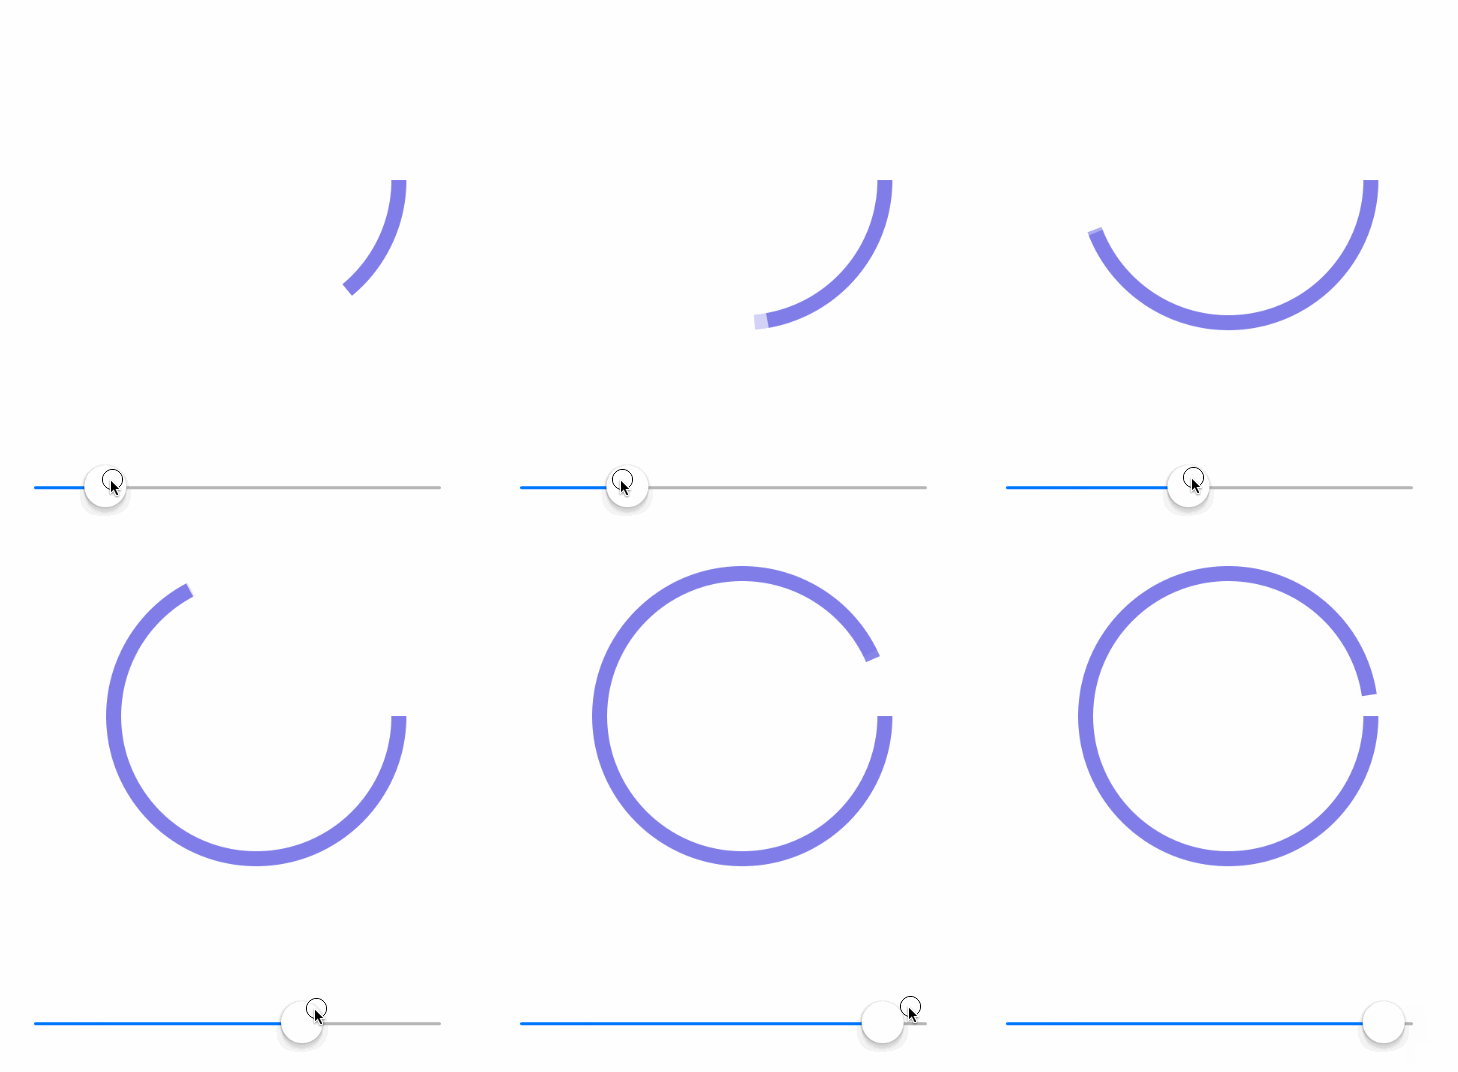
CustomAnimation - setNeedsDisplay - play.gif
更優雅的實作:改用 CALayer
覆寫 View 的 drawRect 雖然可行,但既不夠優雅,畫更複雜的界面時也不夠方便。下面改用添加 Layer 的方式。
1. 新建 CircleProgressLayer 類。
CircleProgressLayer.h
CircleProgressLayer.m
2. 加上 progress 屬性。
@interface CircleProgressLayer : CALayer

@property (nonatomic, assign) CGFloat progress;

@end
3. 覆寫繪圖方法 drawInContext,並在 progress 變化時觸發重繪。
- (void)drawInContext:(CGContextRef)ctx {
    CGFloat radius = self.bounds.size.width / 2;
    CGFloat lineWidth = 10.0;

    UIBezierPath *path =
        [UIBezierPath bezierPathWithArcCenter:CGPointMake(radius, radius)
                                       radius:radius - lineWidth / 2
                                   startAngle:0.f
                                     endAngle:M_PI * 2 * self.progress
                                    clockwise:YES];

    CGContextSetRGBStrokeColor(ctx, 0.5, 0.5, 0.9, 1.0); // 筆顏色
    CGContextSetLineWidth(ctx, 10);                      // 線條寬度
    CGContextAddPath(ctx, path.CGPath);
    CGContextStrokePath(ctx);
}

- (void)setProgress:(CGFloat)progress {
    _progress = progress;
    [self setNeedsDisplay];
}
4. 把 layer 加到自訂 view 中,並在 progress 變化時通知 layer。
- (id)initWithFrame:(CGRect)frame {
    self = [super initWithFrame:frame];
    if (self) {
        self.circleProgressLayer = [CircleProgressLayer layer];
        self.circleProgressLayer.frame = self.bounds;

        // 像素大小比例
        self.circleProgressLayer.contentsScale = [UIScreen mainScreen].scale;

        [self.layer addSublayer:self.circleProgressLayer];
    }
    return self;
}

- (void)setProgress:(CGFloat)progress {
    self.circleProgressLayer.progress = progress;
    _progress = progress;
}
這樣能達到與前面相同的視覺效果。那為什麼更推薦這種方式?
答案是:CALayer 自帶動畫能力(或者說天生就懂得自動生成動畫幀)。
1)直接在 View 中繪圖也能形成動畫,但前提是變化幅度必須非常小,否則看起來會一頓一頓的。比如上面的例子中,progress 從 0.2 跳到 0.5 時,完全沒有動畫效果。
2)相比之下,在 CALayer 中繪圖可以借助 CA 動畫,讓自訂屬性的變化也自帶過渡效果。原理是:給 Layer 的屬性提供初值、終值與動畫時長,CA 會自動計算中間值並生成關鍵幀,在非主線程播放,動畫於焉成形。
接下來為這個 Layer 加上動畫:
1. 新建 CircleProgressLayer 類。
CircleProgressLayer.h
CircleProgressLayer.m
2. 加上 progress 屬性。
@interface CircleProgressLayer : CALayer

@property (nonatomic, assign) CGFloat progress;

@end
3. 覆寫繪圖方法 drawInContext。
- (void)drawInContext:(CGContextRef)ctx {
    CGFloat radius = self.bounds.size.width / 2;
    CGFloat lineWidth = 10.0;

    UIBezierPath *path =
        [UIBezierPath bezierPathWithArcCenter:CGPointMake(radius, radius)
                                       radius:radius - lineWidth / 2
                                   startAngle:0.f
                                     endAngle:M_PI * 2 * self.progress
                                    clockwise:YES];

    CGContextSetRGBStrokeColor(ctx, 0.5, 0.5, 0.9, 1.0); // 筆顏色
    CGContextSetLineWidth(ctx, 10);                      // 線條寬度
    CGContextAddPath(ctx, path.CGPath);
    CGContextStrokePath(ctx);
}
4. 覆寫 needsDisplayForKey,指定 progress 變化時需要重繪。
+ (BOOL)needsDisplayForKey:(NSString *)key {
    if ([key isEqualToString:@"progress"]) {
        return YES;
    }
    return [super needsDisplayForKey:key];
}
5. 覆寫 initWithLayer。
- (instancetype)initWithLayer:(CircleProgressLayer *)layer {
    NSLog(@"initLayer");
    if (self = [super initWithLayer:layer]) {
        self.progress = layer.progress;
    }
    return self;
}
6. 在 View 中,progress 變化時為 layer 加上 CA 動畫,並在動畫結束後同步 layer 的 progress。
- (id)initWithFrame:(CGRect)frame {
    self = [super initWithFrame:frame];
    if (self) {
        self.circleProgressLayer = [CircleProgressLayer layer];
        self.circleProgressLayer.frame = self.bounds;

        // 像素大小比例
        self.circleProgressLayer.contentsScale = [UIScreen mainScreen].scale;

        [self.layer addSublayer:self.circleProgressLayer];
    }
    return self;
}

- (void)setProgress:(CGFloat)progress {
    CABasicAnimation *ani = [CABasicAnimation animationWithKeyPath:@"progress"];
    ani.duration = 5.0 * fabs(progress - _progress);
    ani.toValue = @(progress);
    ani.removedOnCompletion = YES;
    ani.fillMode = kCAFillModeForwards;
    ani.delegate = self;

    [self.circleProgressLayer addAnimation:ani forKey:@"progressAni"];

    _progress = progress;
}

- (void)animationDidStop:(CAAnimation *)anim finished:(BOOL)flag {
    self.circleProgressLayer.progress = self.progress;
}
7. 加入視圖,並由外部事件改變進度。測試範例是點擊螢幕時隨機增加進度:
- (void)touchesBegan:(NSSet *)touches withEvent:(UIEvent *)event {
    self.circleProgressView.progress += (arc4random() % 4 + 1) * 0.1;
}
效果圖:
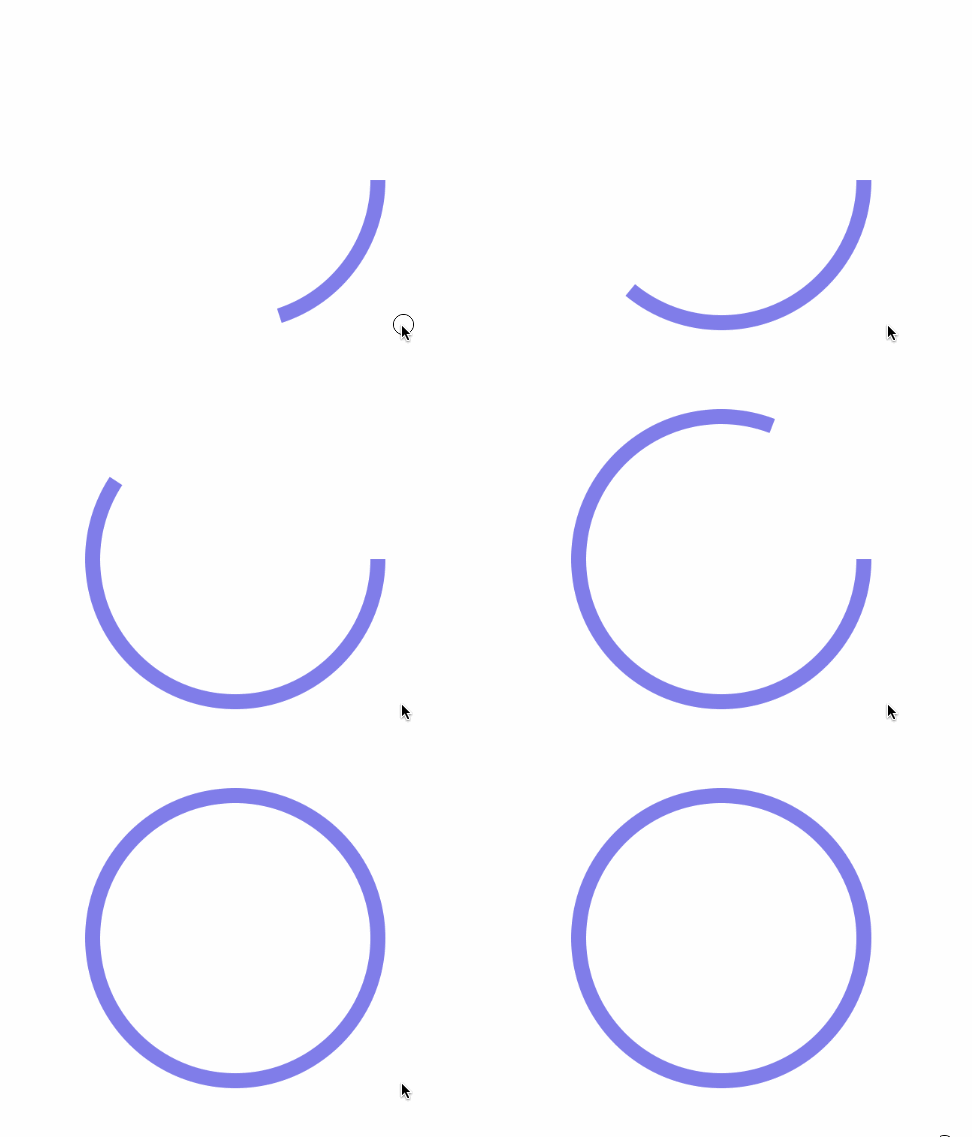
CustomAnimation - layerAni.gif
小結:
1)needsDisplayForKey:CA 動畫需要知道該對 Layer 的哪一個屬性做插值。Layer 預設有許多自帶動畫效果的屬性,如 position、backgroundColor 等;自訂屬性則必須手動指定。
2)initWithLayer:CA 生成關鍵幀的機制是複製一份 CALayer。複製時只會帶走原有(系統)屬性,自訂屬性與持有的物件不會被複製,因此必須覆寫 initWithLayer 手動搬 ourselves 需要的東西。
蛋糕出爐加奶油:UIView 與 CALayer 的結合
進度條動畫已經具備,再加上進度數字的顯示,一個自定義的圓形進度條就完成了。這裡的進度用 UILabel 展示——只要能滿足需求,完全可以結合 UIView 一起做。如果有讀者追求更完美的動畫效果(例如進度數字本身的跳動動畫),可以再往下思考如何完善。
效果圖:
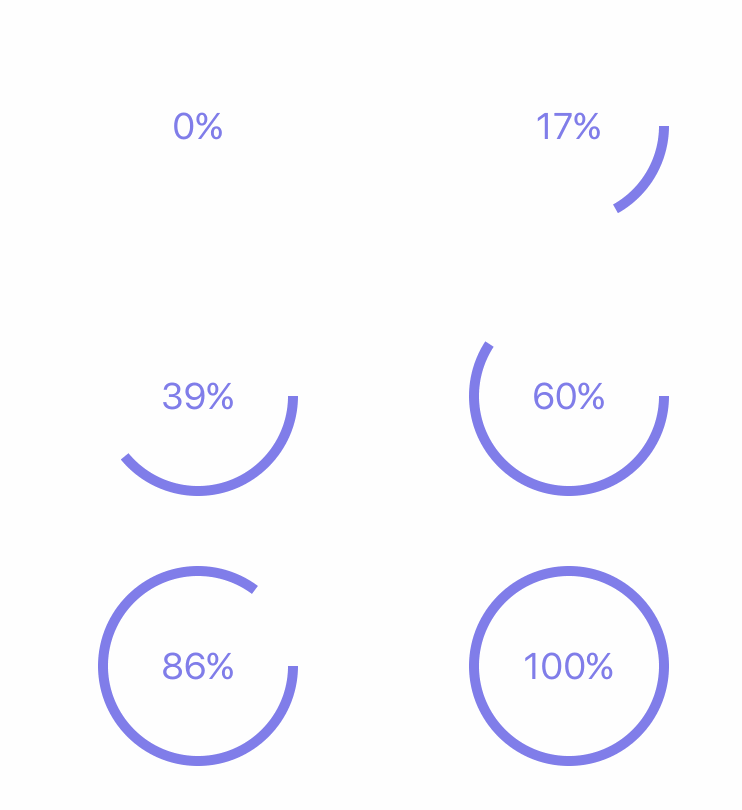
CustomAnimation - preview.gif
本文範例的 demo 可以在我的 GitHub 上下載。
總結
至此,我們大致掌握了自定義 View 動畫的實作流程,可以依不同情境選擇合適的做法:
1)變化幅度小、變化速度快——用 setNeedsDisplay 重繪即可滿足需求。
應用場景:進度條拖動、下拉刷新動畫等。
2)變化幅度大、變化速度慢——用屬性 + CA 動畫來滿足需求。
應用場景:下載進度的變化、數字跳動效果等。
文/明仔Su(簡書作者)
原文鏈接:https://www.jianshu.com/p/673585164bd2