
動畫篇:用 maskView 實現碎片消失動畫

本文授權轉載,作者:Sindri的小巢(簡書)
前言
動畫篇開筆到現在,一晃過去了四個多月。前些天回頭翻自己寫過的動畫文章,發現用來演示的例子實在不夠耐看。於是一直想著:能不能只用最基礎的動畫知識,做出一個真正好看的效果?念頭轉了很久都沒落地,直到在網上撞見一個很驚艷的碎片化動畫,自己復刻了一遍,正好拿來做講解素材。
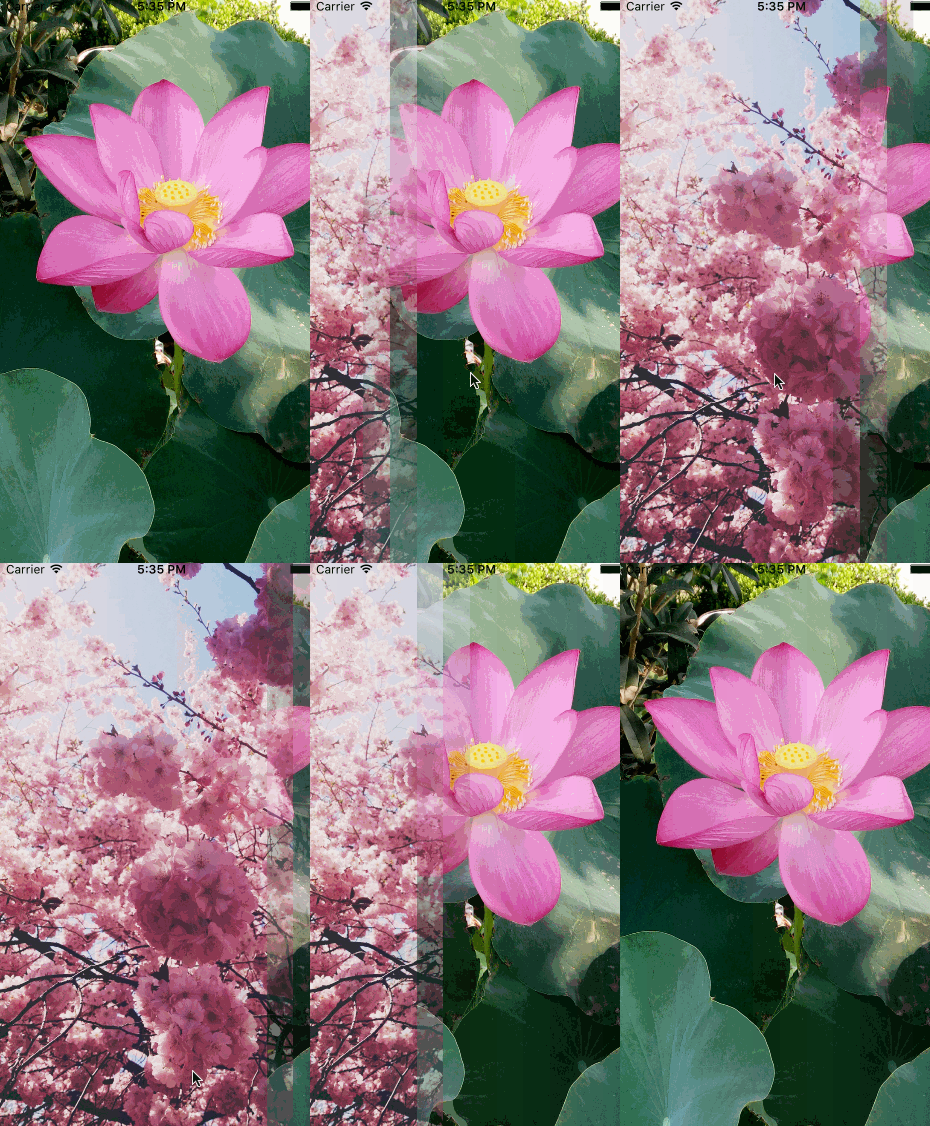
碎片化動畫
遮罩視圖
今天的關鍵角色是 UIView 的 maskView 屬性。它從 iOS 8 起可用,用來指定視圖的遮罩。
遮罩是什麼?我斟酌了很久也沒找到合適的類比。簡單說:一個 UIView 可以通過 alpha 調整自身的透明度,遮罩做的事與此類似,只是控制方式不同——你不再去改 0~1 的那個值,而是讓遮罩視圖的 backgroundColor、alpha、transform 等屬性去決定被遮視圖的呈現效果。看下面這段代碼:
UIView * viewContainer = [[UIView alloc] initWithFrame: CGRectMake(0, 0, 200, 200)]; viewContainer.backgroundColor = [UIColor blueColor]; UIView * contentView = [[UIView alloc] initWithFrame: CGRectMake(20, 20, 160, 160)]; contentView.backgroundColor = [UIColor redColor]; [viewContainer addSubview: contentView]; UIView * maskView = [[UIView alloc] initWithFrame: CGRectMake(100, 100, 35, 80)]; maskView.backgroundColor = [UIColor yellowColor]; contentView.maskView = maskView;
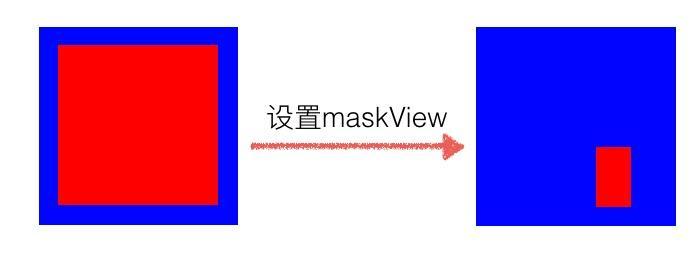
遮罩視圖決定了視圖的顯示內容
接著做個小實驗:分別調整 maskView 與 contentView 的透明度,看看紅色視圖會如何變化。
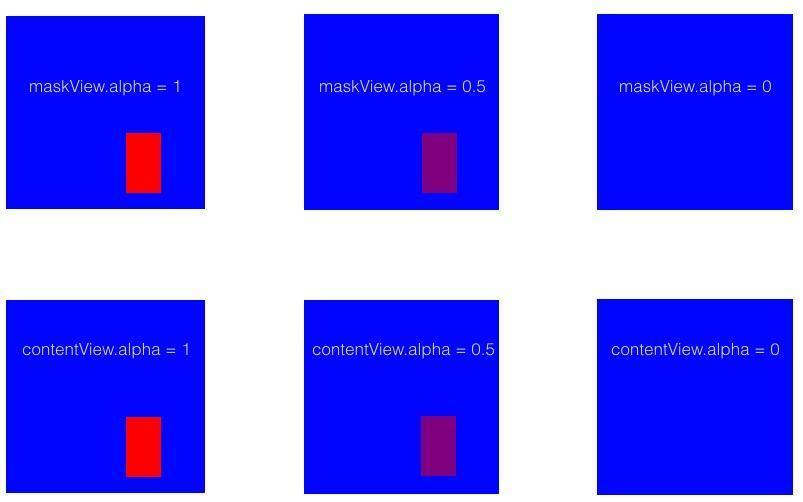
修改透明度
結論很清楚:改視圖自身的 alpha,與改 maskView 的 alpha,效果一致。也就是說,遮罩對視圖的影響,最終都落在透明度與可見範圍這兩個維度上。
那麼除了 alpha,遮罩視圖上還有什麼屬性會左右最終效果?
顏色
上面的實驗已經說明:決定呈現效果的是 maskView 的透明程度。當顏色本身不含透明度時,視圖不會出現任何透明效果。但如果我們把遮罩顏色的透明度調下來:
maskView.backgroundColor = [UIColor colorWithWhite: 1 alpha: 0.5]; //任意顏色
結果與直接設 alpha = 0.5 完全等價。顏色渲染與 alpha 之間的關聯,在《繪制像素到屏幕》一文中已有討論。
maskView 的子視圖
maskView.backgroundColor = [UIColor clearColor]; UIView * sub1 = [[UIView alloc] initWithFrame: CGRectMake(0, 0, 20, 34)]; sub1.backgroundColor = [UIColor blackColor]; UIView * sub2 = [[UIView alloc] initWithFrame: CGRectMake(15, 18, 33, 40)]; sub2.backgroundColor = [UIColor blackColor]; [maskView addSubview: sub1]; [maskView addSubview: sub2];
想觀察子視圖的影響,得先排除遮罩自身的干擾,因此把 maskView 的背景設為透明。
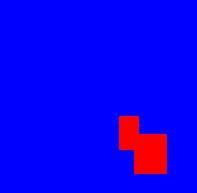
子視圖對於遮罩的影響
可以看到,即便遮罩自身透明,子視圖也能構成有效的部分遮罩。順理成章地,改變這些子視圖的透明度,遮罩效果也會跟著改變——這正是碎片化動畫的實現基礎。
動畫實現
回到最初的效果:圖片被切成許多長方形小塊,逐塊消失。垂直方向分兩份,橫向大約十五份。所以我們要在 maskView 上均勻鋪滿 2 × 15 個子視圖,並給它們編上標識,以便後續按順序控制:
UIView * maskView = [[UIView alloc] initWithFrame: contentView.bounds]; const NSInteger horizontalCount = 15; const NSInteger verticalCount = 2; const CGFloat fadeWidth = CGRectGetWidth(maskView.frame) / horizontalCount; const CGFloat fadeHeight = CGRectGetHeight(maskView.frame) / verticalCount; for (NSInteger line = 0; line < horizontalCount; line ++) { for (NSInteger row = 0; row < verticalCount; row++) { CGRect frame = CGRectMake(line*fadeWidth, row*fadeHeight, fadeWidth, fadeHeight); UIView * fadeView = [[UIView alloc] initWithFrame: frame]; fadeView.tag = [self viewTag: line*verticalCount+row]; fadeView.backgroundColor = [UIColor whiteColor]; [maskView addSubview: fadeView]; } } contentView.maskView = maskView;動畫啟動時,遍歷所有子視圖,讓它們按序退場:
for (NSInteger line = 0; line < horizontalCount; line ++) { for (NSInteger row = 0; row < verticalCount; row++) { NSInteger idx = line*verticalCount+row; UIView * fadeView = [contentView.maskView viewWithTag: [self viewWithTag: idx]; [UIView animateWithDuration: fadeDuration delay: interval*idx options: UIViewAnimationOptionCurveLinear animations: ^{ fadeView.alpha = 0; } completion: nil]; } }寫動畫的同時也該想著怎麼複用。上面這套碎片化效果很適合封裝成 UIView 的 category,侵入性低、耦合度小:
#define LXDMAXDURATION 1.2 #define LXDMINDURATION .2 #define LXDMULTIPLED .25 @interface UIView (LXDFadeAnimation) /*! * @brief 視圖是否隱藏 */ @property (nonatomic, assign, readonly) BOOL isFade; /*! * @brief 是否處在動畫中 */ @property (nonatomic, assign, readonly) BOOL isFading; /*! * @brief 垂直方塊個數。默認為3 */ @property (nonatomic, assign) NSInteger verticalCount; /*! * @brief 水平方塊個數。默認為18 */ @property (nonatomic, assign) NSInteger horizontalCount; /*! * @brief 方塊動畫之間的間隔0.2~1.2。默認0.7 */ @property (nonatomic, assign) NSTimeInterval intervalDuration; /*! * @brief 每個方塊隱藏的動畫時間0.05~0.3,最多為動畫時長的25%。默認為0.175 */ @property (nonatomic, assign) NSTimeInterval fadeAnimationDuration; - (void)configurateWithVerticalCount: (NSInteger)verticalCount horizontalCount: (NSInteger)horizontalCount interval: (NSTimeInterval)interval duration: (NSTimeInterval)duration; - (void)reverseWithComplete: (void(^)(void))complete; - (void)animateFadeWithComplete: (void(^)(void))complete; - (void)reverseWithoutAnimate; @end
要注意的是,category 裡聲明的屬性,編譯器不會自動合成 getter 和 setter,而且你也無法用下劃線加變量名的方式直接訪問成員。所以必須引入 objc/runtime.h,靠關聯對象機制為視圖動態掛上這些屬性:
- (BOOL)isFade { return [objc_getAssociatedObject(self, kIsFadeKey) boolValue]; } // other getAssociatedObject method - (void)setIsFade: (BOOL)isFade { objc_setAssociatedObject(self, kIsFadeKey, @(isFade), OBJC_ASSOCIATION_RETAIN_NONATOMIC); } // other setAssociatedObject method有了解散,自然也要有重聚。還原動畫只是把順序倒過來:
NSInteger fadeCount = self.verticalCount * self.horizontalCount; for (NSInteger idx = fadeCount - 1; idx >= 0; idx--) { UIView * subview = [self.maskView viewWithTag: [self subViewTag: idx]]; [UIView animateWithDuration: self.fadeAnimationDuration delay: self.intervalDuration * (fadeCount - 1 - idx) options: UIViewAnimationOptionCurveLinear animations: ^{ subview.alpha = 1; } completion: nil]; }接著有個務實的問題要處理:用戶連點圖片時,必須先判斷是否已在動畫中,若是則直接忽略後續點擊。動畫開始前把 isFading 置為 YES;但由於每個方塊各自跑一個動畫,整個序列的結束時刻該怎麼判定?已知方塊總數是 count,那麼第 count 個動畫完成時,整段碎片化動畫也就結束了。用一個臨時計數器記錄即可:
__block NSInteger timeCount = 0; //...... [UIView animateWithDuration: self.fadeAnimationDuration delay: self.intervalDuration * (fadeCount - 1 - idx) options: UIViewAnimationOptionCurveLinear animations: ^{ subview.alpha = 1; } completion: ^(BOOL finished) { if (++timeCount == fadeCount) { self.isFade = NO; self.isFading = NO; if (complete) { complete(); } } }]; //......拿到確切的結束時刻後,就能對外提供一個 block,讓調用者在動畫收尾時接著做別的事。
輪播碎片動畫
有了碎片動畫這塊積木,我想做一個有點酷的廣告輪播頁,同樣用 category 實現(demo 裡用的是本地圖片)。先看效果:

廣告輪播頁
步驟並不多:
1、在當前圖片下方插入一個 UIImageView 預先裝好下一張圖,能複用就複用。
2、加一個 UIPageControl 標示當前下標。
於是我對外暴露了一個接收圖片數組的接口:
// 獲取動態綁定臨時展示的UIImageView - (UIImageView *)associateTempBannerWithImage: (UIImage *)image { UIImageView * tempBanner = objc_getAssociatedObject(self, kTempImageKey); if (!tempBanner) { tempBanner = [[UIImageView alloc] initWithFrame: self.frame]; objc_setAssociatedObject(self, kTempImageKey, tempBanner, OBJC_ASSOCIATION_RETAIN_NONATOMIC); [self.superview insertSubview: tempBanner belowSubview: self]; } tempBanner.image = image; return tempBanner; }pageControl 一開始我掛在執行動畫的 imageView 上,結果動畫跑到一半,它也跟著局部遮罩一起消失了。所以要把 pageControl 挪出來,並依據 imageView 的實際位置換算合適的坐標:
- (void)associatePageControlWithCurrentIdx: (NSInteger)idx { UIPageControl * pageControl = objc_getAssociatedObject(self, kPageControlKey); if (!pageControl) { pageControl = [[UIPageControl alloc] initWithFrame: CGRectMake(self.frame.origin.x, CGRectGetHeight(self.frame) - 37 + self.frame.origin.y, CGRectGetWidth(self.frame), 37)]; [self.superview addSubview: pageControl]; pageControl.numberOfPages = self.bannerImages.count; objc_setAssociatedObject(self, kPageControlKey, pageControl, OBJC_ASSOCIATION_RETAIN_NONATOMIC); } pageControl.currentPage = idx; }由於每次碎片動畫結束後都要接著跑下一輪,而動畫結束是通過 block 通知的,等於要在 block 裡重複調用同一個 block。因此先把這段執行邏輯聲明成 block 變量;另外需要一個 idx 在每輪結束時更新圖片,並用 __block 修飾以便在回調中改寫:
- (void)fadeBanner NSParameterAssert(self.superview); UIImageView * tempBanner = [self associateTempBannerWithImage: [UIImage imageNamed: self.bannerImages[1]]]; self.stop = NO; __block NSInteger idx = 0; __weak typeof(self) weakSelf = self; [self associatePageControlWithCurrentIdx: idx]; void (^complete)() = ^{ NSInteger updateIndex = [weakSelf updateImageWithCurrentIndex: ++idx tempBanner: tempBanner]; idx = updateIndex; [weakSelf associatePageControlWithCurrentIdx: idx]; }; // 保存block並執行動畫 objc_setAssociatedObject(self, kCompleteBlockKey, complete, OBJC_ASSOCIATION_COPY_NONATOMIC); [self animateFadeWithComplete: ^{ if (!self.stop) { complete(); } }]; } // 更新展示的圖片,並且返回下一次要展示的圖片下標 - (NSInteger)updateImageWithCurrentIndex: (NSInteger)idx tempBanner: (UIImageView *)tempBanner { if (idx >= self.bannerImages.count) { idx = 0; } self.image = [UIImage imageNamed: self.bannerImages[idx]]; [self reverseWithoutAnimate]; NSInteger nextIdx = idx + 1; if (nextIdx >= self.bannerImages.count) { nextIdx = 0; } tempBanner.image = [UIImage imageNamed: self.bannerImages[nextIdx]]; [self animateFadeWithComplete: ^{ if (!self.stop) { void (^complete)() = objc_getAssociatedObject(self, kCompleteBlockKey); complete(); } }]; return idx; }這裡有一處必須注意:我用 objc_Associate 機制把完成回調的 block 保存了下來,這一步不能省。就算你不把更新圖片的邏輯抽成獨立方法,而是直接寫在 complete 聲明裡,也依然得動態保存它,否則 block 跑到第三輪碎片動畫時就會被釋放,直接崩潰。
另外別忘了,每次切圖完成後要把所有遮罩子視圖還原,並更新圖片顯示:
- (void)reverseWithoutAnimate { if (self.isFading) { NSLog(@"It's animating!"); return; } for (UIView * subview in self.maskView.subviews) { subview.alpha = 1; } }最後
動畫篇開筆至今四個多月,時間過得真快。從下一篇開始,就要正式進入 CoreAnimation 的地界了——那是個功能強大到沒有邊界的框架。順帶一提,本文裡頗能打的那位 maskView,本質上也只是圖層 mask 屬性的高階封裝而已。
本文 DEMO:LXDMaskViewAnimation,把點擊事件裡的註釋打開就能看到效果。
推薦閱讀:
動畫篇-Transform 和 KeyFrame 動畫
動畫篇-從 UIView 動畫說起
動畫篇-layout 動畫初體驗
動畫篇-layout 動畫的更多用法