
iOS 開發中的 10 個實用技巧與冷知識
本文為授權轉載,作者:吳白
1. 關於關鍵字 volatile
被 volatile 修飾的變量,意味著它的值可能被意料之外地改變,因此編譯器不能對它做任何「值不變」的假設。具體來說,每次使用都必須重新從內存讀取,而不是複用寄存器中的副本。它與 const 同屬類型修飾符,主要用於修飾被不同線程讀寫的變量。不加 volatile,結果通常是:要麼寫不出可靠的多線程程序,要麼編譯器放棄大量優化機會。
volatile 具備可見性語義,但不具備原子性——線程能自動看到最新值,卻不能保證「讀—改—寫」的完整性。因此它只適用於很有限的場景:多個變量之間、或某變量的當前值與修改後值之間不存在額外約束。單靠 volatile 無法實現計數器、互斥鎖,也無法維護與多變量相關的不變式(例如 start <= end)。
出於簡潔與可擴展性考慮,有時會傾向用 volatile 替代鎖:寫法和閱讀都更輕,也不會造成線程阻塞,可擴展性問題更少;當讀操作遠多於寫操作時,性能甚至可能優於鎖。
volatile int i = 10;
int j = i;
// ... 中間沒有對 i 的修改
int k = i;
volatile 告訴編譯器 i 隨時可能變化,每次使用都要重新從其地址讀取。Release 版本會開啟編譯優化,與 volatile 變量相關的運算不會被優化;否則編譯器發現兩次讀 i 之間沒有寫操作,就會直接把上次的值複用給 k。若 i 其實是硬件寄存器或端口數據,這就出錯了。
int square(volatile int *ptr) {
    return *ptr * *ptr;
}
本意是返回指針指向值的平方,但由於 ptr 指向 volatile 數據,編譯器可能生成:
int square(volatile int *ptr) {
    int a, b;
    a = *ptr;
    b = *ptr;   // 兩次讀取的值可能不同
    return a * b;
}
結果自然可能不是期望的平方值。正確寫法是先取值再運算:
long square(volatile int *ptr) {
    int a = *ptr;
    return a * a;
}
volatile 的幾類典型用途:
- 并行設備的硬件寄存器(如狀態寄存器)
- 中斷服務子程序中會訪問到的非自動變量
- 多線程應用中被多個任務共享的變量
兩個常見追問:
一個參數能否同時是 const 和 volatile?可以。比如只讀的狀態寄存器——它是 volatile,因為值可能在意料之外的時刻變化;它是 const,因為程序不應嘗試修改它。
一個指針能否是 volatile?可以,雖然不常見。例如中斷服務子程序修改了一個指向 buffer 的指針時。
多線程中使用 volatile 的要點:把共享對象聲明為 volatile;不要直接把 volatile 修飾在基本類型上;定義共享類時用 volatile 成員函數保證線程安全。臨界區內部用鎖保護,臨界區外讀寫共享變量則需要 volatile。
2. const 的位置含義
const int a;          // a 是常整型數
int const a;          // 同上
const int *a;         // a 是「指向常整型的指針」:所指數據不可改,指針可改
int * const a;        // a 是「常指針」:指針不可改,所指數據可改
int const * const a;  // 兩者皆不可改
// 也可寫成 const int * const a; 含義相同
合理使用 const 能讓編譯器幫你保護那些不希望被改動的數據,減少 bug。定義時通常需要同時初始化,因為此後再無修改機會;指針場景下可分別指定「指針本身為 const」「所指數據為 const」或兩者皆是;函數聲明中可用 const 修飾形參,表明它是輸入參數;成員函數標為 const 則表示不修改成員變量;某些成員函數還需把返回值聲明為 const,以避免其成為左值。
3. 滑動時自動隱藏導航欄
navigationController.hidesBarsOnSwipe = YES;
4. 去掉返回按鈕上的標題
[[UIBarButtonItem appearance] setBackButtonTitlePositionAdjustment:UIOffsetMake(0, -60)
                                                     forBarMetrics:UIBarMetricsDefault];
5. 讓導航欄透明且不帶模糊
[self.navigationController.navigationBar setBackgroundImage:[UIImage new]
                                              forBarMetrics:UIBarMetricsDefault];
self.navigationController.navigationBar.shadowImage = [UIImage new];
self.navigationController.navigationBar.translucent = YES;
6. static 的幾種語義
函數內的 static 局部變量作用域仍局限於該函數,但內存只分配一次,因此下次調用時保持上次的值;模塊內的 static 全局變量可被本模塊函數訪問,模塊外不可見;模塊內的 static 函數只能被本模塊調用;類中的 static 成員變量屬於整個類,所有對象共享一份;static 成員函數不接收 this 指針,因此只能訪問 static 成員變量。
7. 用一個 pan 手勢替代四個方向滑動
- (void)pan:(UIPanGestureRecognizer *)sender {
    typedef NS_ENUM(NSUInteger, UIPanGestureRecognizerDirection) {
        UIPanGestureRecognizerDirectionUndefined,
        UIPanGestureRecognizerDirectionUp,
        UIPanGestureRecognizerDirectionDown,
        UIPanGestureRecognizerDirectionLeft,
        UIPanGestureRecognizerDirectionRight
    };

    static UIPanGestureRecognizerDirection direction = UIPanGestureRecognizerDirectionUndefined;

    switch (sender.state) {
        case UIGestureRecognizerStateBegan: {
            if (direction == UIPanGestureRecognizerDirectionUndefined) {
                CGPoint velocity = [sender velocityInView:sender.view];
                BOOL isVerticalGesture = fabs(velocity.y) > fabs(velocity.x);
                if (isVerticalGesture) {
                    direction = (velocity.y > 0) ? UIPanGestureRecognizerDirectionDown
                                                 : UIPanGestureRecognizerDirectionUp;
                } else {
                    direction = (velocity.x > 0) ? UIPanGestureRecognizerDirectionRight
                                                 : UIPanGestureRecognizerDirectionLeft;
                }
            }
            break;
        }
        case UIGestureRecognizerStateChanged: {
            switch (direction) {
                case UIPanGestureRecognizerDirectionUp:    [self handleUpwardsGesture:sender]; break;
                case UIPanGestureRecognizerDirectionDown:  [self handleDownwardsGesture:sender]; break;
                case UIPanGestureRecognizerDirectionLeft:  [self handleLeftGesture:sender]; break;
                case UIPanGestureRecognizerDirectionRight: [self handleRightGesture:sender]; break;
                default: break;
            }
            break;
        }
        case UIGestureRecognizerStateEnded: {
            direction = UIPanGestureRecognizerDirectionUndefined;
            break;
        }
        default: break;
    }
}
8. 拉伸圖片而不變形
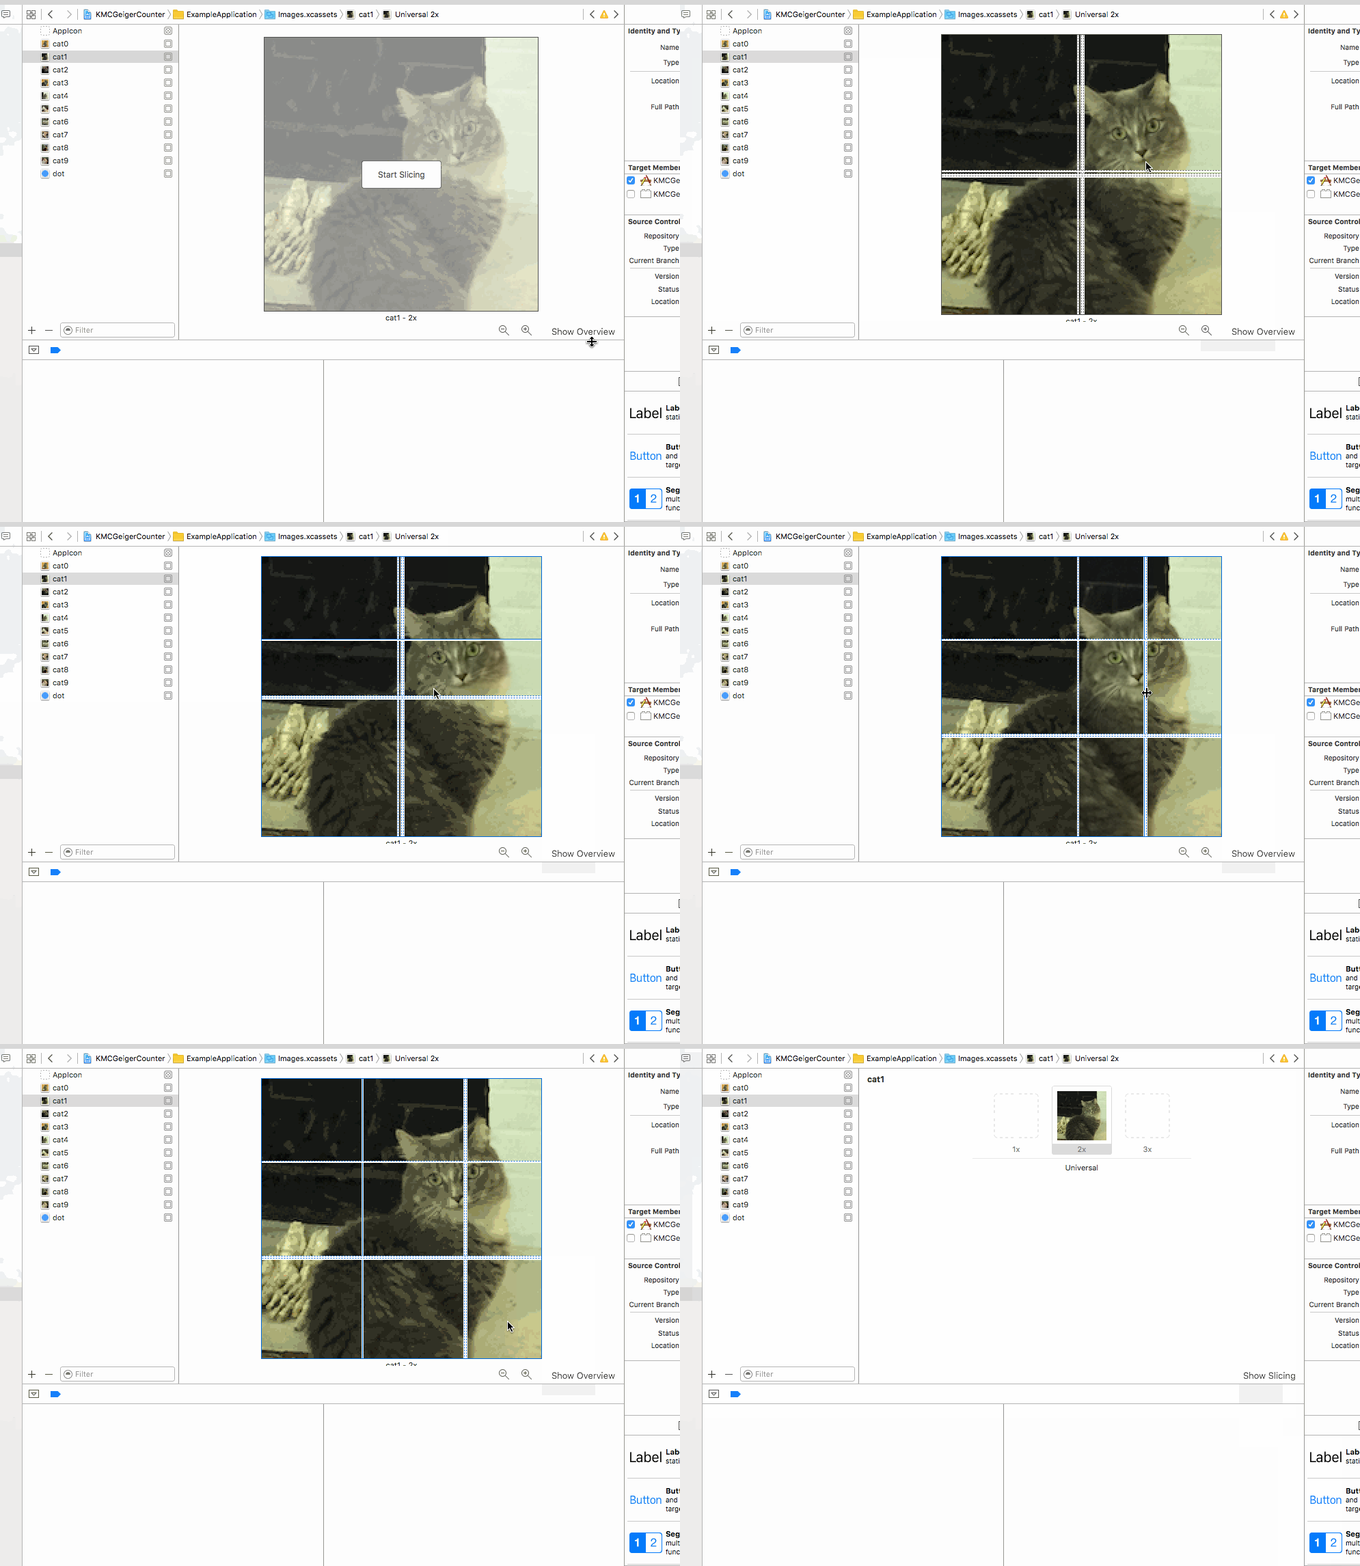
// 舊寫法
[[UIImage imageNamed:@""] stretchableImageWithLeftCapWidth:10 topCapHeight:10];

// 推薦寫法
[[UIImage imageNamed:@""] resizableImageWithCapInsets:UIEdgeInsetsMake(10, 10, 10, 10)];
9. GIF 播放優化
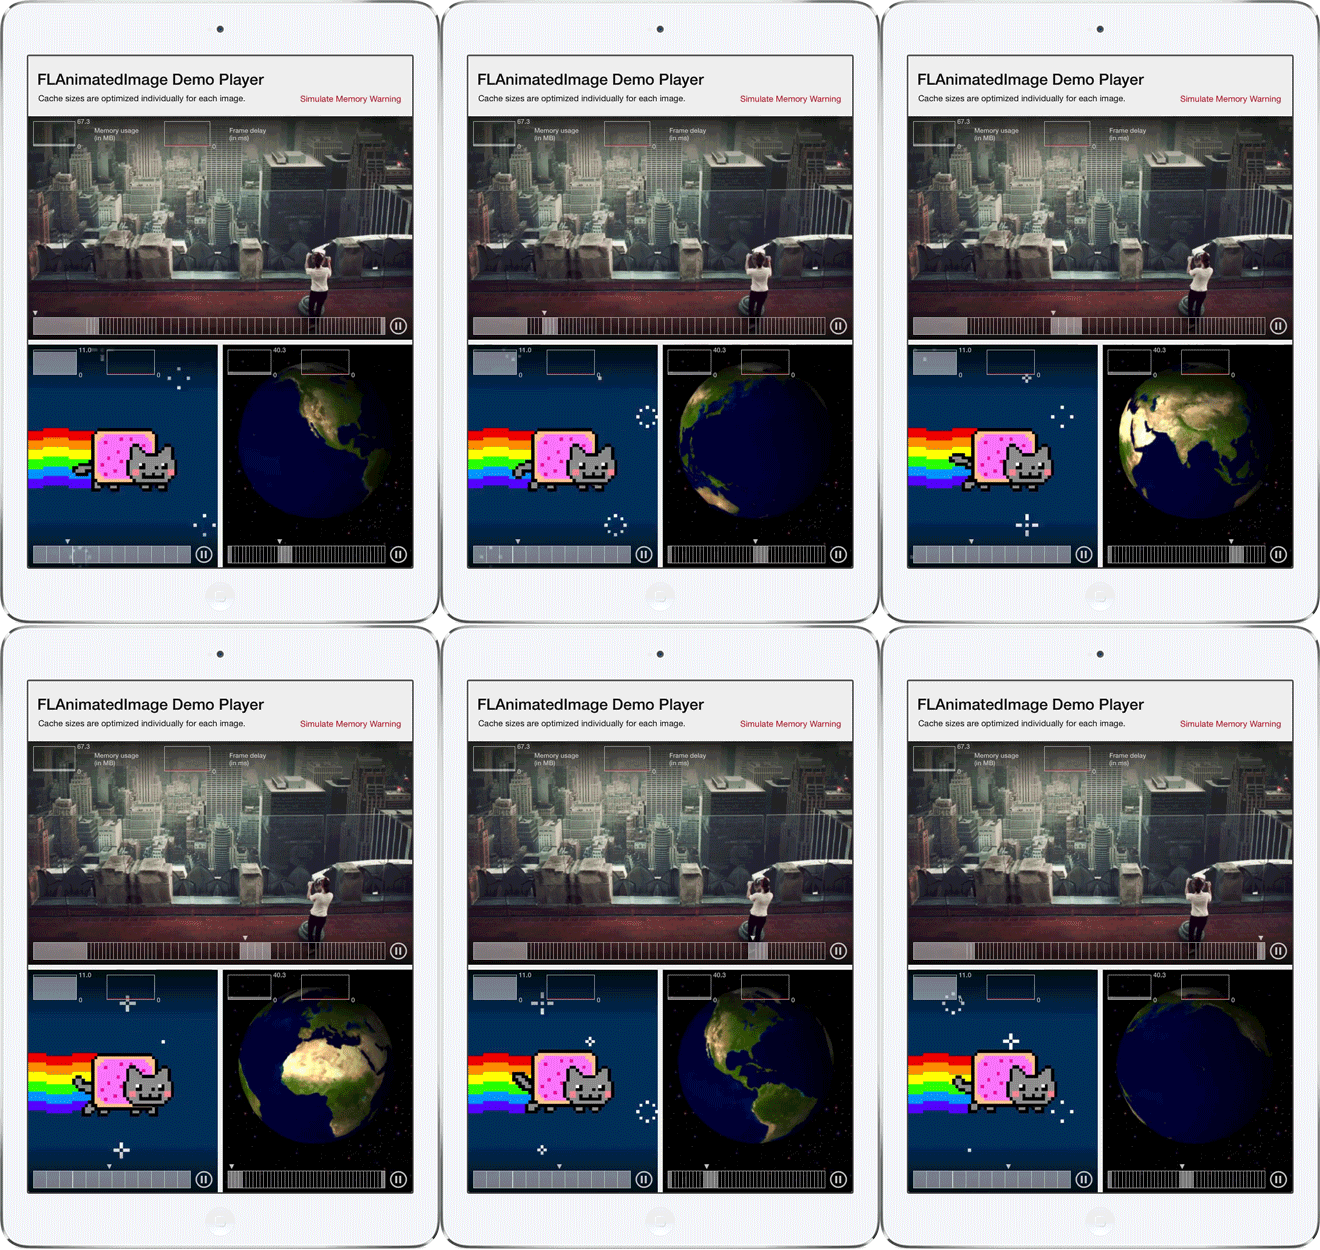
FLAnimatedImage 能顯著改善 GIF 的顯示性能,解決播放卡頓。
FLAnimatedImage *image = [FLAnimatedImage animatedImageWithGIFData:
    [NSData dataWithContentsOfURL:[NSURL URLWithString:@"https://example.com/anim.gif"]]];
FLAnimatedImageView *imageView = [[FLAnimatedImageView alloc] init];
imageView.animatedImage = image;
imageView.frame = CGRectMake(0.0, 0.0, 100.0, 100.0);
[self.view addSubview:imageView];
10. 用 CollectionView 實現懸停 Header
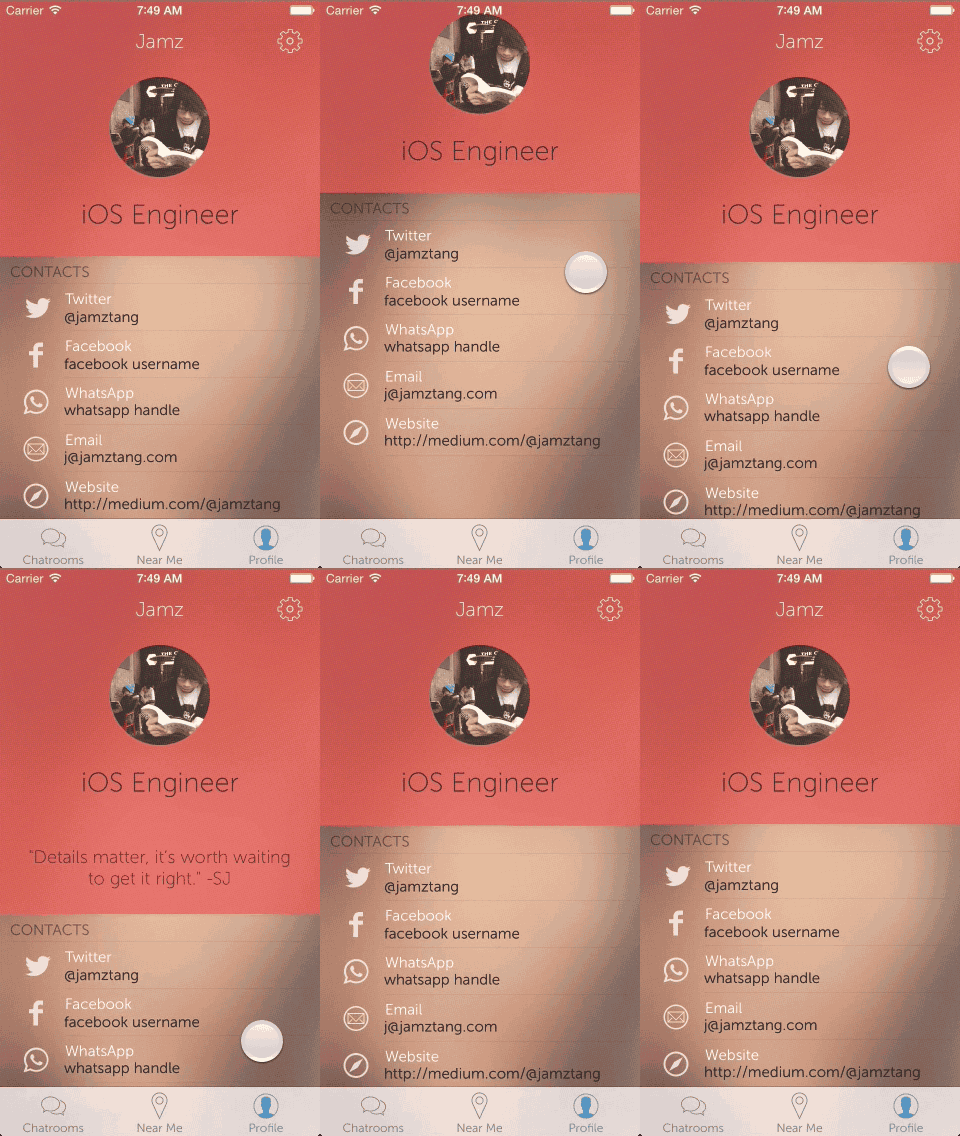
CSStickyHeaderFlowLayout 可以滿足這一需求。
#import "CSStickyHeaderFlowLayout.h"

- (void)viewDidLoad {
    [super viewDidLoad];
    CSStickyHeaderFlowLayout *layout = (id)self.collectionViewLayout;
    if ([layout isKindOfClass:[CSStickyHeaderFlowLayout class]]) {
        layout.parallaxHeaderReferenceSize = CGSizeMake(320, 200);
    }
}

- (UICollectionReusableView *)collectionView:(UICollectionView *)collectionView
          viewForSupplementaryElementOfKind:(NSString *)kind
                        atIndexPath:(NSIndexPath *)indexPath {
    if ([kind isEqualToString:CSStickyHeaderParallaxHeader]) {
        return [collectionView dequeueReusableSupplementaryViewOfKind:kind
                                                  withReuseIdentifier:@"header"
                                                         forIndexPath:indexPath];
    }
    return nil;
}
- 上一篇文章: iOS 圖像處理入門:Core Image 核心概念與實踐
- 下一篇文章: 源碼推薦(0719B):仿知乎導航欄漸變與 GIF 動畫播放