
iOS 橫豎屏切換筆記:四種場景的實作方式與常見陷阱
橫豎屏切換在 iOS 開發中幾乎一定會遇到。看起來簡單,但真正動手時會發現細節多得超出預期。以下把幾種常見場景的處理方式與踩過的坑整理出來。
先記住一個容易搞混的點:

UIInterfaceOrientationLandscapeRight 與 UIInterfaceOrientationMaskLandscapeRight 都代表橫屏且 Home 鍵在右側;而 UIDeviceOrientationLandscapeLeft 則對應 Home 鍵在左側。方向命名的邏輯並不直觀,這裡特別容易寫錯。
一般情形:所有頁面都支援
如果整個 App 都要支援橫豎屏,只需在【General】→【Device Orientation】中勾選要支援的方向即可。
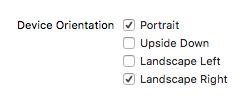
圖中設定為支援豎屏與 Home 鍵在右側的橫屏。設定完成後,裝置豎屏時所有頁面都是豎屏,橫屏且 Home 在右時所有頁面都會轉為橫屏,其他方向則不變。
這裡有個坑:iOS 9 之後,橫屏時狀態列會消失。
解法是確認 plist 中的【View controller-based status bar appearance】為 YES,然後在 ViewController 中重寫:
- (BOOL)prefersStatusBarHidden {
    return NO;
}
特殊情形一:少數頁面鎖定方向,其餘全開
在【General】→【Device Orientation】中設定好支援方向後,只需在那些特殊頁面重寫兩個方法:
// 允許自動旋轉
- (BOOL)shouldAutorotate {
    return YES;
}

// 此頁面僅支援 Home 鍵在右側的橫屏
- (UIInterfaceOrientationMask)supportedInterfaceOrientations {
    return UIInterfaceOrientationMaskLandscapeRight;
}
特殊情形二:少數頁面可旋轉,其餘鎖定
這大概是最常見的需求,例如影片播放頁只能橫屏。有兩種做法。
方式一:用一個基類控制器
先在【General】→【Device Orientation】中勾選所有需要支援的方向,然後建立一個基類,在其中重寫兩個方法,把預設行為設為豎屏:
- (BOOL)shouldAutorotate {
    return YES;
}

- (UIInterfaceOrientationMask)supportedInterfaceOrientations {
    return UIInterfaceOrientationMaskPortrait;
}
接著在需要旋轉的頁面上再覆寫一次,允許它自動切換:
// 橫屏時務必重寫並回傳 NO
- (BOOL)prefersStatusBarHidden {
    return NO;
}

- (BOOL)shouldAutorotate {
    return YES;
}

- (UIInterfaceOrientationMask)supportedInterfaceOrientations {
    // 同時支援橫豎屏
    return UIInterfaceOrientationMaskLandscapeRight | UIInterfaceOrientationMaskPortrait;
    // 僅支援橫屏
    // return UIInterfaceOrientationMaskLandscapeRight;
}
方式二:用通知控制
方式一要求所有控制器都繼承同一個基類,專案一大就會很綁手。另一條路是透過裝置方向通知來控制。
首先在【General】→【Device Orientation】中只勾選豎屏。

然後在特殊頁面的 viewDidLoad 中註冊通知:
[[UIDevice currentDevice] beginGeneratingDeviceOrientationNotifications];
[[NSNotificationCenter defaultCenter] addObserver:self
                                        selector:@selector(deviceOrientationDidChange)
                                            name:UIDeviceOrientationDidChangeNotification
                                          object:nil];
通知的處理:
- (void)deviceOrientationDidChange {
    if ([UIDevice currentDevice].orientation == UIDeviceOrientationPortrait) {
        [[UIApplication sharedApplication] setStatusBarOrientation:UIInterfaceOrientationPortrait];
        [self orientationChange:NO];
        // 注意:UIDeviceOrientationLandscapeLeft 對應 UIInterfaceOrientationLandscapeRight
    } else if ([UIDevice currentDevice].orientation == UIDeviceOrientationLandscapeLeft) {
        [[UIApplication sharedApplication] setStatusBarOrientation:UIInterfaceOrientationLandscapeRight];
        [self orientationChange:YES];
    }
}

- (void)orientationChange:(BOOL)landscapeRight {
    if (landscapeRight) {
        [UIView animateWithDuration:0.2f animations:^{
            self.view.transform = CGAffineTransformMakeRotation(M_PI_2);
            self.view.bounds = CGRectMake(0, 0, SCREEN_WIDTH, SCREEN_HEIGHT);
        }];
    } else {
        [UIView animateWithDuration:0.2f animations:^{
            self.view.transform = CGAffineTransformMakeRotation(0);
            self.view.bounds = CGRectMake(0, 0, SCREEN_WIDTH, SCREEN_HEIGHT);
        }];
    }
}

#define SCREEN_WIDTH  ([UIScreen mainScreen].bounds.size.width)
#define SCREEN_HEIGHT ([UIScreen mainScreen].bounds.size.height)
最重要的一點:必須重寫
- (BOOL)shouldAutorotate並回傳 NO。- (BOOL)shouldAutorotate { return NO; }這樣一來,裝置橫屏時介面變橫屏,豎屏時變豎屏,完全由通知邏輯接管。
實務上會踩到的坑
1. 橫屏時鍵盤樣式不對。方式二中【Device Orientation】只勾了豎屏,所以橫屏時若彈出鍵盤,鍵盤仍是豎屏樣式。解法是把橫屏方向也加回【Device Orientation】。
2. 控制器被包在 UINavigationController 或 UITabBarController 裡。這時系統問的是容器控制器的方向,而不是內容頁的,所以必須在容器上轉發:
// UINavigationController
- (BOOL)shouldAutorotate {
    return [self.topViewController shouldAutorotate];
}
- (UIInterfaceOrientationMask)supportedInterfaceOrientations {
    return [self.topViewController supportedInterfaceOrientations];
}

// UITabBarController
- (BOOL)shouldAutorotate {
    return [self.selectedViewController shouldAutorotate];
}
- (UIInterfaceOrientationMask)supportedInterfaceOrientations {
    return [self.selectedViewController supportedInterfaceOrientations];
}
3. 點擊按鈕強制旋轉,返回後方向錯亂。直覺的寫法:
- (IBAction)landscapAction:(id)sender {
    [[UIApplication sharedApplication] setStatusBarOrientation:UIInterfaceOrientationLandscapeRight];
    [self orientationChange:YES];
}
但這樣返回上一頁時視圖方向會錯,即使返回前補上還原的程式碼也沒用。比較可靠的做法是透過私有介面直接設定裝置方向,再讓通知機制接手:
- (void)interfaceOrientation:(UIInterfaceOrientation)orientation {
    if ([[UIDevice currentDevice] respondsToSelector:@selector(setOrientation:)]) {
        SEL selector = NSSelectorFromString(@"setOrientation:");
        NSInvocation *invocation =
            [NSInvocation invocationWithMethodSignature:
                [UIDevice instanceMethodSignatureForSelector:selector]];
        [invocation setSelector:selector];
        [invocation setTarget:[UIDevice currentDevice]];
        int val = orientation;
        [invocation setArgument:&val atIndex:2];
        [invocation invoke];
    }
}
需要說明的是,這裡呼叫的是非公開 API。它確實有效,但使用私有介面有被 App Store 審核退回的風險。若專案要正式上架,建議改用方式一的基類繼承方案,或利用 iOS 16 之後提供的 setNeedsUpdateOfSupportedInterfaceOrientations 搭配 scene 層級的 request geometry update API。
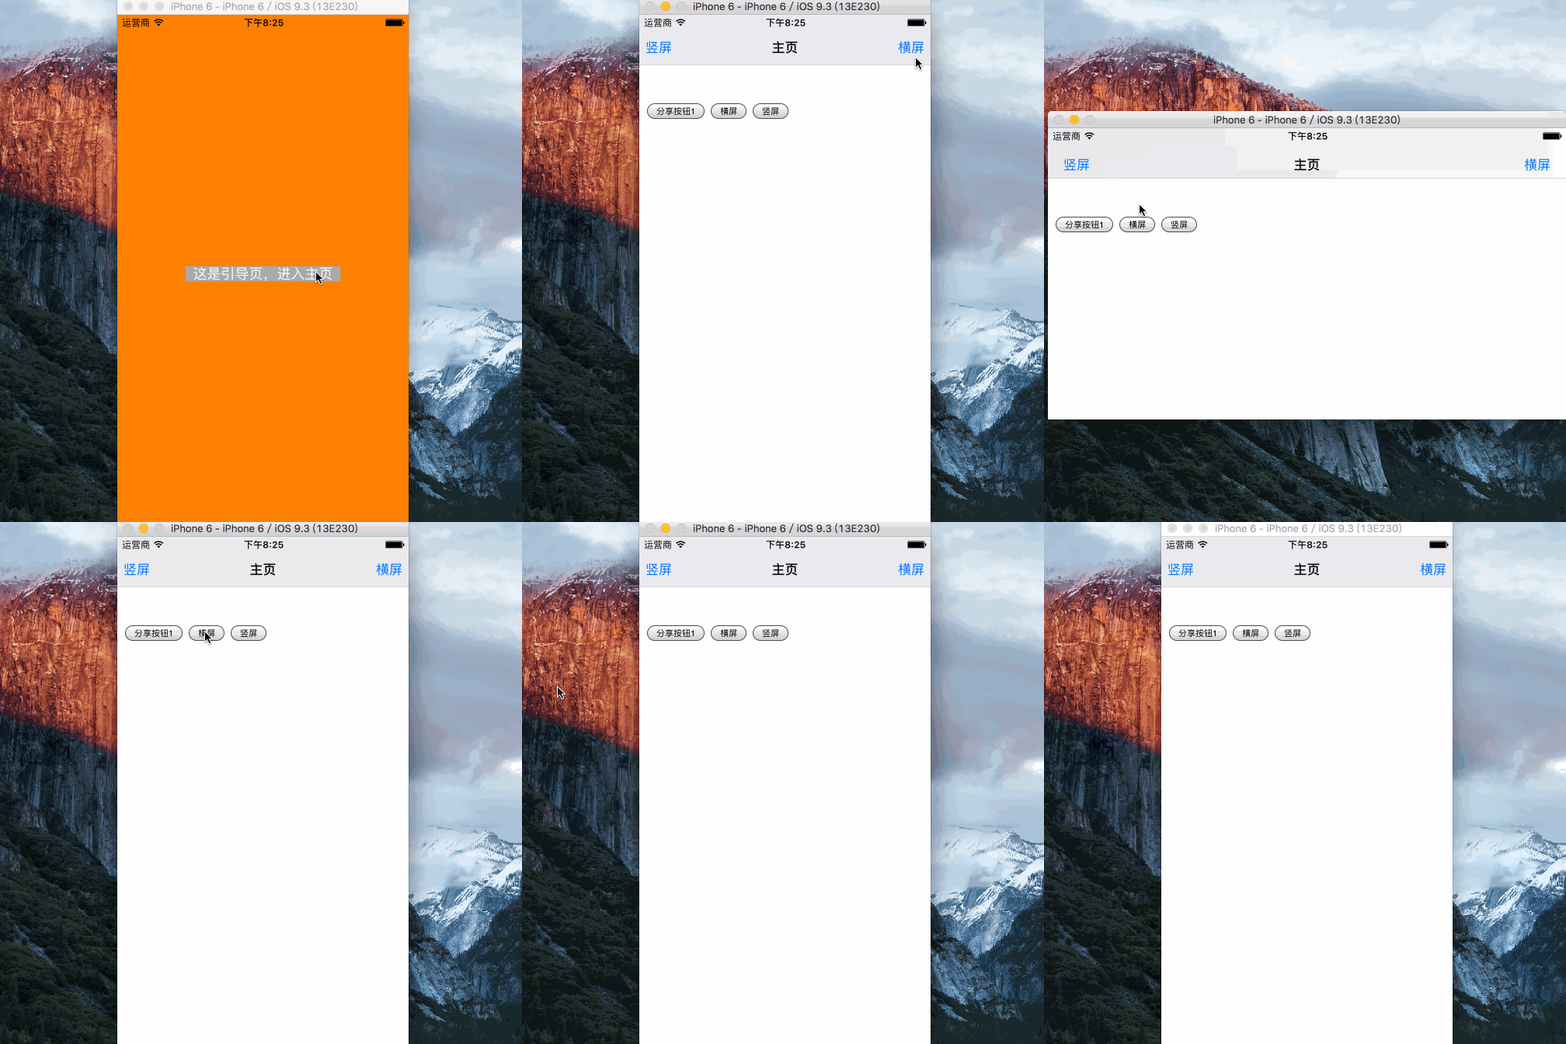
橫豎屏切換的筆記就到這裡。