
高仿印物 App 的 TableView 層疊滾動動畫(二):cell 偏移的核心算法
編輯:iOS 開發基礎

授權轉載,作者:判若兩人丶(Github)
前言
印物 App 定制模塊裡的 TableView 效果一直讓人印象不錯,於是照著它復刻了最主要的亮點之一:滾動時的層疊效果。cell 內部的細節功能沒有實現,有需要的同學可以自己擴展。
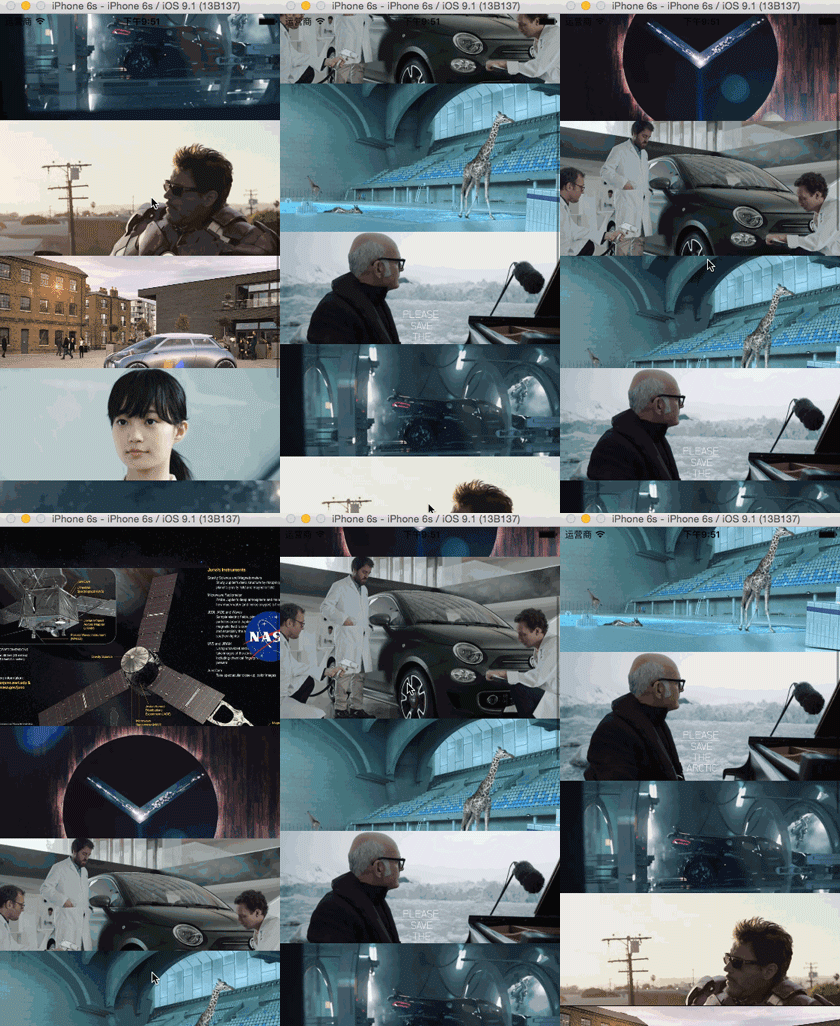
實現思路
TableView 與 cell 的初始化這裡不再贅述,直接看關鍵代碼。首先需要兩個屬性來承載層疊的視覺:
// 底層 View
@property (nonatomic, weak) UIView *backGView;
// 上層 Image
@property (nonatomic, weak) UIImageView *backGImage;

/** cell 偏移設置 */
- (void)cellOffsetOnTabelView:(UITableView *)tabelView;
演算法可以拆成四種情況:
- 先約定一個固定的臨界值 currentLocation。
- 若 cell 的 Y 值已小於 contentOffset.y(也就是完全滾出螢幕上方),做第一次處理:停止偏移,把底層 view 收起到固定高度。
- 若 cell 的 Y 值落在 currentLocation 區間內,做第二次處理:按比例計算偏移量,並把當前 cell 提到最上層。
- 若 cell 的 Y 值還在 currentLocation 之下,做第三次處理:恢復初始值。
- (void)cellOffsetOnTabelView:(UITableView *)tabelView {
    CGFloat currentLocation = tabelView.contentOffset.y + LRLastCellHeight;
    // 如需禁止下拉時第一個 cell 跟著移動,可打開下面這段
#if 0
    if (currentLocation < LRCellHeight) return;
#endif
    // 超出規定位置(上方)
    if (self.frame.origin.y < tabelView.contentOffset.y + LRLastCellHeight - LRCellHeight) {
        self.backGView.height = LRLastCellHeight;
        self.backGView.y = - (LRLastCellHeight - LRCellHeight);
    } else if (self.frame.origin.y <= currentLocation && self.frame.origin.y >= tabelView.contentOffset.y) {
        // cell 進入規定位置,用絕對值取出位移
        CGFloat moveY = ABS(self.frame.origin.y - currentLocation) / LRCellHeight * (LRLastCellHeight - LRCellHeight);
        // 把當前 cell 提到最上層,形成層疊遮擋
        [self.superview bringSubviewToFront:self];
        self.backGView.height = LRCellHeight + moveY;
        self.backGView.y = - moveY;
    } else {
        // 超出規定位置(下方)
        self.backGView.height = LRCellHeight;
        self.backGView.y = 0;
    }
}
在控制器中調用
核心邏輯寫完之後,ViewController 裡的事情就相當輕鬆了:
#pragma mark - <UITableViewDataSource>
- (NSInteger)tableView:(UITableView *)tableView numberOfRowsInSection:(NSInteger)section {
    return 10;
}
- (UITableViewCell *)tableView:(UITableView *)tableView cellForRowAtIndexPath:(NSIndexPath *)indexPath {
    LREffectCell * effectCell = [LREffectCell cellFromTableView:tableView];
    return effectCell;
}
- (void)tableView:(UITableView *)tableView willDisplayCell:(UITableViewCell *)cell forRowAtIndexPath:(NSIndexPath *)indexPath {
    // cell 即將顯示時把數據交給它
    LREffectCell * effectCell = (LREffectCell *)cell;
    effectCell.backGImage.image = LRGetImage(indexPath.row);
    // 初始化,觸發第一次滾動計算
    [effectCell cellOffsetOnTabelView:_tableView];
}
- (CGFloat)tableView:(UITableView *)tableView heightForRowAtIndexPath:(NSIndexPath *)indexPath {
    return LRCellHeight;
}
最後監聽 scrollView 的滾動,讓所有可見 cell 即時更新偏移:
- (void)scrollViewDidScroll:(UIScrollView *)scrollView {
    // visibleCells 取得當前可見的 cell 數組,遍歷後逐一更新
    [[_tableView visibleCells] enumerateObjectsUsingBlock:^(LREffectCell * _Nonnull obj, NSUInteger idx, BOOL * _Nonnull stop) {
        [obj cellOffsetOnTabelView:_tableView];
    }];
}
GIF 有掉幀的情況,建議直接 clone 專案 https://github.com/luran2358/LRLayerSuperposition 跑真機,效果會明顯得多。喜歡的話記得點個讚,也歡迎留言補充或指出不足。
- 上一篇文章: iOS 煙花粒子動畫實作:CAEmitterLayer 三層發射器拆解
- 下一篇文章: 仿真器還是模擬器?搞懂移動開發裡的兩種「虛擬設備」