
UIImage 圖片處理大全:旋轉、裁切、平鋪、縮放與 GIF 播放
圖片處理是 App 開發中避Whatever 不開的一塊——上傳前要壓縮、拍照後方向要校正、做畫板要取色、做動畫要轉 GIF。以下把這些常見操作整理成一份函式清單,全部實作在 UIImage 的 Category 裡,使用起來比較順手。
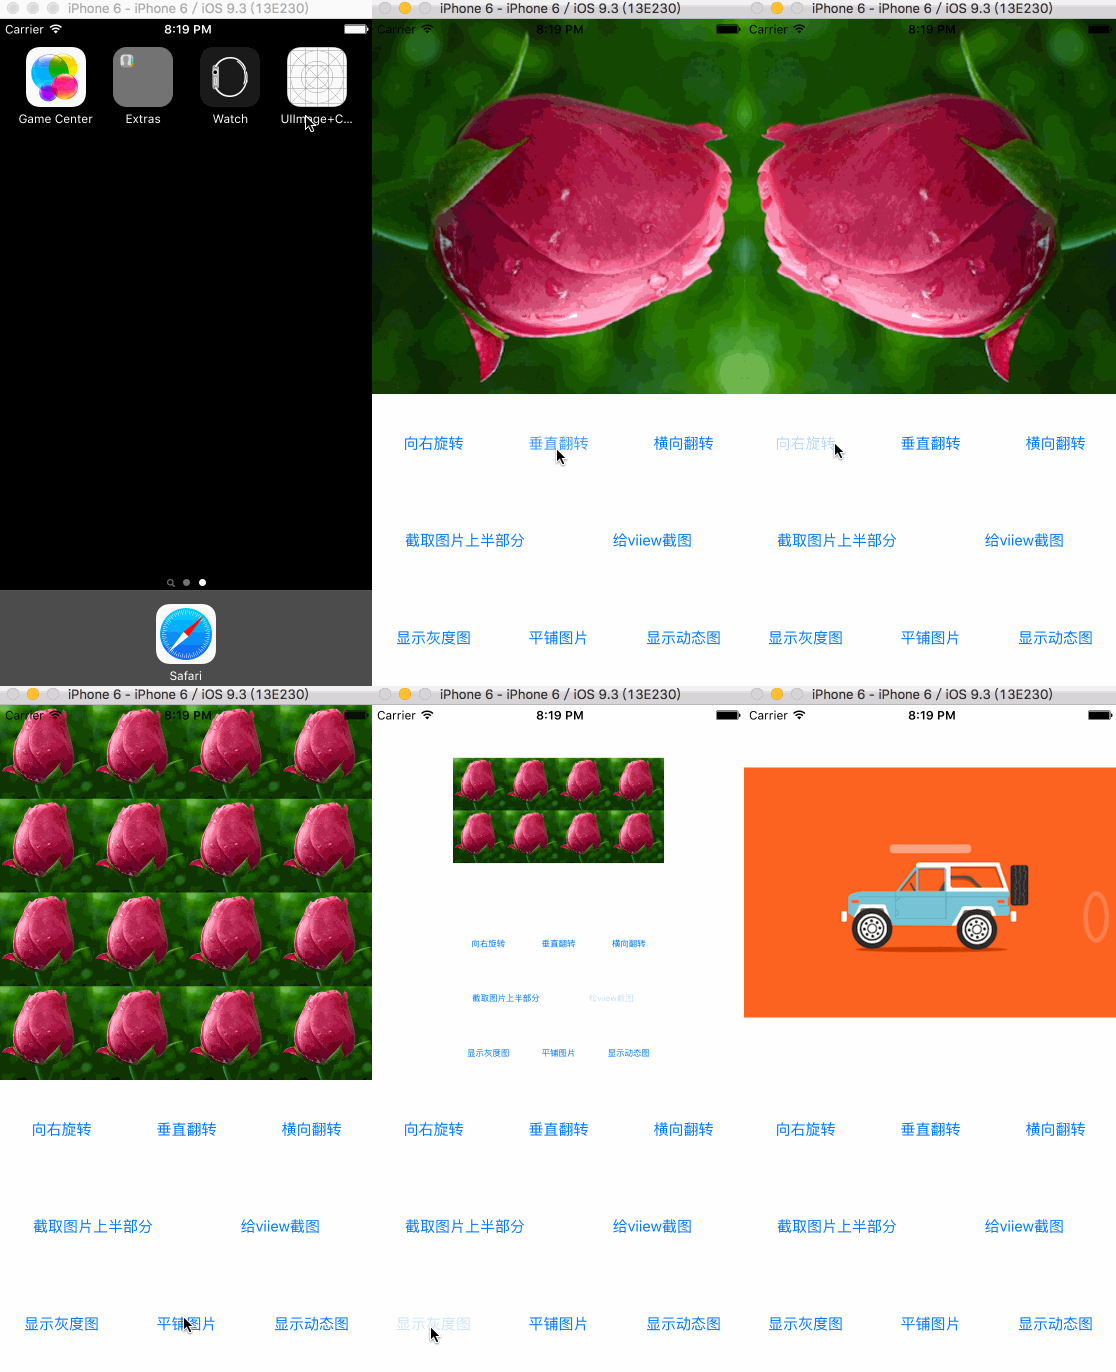
由於程式碼量龐大,這裡只列出各方法的簽名與使用方式,完整實作可參考我在 GitHub 上的 Demo。實際效果如下:
顏色相關
1. 依顏色產生純色圖片
+ (UIImage *)imageWithColor:(UIColor *)color;
使用方式,例如把 imageView 設為紅色純色塊:
self.imageView.image = [UIImage imageWithColor:[UIColor redColor]];
這個技巧常用來做 placeholder、分隔線或按鈕底色,比準備一張圖片資源省事。
2. 取得圖片上某個像素的顏色
做畫板類應用選取筆刷顏色時,往往就是一張包含全部色值的圖片,靠點擊取色來運作。注意這裡傳入的 point 是相對於圖片本身的座標,不是相對於 imageView 的。
- (UIColor *)colorAtPixel:(CGPoint)point;
使用方式:在圖片上加入 tap 手勢,於回呼方法中做座標換算後取色。
- (void)handleTap:(UITapGestureRecognizer *)tap {
    CGPoint point = [tap locationInView:tap.view];
    UIImage *image = self.imageView.image;

    // 換算成圖片自身的座標系
    CGPoint pointInImage = CGPointMake(
        point.x * image.size.width  / self.imageView.frame.size.width,
        point.y * image.size.height / self.imageView.frame.size.height);

    self.view.backgroundColor = [image colorAtPixel:pointInImage];
}
3. 轉為灰階圖
- (UIImage *)convertToGrayImage;
使用方式:
self.imageView.image = [image convertToGrayImage];
旋轉與翻轉相關
1. 校正圖片方向
從相簿讀取照片時常會遇到一個怪現象:照片的實際像素方向與顯示出來的方向不一致。這是因為 iPhone 拍照時為了效能,通常不真的旋轉像素,而是靠 Exif 的 Orientation 欄位記錄方向。若不處理,上傳到伺服器後就可能變成躺倒的。
- (UIImage *)fixOrientation;
使用:
self.imageView.image = [image fixOrientation];
2. 依指定方向旋轉
做圖片編輯工具時一定會需要。參數是系統列舉 UIImageOrientation:
typedef NS_ENUM(NSInteger, UIImageOrientation) {
    UIImageOrientationUp,             // 預設方向
    UIImageOrientationDown,           // 旋轉 180 度
    UIImageOrientationLeft,           // 逆時針 90 度
    UIImageOrientationRight,          // 順時針 90 度
    UIImageOrientationUpMirrored,     // 水平翻轉
    UIImageOrientationDownMirrored,   // 水平翻轉
    UIImageOrientationLeftMirrored,   // 垂直翻轉
    UIImageOrientationRightMirrored,  // 垂直翻轉
};

- (UIImage *)rotate:(UIImageOrientation)orient;
使用,例如順時針旋轉 180 度:
self.imageView.image = [image rotate:UIImageOrientationDown];
3 & 4. 垂直/水平翻轉
- (UIImage *)flipVertical;     // 傳入 UIImageOrientationDownMirrored
- (UIImage *)flipHorizontal;   // 傳入 UIImageOrientationUpMirrored
5 & 6. 依角度或弧度旋轉
- (UIImage *)imageRotatedByDegrees:(CGFloat)degrees;
- (UIImage *)imageRotatedByRadians:(CGFloat)radians;
這兩個方法支援任意角度,不只是 90 度的倍數。實作上要注意旋轉後 canvas 尺寸會變大,若不重算,四角容易被裁掉。
裁切與縮放相關
1. 裁切指定矩形區域
- (UIImage *)subImageWithRect:(CGRect)rect;
2. 縮放至指定尺寸
- (UIImage *)rescaleImageToSize:(CGSize)size;
3. 縮放至指定像素寬度
- (UIImage *)rescaleImageToPX:(CGFloat)toPX;
這個方法常用於上傳前處理:只給定目標寬度,高度按原始比例自動換算,避免變形。
4. 產生指定尺寸的平鋪圖
- (UIImage *)getTiledImageWithSize:(CGSize)size;
用一張小圖重複鋪滿成指定尺寸的底圖,適合做背景紋理。
5. 把 UIView 轉為 UIImage
+ (UIImage *)imageFromView:(UIView *)view;
實作原理是建立 UIGraphicsImageRenderer(舊寫法是 UIGraphicsBeginImageContext)後呼叫 view 的 drawViewHierarchyInRect:afterScreenUpdates: 或 layer.renderInContext:。前者能正確呈現 video、cameralayer 等內容,但效能較差;後者速度快但對某些 layer 支援不完整,依場景挑用。
6. 合成兩張圖片
+ (UIImage *)mergeImage:(UIImage *)firstImage withImage:(UIImage *)secondImage;
firstImage 在底層,secondImage 疊在上面。常見用途是加浮水印或角標。
GIF 相關
把 GIF 直接設為 imageView 的 image 就能播放動畫:
/** 以 GIF Data 產生 UIImage */
+ (UIImage *)animatedImageWithAnimatedGIFData:(NSData *)theData;

/** 以 GIF 檔案路徑產生 UIImage */
+ (UIImage *)animatedImageWithAnimatedGIFURL:(NSURL *)theURL;
使用方式:
NSString *path = [[NSBundle mainBundle] pathForResource:@"gif" ofType:@"gif"];
self.imageView.image = [UIImage animatedImageWithAnimatedGIFURL:[NSURL fileURLWithPath:path]];

// 或者
self.imageView.image = [UIImage animatedImageWithAnimatedGIFData:[NSData dataWithContentsOfFile:path]];
這種做法的實作原理是自己解析 GIF 的每幀資料,再透過 animatedImageWithImages:duration: 交給系統播放。缺點是會把全部幀都解壓進記憶體,遇到大圖或長動畫容易 OOM;若你的場景對記憶體敏感,建議改用 FLAnimatedImage 或 SDWebImage 這類逐幀解碼的函式庫。
幾個實作上的提醒
大量運算請放到背景執行緒。高解析度照片的縮放、旋轉都是 CPU 密集任務,放在主線程會直接卡住 UI。處理完再切回主線程更新畫面。
注意 memory warning。解碼後的 UIImage 在記憶體中是以未壓縮的位圖形式存在,一張 4000×3000 的照片約佔 48MB。這也是為什麼「上傳前先壓縮」不是可有可無的優化。
座標系要分清。取色、裁切這類操作出錯,十之八九是 point 與 pixel 沒搞清楚——Retina 螢幕上 image.size 是以 point 為單位,而實際像素數要乘上 scale。
內容會持續更新,歡迎關注我的專題「iOS 技術交流」。
本文整理自「iOS_啼血無痕_小松哥」於簡書發佈的相關文章。