
StoryBoard 中 Static Cell 與 Dynamic Cell 混用的完整做法
關於靜態 cell 與動態 cell 混用,網路上已經有不少前輩寫過。這篇是我在自己實作之後整理的筆記,重點放在「哪幾個步驟不能省」以及「為什麼要這樣做」。
為什麼要混用
有些介面如果全部用動態 cell 寫,會出現大量沒意義的 if-else 判斷;但如果全部用靜態 cell 寫,遇到筆數不固定的區塊又會卡住。這時候混用反而最省事。
最典型的例子就是 iOS 的 Wi-Fi 設定頁:
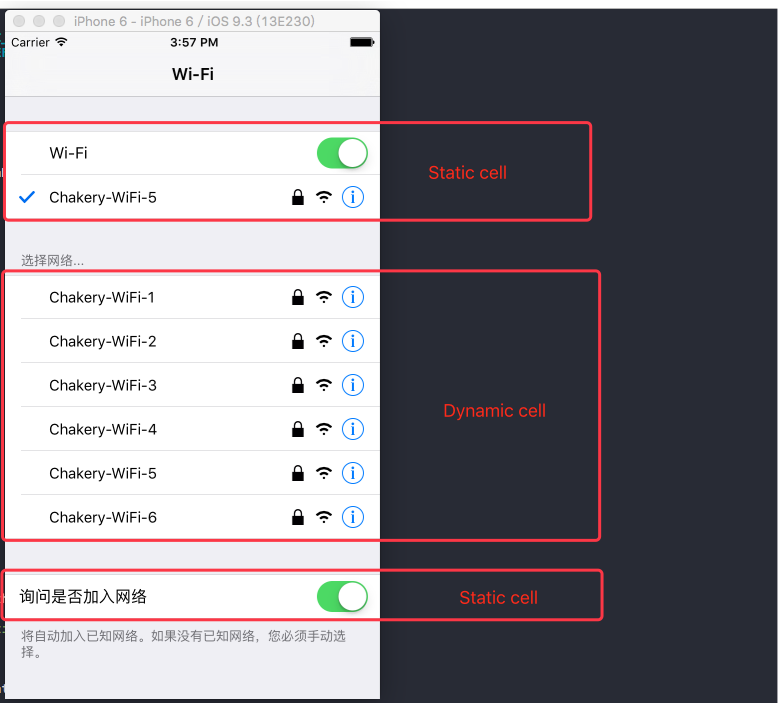
第一組與第三組的行數固定、內容固定,用 Static Cell 在 StoryBoard 上直接拉一拉就完成了;但第二組是周邊 Wi-Fi 網路列表,數量完全取決於執行環境,必須用 Dynamic Cell 動態產生。
步驟一:建立 Static Cells 並預留空位
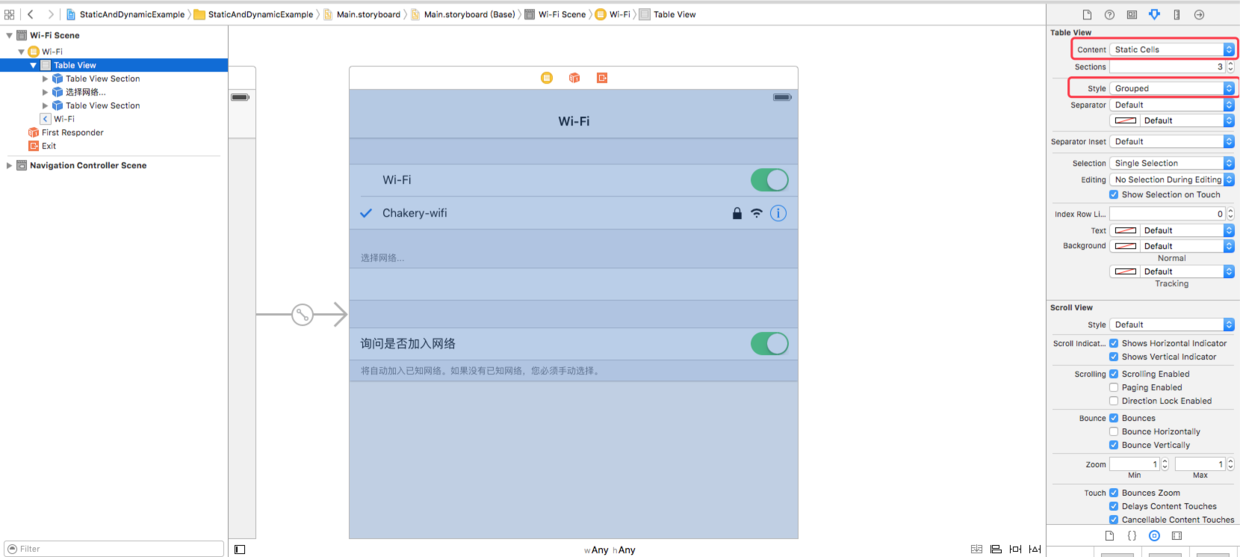
在 StoryBoard 中拖入一個 UITableViewController,把 Content 設為 Static Cells,先完成第一組與第三組的內容設定。第二組則放一個空白的 Cell 佔位。
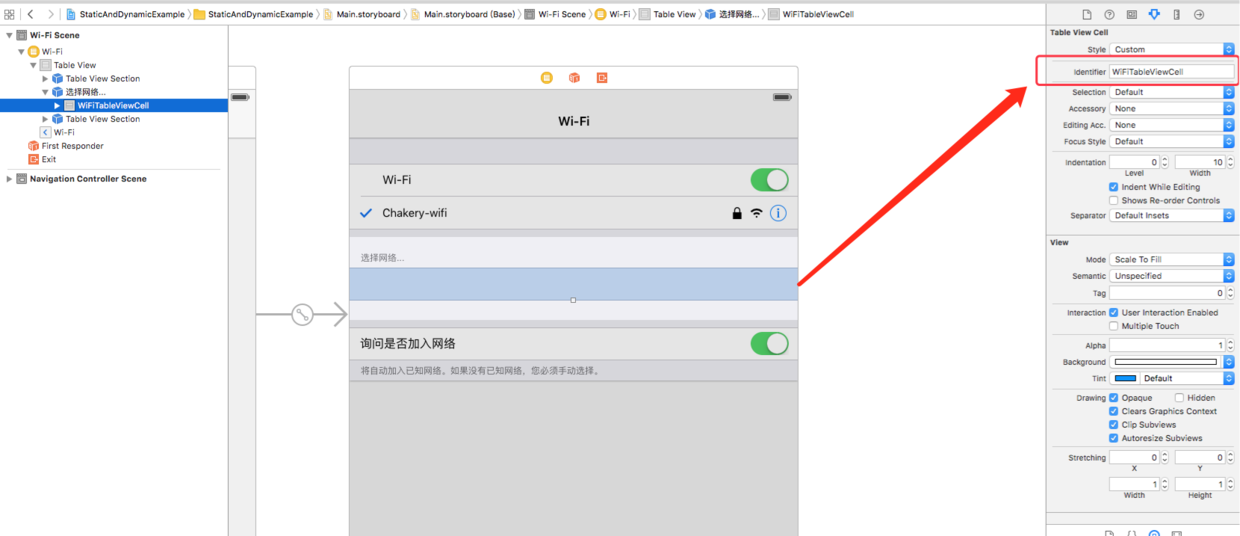
步驟二:給空白 Cell 一個 reuse identifier
這一步很容易漏掉。第二組的空白 Cell 必須設定 identifier,因為程式碼要靠它把 XIB 載入的 cell 排進去。
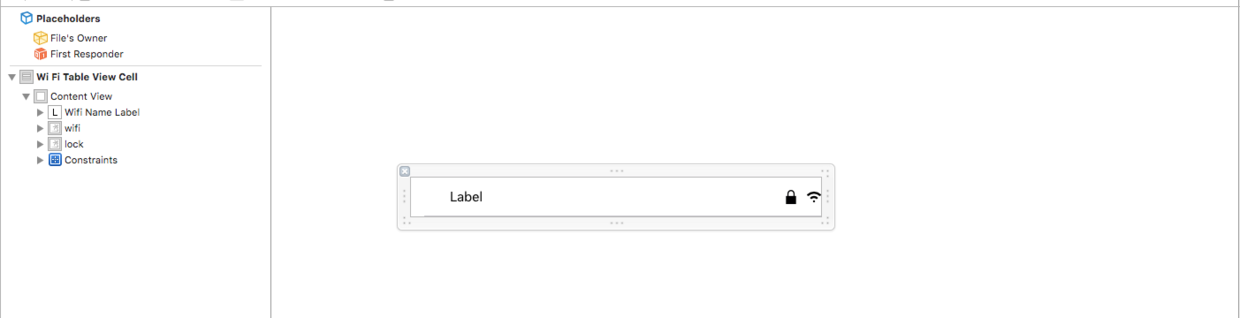
步驟三:用 XIB 製作自訂 Cell
第二組的樣式與其他兩組不同,因此另外做一個 XIB 來描述它的外觀,並在 XIB 裡同樣把 reuse identifier 設為一致。
步驟四:註冊 Nib
靜態 cell 由 StoryBoard 自己管理,動態 cell 則需要我們手動註冊:
let nib = UINib(nibName: "WiFiTableViewCell", bundle: nil)
tableView.registerNib(nib, forCellReuseIdentifier: "WiFiTableViewCell")
步驟五:覆寫必要的代理方法
這是混用能否成功的關鍵。因為 UITableViewController 在靜態模式下已經有一套預設行為,我們要做的是「只針對第二組改寫,其他維持原樣」,而維持原樣的方式就是呼叫 super。
// 以下幾個代理方法都必須實作
override func tableView(tableView: UITableView, cellForRowAtIndexPath indexPath: NSIndexPath) -> UITableViewCell {
    if indexPath.section == 1 {
        let cell = tableView.dequeueReusableCellWithIdentifier("WiFiTableViewCell") as? WiFiTableViewCell
        return cell!
    }
    return super.tableView(tableView, cellForRowAtIndexPath: indexPath)
}

override func tableView(tableView: UITableView, numberOfRowsInSection section: Int) -> Int {
    if section == 1 {
        return 10   // 第二組的動態行數
    }
    return super.tableView(tableView, numberOfRowsInSection: section)
}

override func tableView(tableView: UITableView, indentationLevelForRowAtIndexPath indexPath: NSIndexPath) -> Int {
    if indexPath.section == 1 {
        return super.tableView(tableView, indentationLevelForRowAtIndexPath: NSIndexPath(forRow: 0, inSection: 1))
    }
    return super.tableView(tableView, indentationLevelForRowAtIndexPath: indexPath)
}

override func tableView(tableView: UITableView, heightForRowAtIndexPath indexPath: NSIndexPath) -> CGFloat {
    if indexPath.section == 1 {
        return 44
    }
    return super.tableView(tableView, heightForRowAtIndexPath: indexPath)
}
三個容易踩到的坑
- StoryBoard 上的佔位 Cell 不能刪。雖然它不會真的被顯示,但它是該 section 在靜態結構中的「存在依據」,刪掉之後 section 對應關係會錯亂。
- 程式碼中的 registerNib 不能省。少了這行,
dequeueReusableCellWithIdentifier會拿到 nil 或直接崩潰。 - 上面列的代理方法必須全部實作。特別是
indentationLevelForRowAtIndexPath和heightForRowAtIndexPath,如果不覆寫並轉呼叫 super,動態 cell 的縮排與高度會沿用靜態 cell 的設定,畫面就會怪怪的。
關於 indentationLevel 的補充
為什麼 indentationLevelForRowAtIndexPath 要固定傳 row 0?因為動態 cell 的層級應該整組一致,若照傳 indexPath,某些 iOS 版本在混合模式下會出現層級遞增的異常。固定指向同列可以讓整組對齊。
結語
本文聚焦在混用的機制本身,因此沒有處理快取優化、空狀態提示等細節。如果你想進一步了解靜態 cell 的其他進階用法,可以參考「更優雅地使用 Static Cell」這類延伸閱讀。
Demo 程式碼可於原專案頁面下載。
本文整理自「Chakery」於簡書發佈的相關文章。