
用巨集優雅實作 iOS 單例(ARC 篇)
編輯:iOS 開發基礎
本文只討論 ARC 環境下的單例寫法
過去一直背不起來單例到底怎麼寫,雖然知道大概原理,也知道可以用巨集來實作,卻總是記不牢,今天就用一篇文章把它記錄下來。
先看一般情況:如果直接建立兩個物件,印出來其實是兩個不同的記憶體位址,這顯然不是單例。
- (void)viewDidLoad {
    [super viewDidLoad];
    SIPerson *person = [[SIPerson alloc] init];
    NSLog(@"%@",person);
    SIPerson *person1 = [[SIPerson alloc] init];
    NSLog(@"%@",person1);
}
接著是單例的實作方法:
#import "SIPerson.h"
static SIPerson *instance_ = nil;

@implementation SIPerson
// 方法1,快速創建對象
+ (instancetype)sharedInstance{
    static dispatch_once_t onceToken;
    dispatch_once(&onceToken, ^{
        instance_ = [[self alloc] init];
    });
    return instance_;
}
// 方法2,alloc] init] 一定會調用這個方法
+ (instancetype)allocWithZone:(struct _NSZone *)zone{
    static dispatch_once_t onceToken;
    dispatch_once(&onceToken, ^{
        instance_ = [super allocWithZone:zone];
    });
    return instance_;
}
@end
// 此處還應該有一個 + copy 方法,因為可能是 copy,那就有可能生成新物件
方法 1 與方法 2 都實作,才是真正的單例。假如沒實作方法 2,透過
sharedInstance得到的確是單例,但用alloc] init]又會生成另一個物件。
若兩次都走 alloc] init],印出來會是兩個不同位址;而透過 sharedInstance 則會得到相同物件。
如果你的物件未來可能需要呼叫
copy(應宣告NSCopying協議),那麼還要再實作一個方法:
- (id)copyWithZone:(NSZone *)zone{
    return instance_;
}
一般 copy 會生成新物件,這樣就不再是單例了;不過這種用法較少,非必要時可不實作。之所以能這樣寫,是因為它是物件方法,
instance_裡已經有值。
驗證如下:
    [super viewDidLoad];
    SIPerson *person = [SIPerson sharedInstance];
    NSLog(@"%@",person);
    SIPerson *person1 = [[SIPerson alloc] init];
    NSLog(@"%@",person1);

    SIPerson *person2 = [person1 copy];
    NSLog(@"%@",person2);
結果會發現三個印出的位址都相同,證明它確實是單例。
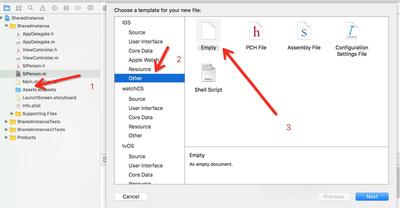
接著把它封裝成巨集,之後就能一行搞定:
/**
 *  在 .h 文件中定義的巨集,ARC
 *  SISingletonH(name) 這個是巨集
 *  + (instancetype)shared##name 這個是被替換的方法,## 代表 shared+name,高度定制化
 *  在外邊我們使用 "SISingletonH(gege)",那麼在 .h 文件中就定義了一個方法 "+ (instancetype)sharedgege"
 *  所以第一個字母要記得大寫
 */
#define SISingletonH(name) + (instancetype)shared##name;

/**
 *  在 .m 文件中處理好的巨集,ARC
 *  因為是多行的東西,所以每行後面都有一個 "\",最後一行除外
 *  之所以還要傳遞一個 "name",是因為有個方法要命名 "+ (instancetype)shared##name"
 */
#define SISingletonM(name) \
static SIPerson *instance_ = nil;\
+ (instancetype)shared##name{\
    static dispatch_once_t onceToken;\
    dispatch_once(&onceToken, ^{\
        instance_ = [[self alloc] init];\
    });\
    return instance_;\
}\
+ (instancetype)allocWithZone:(struct _NSZone *)zone{\
    static dispatch_once_t onceToken;\
    dispatch_once(&onceToken, ^{\
        instance_ = [super allocWithZone:zone];\
    });\
    return instance_;\
}\
- (id)copyWithZone:(NSZone *)zone{\
    return instance_;\
}
實際使用時超簡單:
// .h 文件
SISingletonH(Default)
// .m 文件
SISingletonM(Default)
都只要一行,連分號都不用(定義時就已經給了),就是這麼簡單。
使用時:
 [super viewDidLoad];
    SIPerson *person = [SIPerson sharedDefault];
    NSLog(@"%@",person);
    SIPerson *person1 = [[SIPerson alloc] init];
    NSLog(@"%@",person1);
    SIPerson *person2 = [person1 copy];
    NSLog(@"%@",person2);
// 打印結果:三個位址皆相同
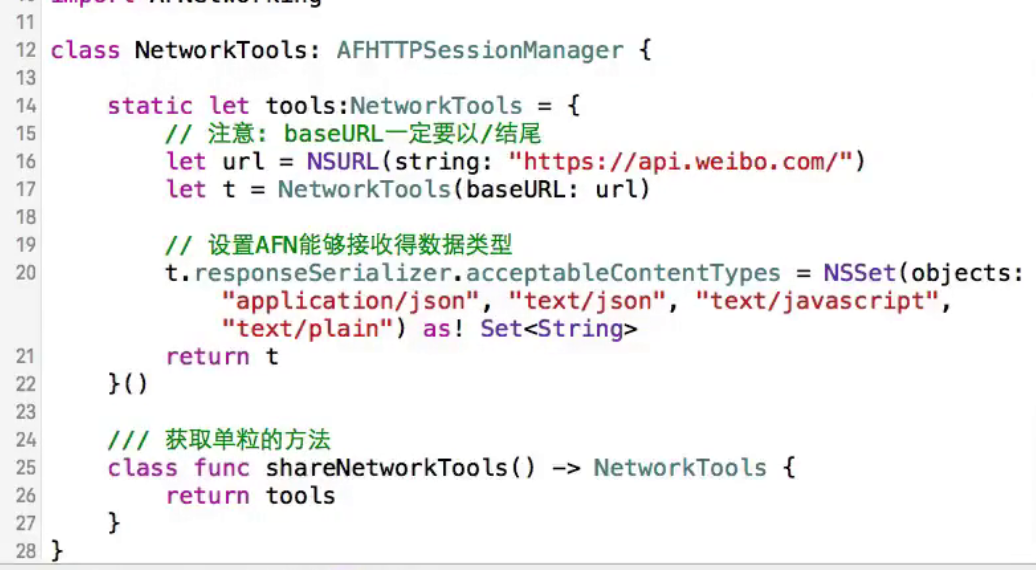
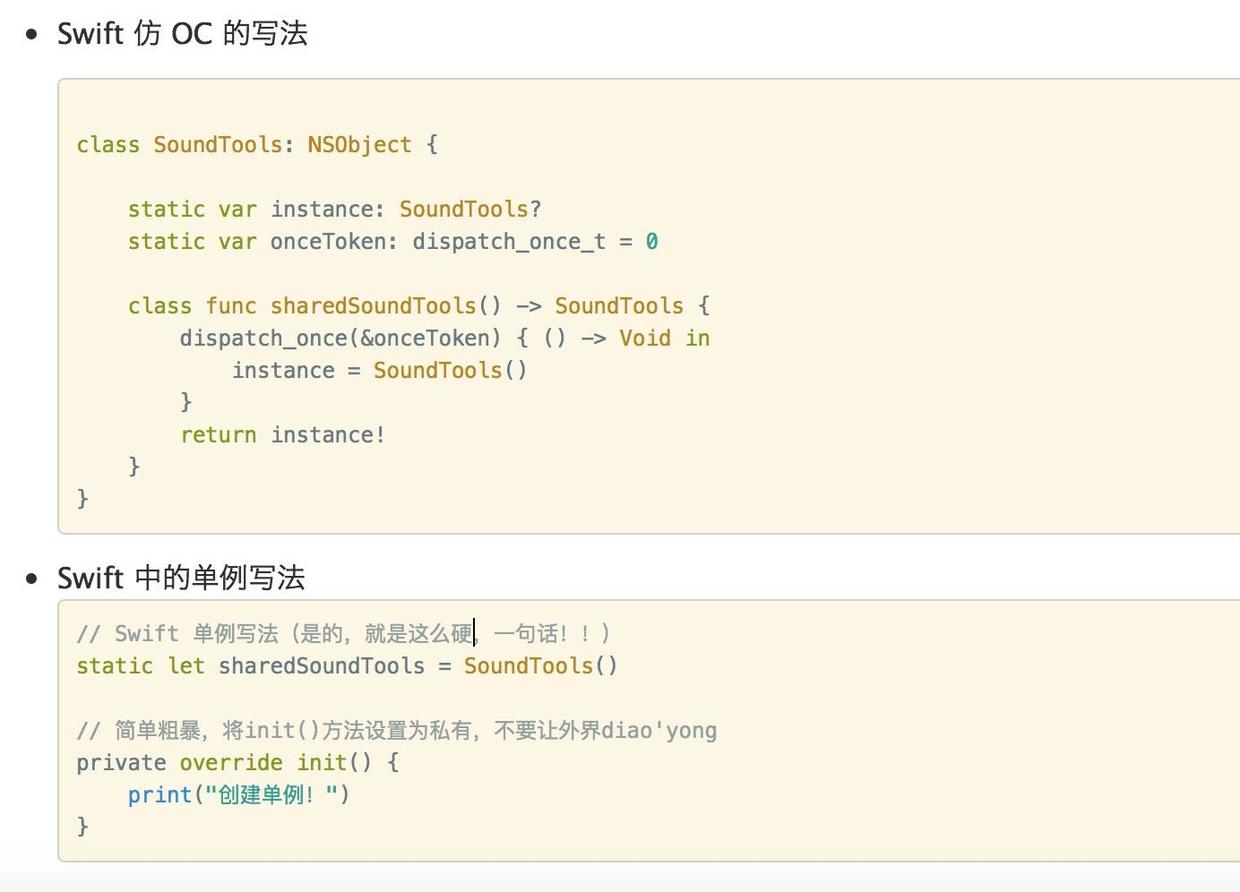
最後補充一句:至於 Swift 版本的單例,正常寫即可,這裡就不深入討論了。
文章轉自 王鑫20111的簡書
- 上一篇文章: 用 Xcode 8 開發 iOS 10 推送通知的實戰筆記
- 下一篇文章: 以 AVPlayer 打造高度自訂的 iOS 播放器