
一個接口搞定今日頭條風格的頂部標籤切換
編輯:iOS 開發基礎
導讀
「頂部標籤 + 下方多個視圖聯動滑動」這個效果,在無數 App 裡都看得到。相信大家都寫過很多遍,網路上的 Demo 與設計思路也一大堆,只是程式碼的繁瑣程度實在令人想吐槽。
筆者把這個效果做了一層封裝,幾輪優化之後,現在的程式碼精簡美觀、接口簡單:外界只需要呼叫一個方法,就能完成整個效果。使用方式與系統的 UITabBarController 相似——把對應的控制器交給 HYTabbarView 即可。
原始碼分享:https://github.com/HelloYeah/HYTabbarView
順手點個 star,與人為樂,自得其樂。
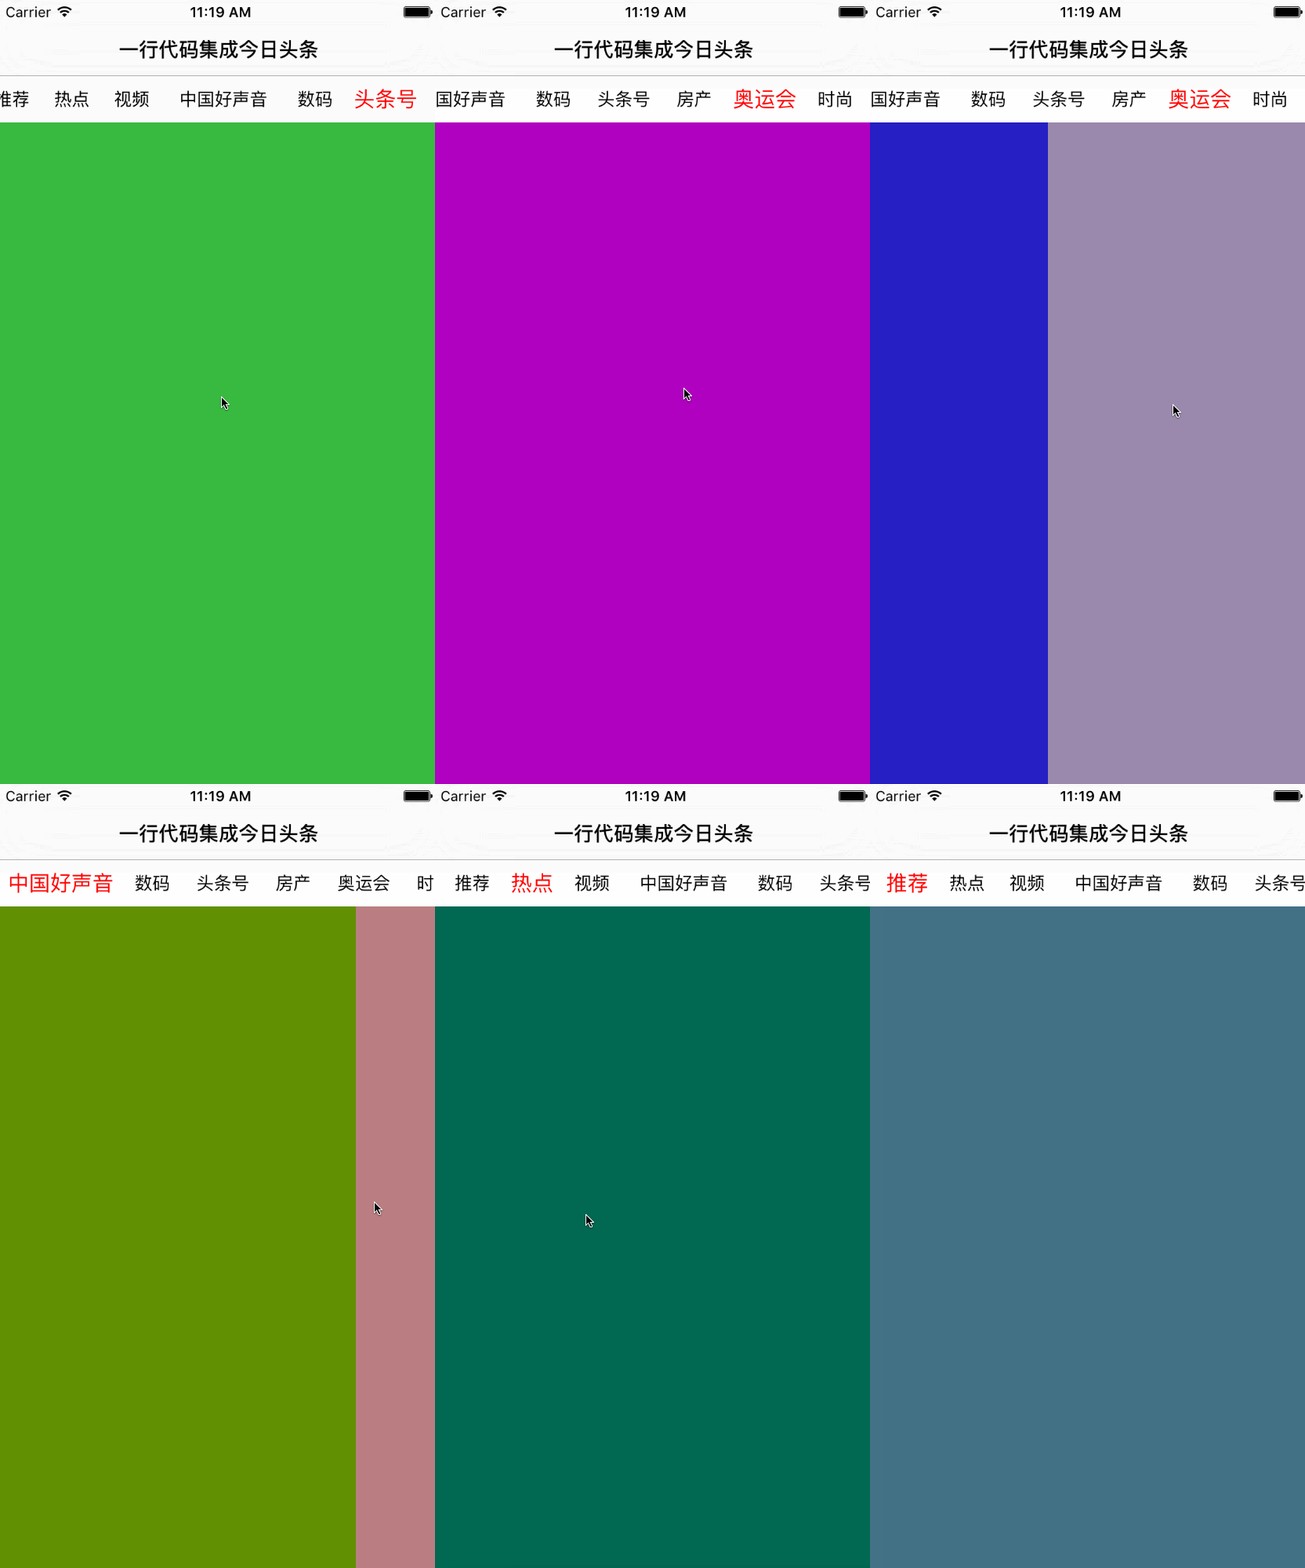
樣式也可以靈活配置:
static CGFloat const topBarItemMargin = 15;  // 標題之間的間距
static CGFloat const topBarHeight = 40;      // 頂部標籤條的高度
實作思路
- 介面結構:分上下兩部分,頂部是 UIScrollView,底部是 UICollectionView,只要讓兩者聯動即可。底部改用 CollectionView 而非 ScrollView,是因為它支援 cell 複用,視圖數量多時效能與記憶體佔用都明顯更好。
- 一頁一控制器:每個標題對應一個 view,交由各自的控制器管理,程式碼結構清晰,各頁的業務邏輯高度聚合,彼此不產生耦合。
- 上下聯動:這裡用 KVO 監聽
selectedIndex。底部視圖滾動時修改該值,並在 KVO 回調裡讓標題居中。 - 其他細節:點擊頂部標題時切換按鈕選中態、滾動到對應的 cell 等,都是常規處理。
關鍵程式碼
1. 外界傳入控制器與標題,新增一個欄目。
// 外界傳個控制器,添加一個欄目
- (void)addSubItemWithViewController:(UIViewController *)viewController {
    UIButton *btn = [UIButton buttonWithType:UIButtonTypeCustom];
    [self.tabbar addSubview:btn];
    [self setupBtn:btn withTitle:viewController.title];
    [btn addTarget:self action:@selector(itemSelected:) forControlEvents:UIControlEventTouchUpInside];
    [self.subViewControllers addObject:viewController];
}
2. 用 KVO 監聽當前選中的序號,並計算標題居中所需的偏移量。
// viewDidLoad 中添加觀察者
[self addObserver:self forKeyPath:@"selectedIndex"
          options:NSKeyValueObservingOptionOld | NSKeyValueObservingOptionNew
          context:@"scrollToNextItem"];

// 讓標題按鈕居中
- (void)observeValueForKeyPath:(NSString *)keyPath ofObject:(id)object
                        change:(NSDictionary *)change context:(void *)context {
    if (context == @"scrollToNextItem") {
        // 設置按鈕選中態
        [self itemSelectedIndex:self.selectedIndex];

        UIButton *btn = self.titles[self.selectedIndex];
        // 計算偏移量
        CGFloat offsetX = btn.center.x - HYScreenW * 0.5;
        if (offsetX < 0) offsetX = 0;

        // 取得最大滾動範圍
        CGFloat maxOffsetX = self.tabbar.contentSize.width - HYScreenW;
        if (offsetX > maxOffsetX) offsetX = maxOffsetX;

        // 滾動標題 scrollView
        [self.tabbar setContentOffset:CGPointMake(offsetX, 0) animated:YES];
    }
}
3. 點擊按鈕時切換選中態,並加上字體放大的過場動畫。
- (void)itemSelectedIndex:(NSInteger)index {
    UIButton *preSelectedBtn = self.titles[_preSelectedIndex];
    preSelectedBtn.selected = NO;

    _selectedIndex = index;
    _preSelectedIndex = _selectedIndex;

    UIButton *selectedBtn = self.titles[index];
    selectedBtn.selected = YES;

    [UIView animateWithDuration:0.25 animations:^{
        preSelectedBtn.titleLabel.font = [UIFont systemFontOfSize:15];
        selectedBtn.titleLabel.font  = [UIFont systemFontOfSize:18];
    }];
}
控制器中的用法
使用方式與系統的 UITabBarController 幾乎一致,外界只要把控制器交進去。
- (void)viewDidLoad {
    [super viewDidLoad];
    [self.view addSubview:self.tabbarView];
}

// 懶加載
- (HYTabbarView *)tabbarView {
    if (!_tabbarView) {
        _tabbarView = ({
            HYTabbarView *tabbar = [[HYTabbarView alloc] initWithFrame:CGRectMake(0, 64,
                                      [UIScreen mainScreen].bounds.size.width,
                                      [UIScreen mainScreen].bounds.size.height - 64)];

            // 傳入多個控制器,每個控制器分別管理對應的視圖
            UIViewController *vc0 = [[UIViewController alloc] init];
            vc0.title = @"推薦";
            [tabbar addSubItemWithViewController:vc0];

            UIViewController *vc1 = [[UIViewController alloc] init];
            vc1.title = @"熱點";
            [tabbar addSubItemWithViewController:vc1];

            UIViewController *vc2 = [[UIViewController alloc] init];
            vc2.title = @"視頻";
            [tabbar addSubItemWithViewController:vc2];

            UIViewController *vc3 = [[UIViewController alloc] init];
            vc3.title = @"中國好聲音";
            [tabbar addSubItemWithViewController:vc3];

            UIViewController *vc4 = [[UIViewController alloc] init];
            vc4.title = @"數碼";
            [tabbar addSubItemWithViewController:vc4];

            UIViewController *vc5 = [[UIViewController alloc] init];
            vc5.title = @"頭條號";
            [tabbar addSubItemWithViewController:vc5];

            UIViewController *vc6 = [[UIViewController alloc] init];
            vc6.title = @"房產";
            [tabbar addSubItemWithViewController:vc6];

            UIViewController *vc7 = [[UIViewController alloc] init];
            vc7.title = @"奧運會";
            [tabbar addSubItemWithViewController:vc7];

            UIViewController *vc8 = [[UIViewController alloc] init];
            vc8.title = @"時尚";
            [tabbar addSubItemWithViewController:vc8];

            tabbar;
        });
    }
    return _tabbarView;
}
文章來自 yeliang_new 的投稿