
iOS 每日一發:用 30 行程式碼做出側邊抽屜效果
編輯:iOS 程式設計技術
效果預覽
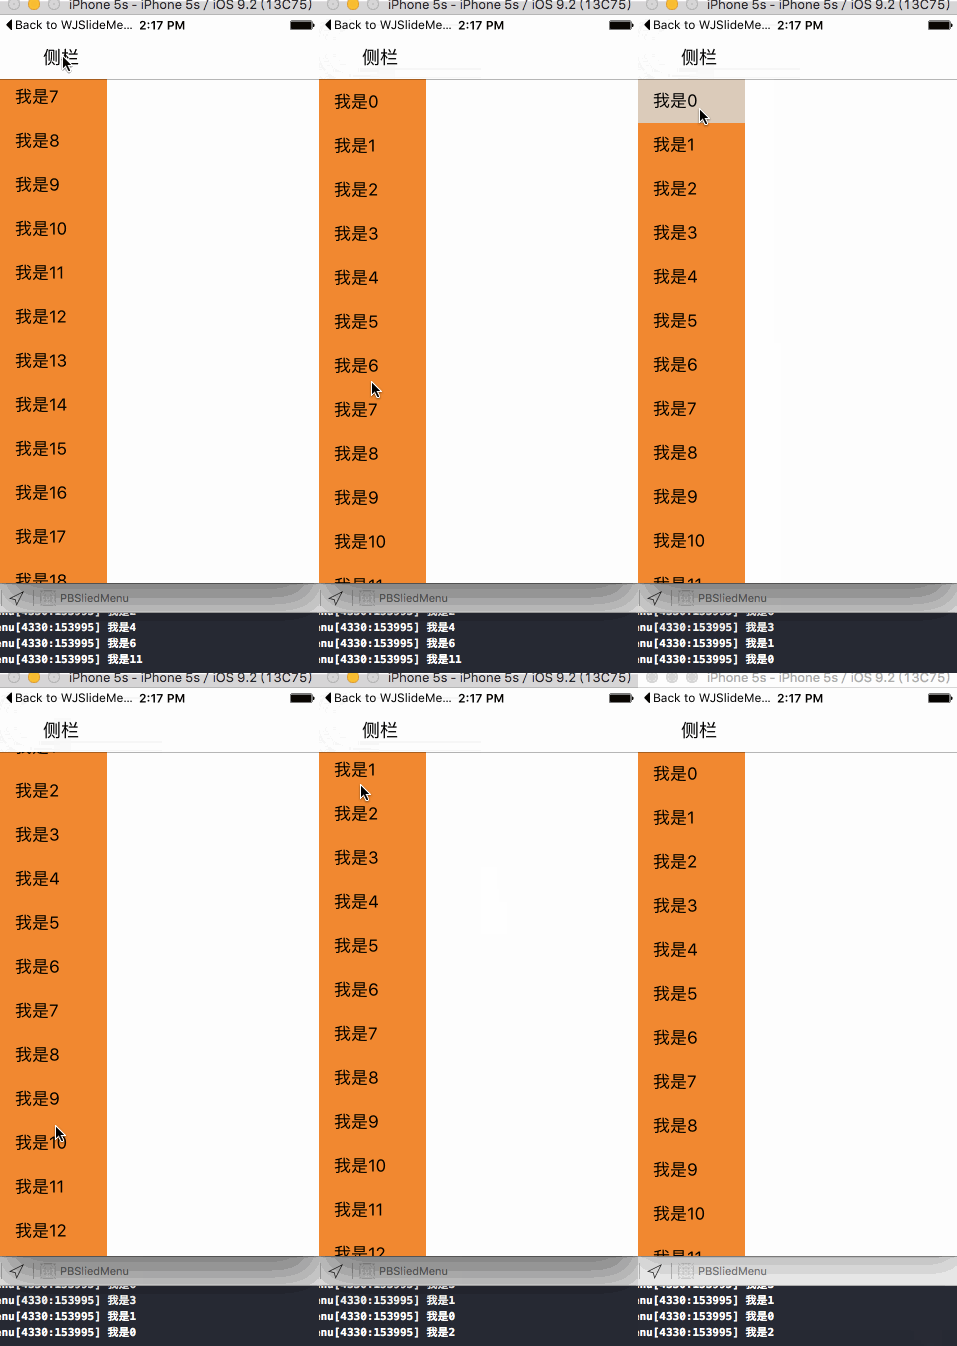
側邊抽屜是很常見的互動模式。它的核心其實非常單純:一個 UITableView 加上寬度動畫,不需要任何第三方庫。
一、在 AppDelegate 中建立導航結構
抽屜按鈕要放在 navigation bar 上,所以根控制器必須包一層導航控制器。
#import "AppDelegate.h"
#import "ViewController.h"

@implementation AppDelegate

- (BOOL)application:(UIApplication *)application didFinishLaunchingWithOptions:(NSDictionary *)launchOptions {
    self.window = [[UIWindow alloc] initWithFrame:[UIScreen mainScreen].bounds];

    ViewController *vc = [[ViewController alloc] init];
    // 必須以 view controller 作為根控制器來初始化導航控制器
    UINavigationController *nav = [[UINavigationController alloc] initWithRootViewController:vc];

    self.window.rootViewController = nav;
    [self.window makeKeyAndVisible];
    return YES;
}

@end
二、宣告需要的屬性
#define kScreenH [UIScreen mainScreen].bounds.size.height
#define kScreenW [UIScreen mainScreen].bounds.size.width
#define kNavW 64

@interface ViewController () <UITableViewDelegate, UITableViewDataSource>
@property (nonatomic, strong) UITableView *tableView;
/** 記錄側邊欄目前是展開還是收起 */
@property (nonatomic, assign) BOOL openSlide;
/** 側欄按鈕,動畫期間用來禁用點擊 */
@property (nonatomic, strong) UIBarButtonItem *btnLeft;
@end兩個關鍵設計:openSlide 記錄狀態,每次點擊都要翻轉它;btnLeft 用來在動畫進行的 0.3 秒內鎖住按鈕,避免重複觸發導致狀態錯亂。
三、TableView 的懶載入
#pragma mark - 懶載入 tableView
- (UITableView *)tableView {
    if (_tableView == nil) {
        _tableView = [[UITableView alloc] init];
        _tableView.delegate = self;
        _tableView.dataSource = self;
        _tableView.backgroundColor = [UIColor orangeColor];

        // 關鍵:一開始就把寬度設為 0,這樣展開時才會是「整條從左側滑出」
        CGFloat height = kScreenH;
        CGFloat x = 0;
        CGFloat y = kNavW;
        CGFloat width = 0;
        _tableView.frame = CGRectMake(x, y, width, height);

        // 隱藏垂直滾動條
        _tableView.showsVerticalScrollIndicator = NO;
    }
    return _tableView;
}
這裡藏著一個實作細節:在 viewDidLoad 中註冊 cell 時會用到 self.tableView,也就順帶觸發了懶載入,確保 tableView 已經被建立。如果拖到第一次點擊才建立,會出現「cell 從螢幕左上角 (0, 0) 蹦出來」而不是整條列表滑出的怪異視覺。
四、資料源與初始化
- (void)viewDidLoad {
    [super viewDidLoad];
    self.view.backgroundColor = [UIColor whiteColor];
    [self initLeftBarButton];
    [self.tableView registerClass:[UITableViewCell class] forCellReuseIdentifier:@"cell"];
}

#pragma mark - 初始化側欄按鈕
- (void)initLeftBarButton {
    UIButton *btnLeft = [[UIButton alloc] init];
    btnLeft.frame = CGRectMake(0, 0, 90, 40);
    [btnLeft setTitle:@"側欄" forState:UIControlStateNormal];
    [btnLeft setTitleColor:[UIColor blackColor] forState:UIControlStateNormal];
    [btnLeft addTarget:self action:@selector(didLeftBtn) forControlEvents:UIControlEventTouchUpInside];

    self.navigationItem.leftBarButtonItem = [[UIBarButtonItem alloc] initWithCustomView:btnLeft];
    self.btnLeft = self.navigationItem.leftBarButtonItem;
}

#pragma mark - tableView 資料源
- (NSInteger)tableView:(UITableView *)tableView numberOfRowsInSection:(NSInteger)section {
    return 20;
}

- (UITableViewCell *)tableView:(UITableView *)tableView cellForRowAtIndexPath:(NSIndexPath *)indexPath {
    static NSString *ID = @"cell";
    UITableViewCell *cell = [tableView dequeueReusableCellWithIdentifier:ID forIndexPath:indexPath];
    cell.textLabel.text = [NSString stringWithFormat:@"我是%zd", indexPath.row];
    cell.backgroundColor = [UIColor orangeColor];
    return cell;
}

#pragma mark - 選中某個 cell
- (void)tableView:(UITableView *)tableView didSelectRowAtIndexPath:(NSIndexPath *)indexPath {
    UITableViewCell *cell = [tableView cellForRowAtIndexPath:indexPath];
    NSLog(@"%@", cell.textLabel.text);
    // 選完立刻取消選中
    [tableView deselectRowAtIndexPath:indexPath animated:YES];
}
五、抽屜動畫
#pragma mark - 點擊側欄按鈕
- (void)didLeftBtn {
    // 動畫期間先禁用按鈕,動畫結束後再啟用
    self.btnLeft.enabled = NO;

    CGFloat height = kScreenH;
    CGFloat x = 0;
    CGFloat y = kNavW;

    if (!self.openSlide) {
        [UIView animateWithDuration:0.3 animations:^{
            CGFloat width = kScreenW / 3;          // 展開到螢幕寬度的三分之一
            self.tableView.frame = CGRectMake(x, y, width, height);
        }];
        [self.view addSubview:self.tableView];
    } else {
        [UIView animateWithDuration:0.3 animations:^{
            CGFloat width = 0;                     // 收起,寬度歸零
            self.tableView.frame = CGRectMake(x, y, width, height);
        }];
    }

    // 動畫結束後恢復按鈕
    [self performSelector:@selector(setBtnLeftEnabled) withObject:nil afterDelay:0.3];

    // 翻轉狀態
    self.openSlide = !self.openSlide;
}

#pragma mark - 動畫結束後的收尾
- (void)setBtnLeftEnabled {
    self.btnLeft.enabled = YES;
    // 讓第一個 cell 回到最頂端
    self.tableView.contentOffset = CGPointMake(0, 0);
}
六、兩個踩過的坑
坑一:反覆建立與銷毀 tableView。早期的寫法是點擊時建立、收回時 removeFromSuperview,實測很吃效能。改成懶載入建立一次,收合時只把寬度設為 0 就好,畫面完全一樣但流暢很多。
坑二:列表位置沒有重置。使用者滑動過 tableView 後收起再展開,列表會停在原本的捲動位置。解法是把 contentOffset 歸零,但這行絕對不能寫在動畫 block 裡,否則會看到列表「跳一下」;要寫在動畫結束之後,視覺上才自然。
七、原始碼
https://git.oschina.net/alexpei/PBSliedMenu.git
- 上一篇文章: iOS 自訂 AlertView 提示框:可換色的彈窗實作
- 下一篇文章: iOS SDK 中強制 HTTPS 重新握手的經驗分享