
Swift 教學:UITextView 圖文混排的三種圖片尺寸策略
編輯:iOS 7 技巧
很多人以為要在 UITextView 裡插入圖片就必須搬出 WebView,其實完全不用。UITextView 天生支援屬性化文字(NSAttributedString),只要把圖片包裝成 NSTextAttachment,再轉成 NSAttributedString 插到游標位置,圖文混排就完成了。
先決定圖片怎麼顯示
本文把插入方式抽成一個列舉 ImageAttachmentMode,共三種:
- Default:保留原圖尺寸,不做任何縮放。
- FitTextLine:縮到與行高一致,不會把行撐大,跟文字大小協調,很適合表情符號、小圖示。
- FitTextView:依 textView 寬度等比縮放,適合一般照片或大圖。
這三種可以混用,同一段文字裡穿插不同尺寸的圖片完全沒問題。
效果預覽
(1)保持原始尺寸

(2)與行高一致,適合插入表情圖標
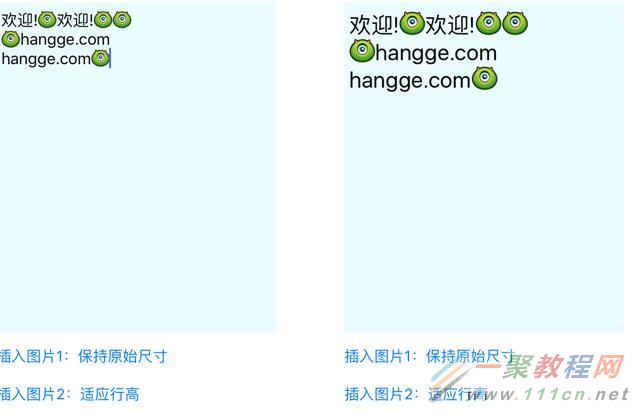
(3)佔滿一行,適合普通圖片或大圖

關鍵觀念
整個做法其實只有兩個動作:插入文字、插入圖片附件。兩者都要注意同一件事——重新賦值 attributedText 之後,游標會被推到文字最後面,所以必須先把新的 selectedRange 記下來,賦值後再設回去,游標才不會亂跑。
另外,插入圖片後記得呼叫 scrollRangeToVisible,讓游標保持在可視區域內,使用者視覺上才不會覺得畫面「跳掉」。
範例程式碼
import UIKit

class ViewController: UIViewController {

    //圖文混排顯示的文本區域
    @IBOutlet weak var textView: UITextView!

    //文字大小
    let textViewFont = UIFont.systemFontOfSize(22)

    override func viewDidLoad() {
        super.viewDidLoad()

        //初始化顯示默認內容
        insertString("歡迎歡迎!")
        insertPicture(UIImage(named: "icon")!, mode:.FitTextLine)
        insertString("\n歡迎訪問:")
        insertPicture(UIImage(named: "logo")!)
        insertPicture(UIImage(named: "bg")!, mode:.FitTextView)
    }

    //插入文字
    func insertString(text:String) {
        //獲取textView的所有文本,轉成可變的文本
        let mutableStr = NSMutableAttributedString(attributedString: textView.attributedText)
        //獲得目前光標的位置
        let selectedRange = textView.selectedRange
        //插入文字
        let attStr = NSAttributedString(string: text)
        mutableStr.insertAttributedString(attStr, atIndex: selectedRange.location)

        //設置可變文本的字體屬性
        mutableStr.addAttribute(NSFontAttributeName, value: textViewFont,
                                range: NSMakeRange(0,mutableStr.length))
        //再次記住新的光標的位置
        let newSelectedRange = NSMakeRange(selectedRange.location + attStr.length, 0)

        //重新給文本賦值
        textView.attributedText = mutableStr
        //恢復光標的位置(上面一句代碼執行之後,光標會移到最後面)
        textView.selectedRange = newSelectedRange
    }

    //插入圖片
    func insertPicture(image:UIImage, mode:ImageAttachmentMode = .Default){
        //獲取textView的所有文本,轉成可變的文本
        let mutableStr = NSMutableAttributedString(attributedString: textView.attributedText)

        //創建圖片附件
        let imgAttachment = NSTextAttachment(data: nil, ofType: nil)
        var imgAttachmentString: NSAttributedString
        imgAttachment.image = image

        //設置圖片顯示方式
        if mode == .FitTextLine {
            //與文字一樣大小
            imgAttachment.bounds = CGRectMake(0, -4, textView.font!.lineHeight,
                                              textView.font!.lineHeight)
        } else if mode == .FitTextView {
            //撐滿一行
            let imageWidth = textView.frame.width - 10
            let imageHeight = image.size.height/image.size.width*imageWidth
            imgAttachment.bounds = CGRectMake(0, 0, imageWidth, imageHeight)
        }

        imgAttachmentString = NSAttributedString(attachment: imgAttachment)

        //獲得目前光標的位置
        let selectedRange = textView.selectedRange
        //插入圖片
        mutableStr.insertAttributedString(imgAttachmentString, atIndex: selectedRange.location)
        //設置可變文本的字體屬性
        mutableStr.addAttribute(NSFontAttributeName, value: textViewFont,
                                range: NSMakeRange(0,mutableStr.length))
        //再次記住新的光標的位置
        let newSelectedRange = NSMakeRange(selectedRange.location+1, 0)

        //重新給文本賦值
        textView.attributedText = mutableStr
        //恢復光標的位置
        textView.selectedRange = newSelectedRange
        //移動滾動條(確保光標在可視區域內)
        self.textView.scrollRangeToVisible(newSelectedRange)
    }

    //插入圖片1:保持原始尺寸
    @IBAction func btnClick1(sender: AnyObject) {
        insertPicture(UIImage(named: "logo")!)
    }

    //插入圖片2:適應行高
    @IBAction func btnClick2(sender: AnyObject) {
        insertPicture(UIImage(named: "icon")!, mode:.FitTextLine)
    }

    //插入圖片3:適應textView寬度
    @IBAction func btnClick3(sender: AnyObject) {
        insertPicture(UIImage(named: "bg")!, mode:.FitTextView)
    }

    override func didReceiveMemoryWarning() {
        super.didReceiveMemoryWarning()
    }
}

//插入的圖片附件的尺寸樣式
enum ImageAttachmentMode {
    case Default    //默認(不改變大小)
    case FitTextLine    //使尺寸適應行高
    case FitTextView    //使尺寸適應textView
}
小結
真正控制圖片大小的其實是 NSTextAttachment.bounds:想對齊行高就拿 font.lineHeight 當寬高;想鋪滿一行就用 textView 寬度回推高度。掌握這個屬性,其他都是重複的插入流程而已。