
Swift 使用 SSZipArchive 完成檔案壓縮與解壓縮
編輯:iOS 7 技巧
行動網路下傳輸多個檔案時,打包成 Zip 再送是基本操作;從伺服器下載壓縮檔後也要能解開。iOS 上可用的方案不少,SSZipArchive 是其中相當成熟且速度快的一個。本文完整示範它的安裝與各類用法。
一、SSZipArchive 簡介
以 Objective-C 撰寫,可在 iOS 與 Mac 環境使用。GitHub:https://github.com/ZipArchive/ZipArchive
支援能力:
- 解壓 zip 檔案
- 解壓含密碼保護的 zip 檔案
- 建立 zip 檔案
- 把新檔案加入既有 zip
- 壓縮檔案
- 以指定名稱壓縮 NSData 物件
二、安裝設定
1. 加入原始碼
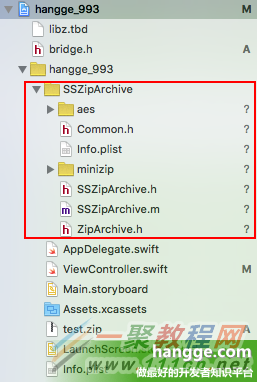
把下載回來的 SSZipArchive 資料夾整包拖進專案。
2. 建立橋接標頭檔
新增 bridge.h 並引入 Objective-C 標頭:
#import "ZipArchive.h"3. 連結 zlib 函式庫
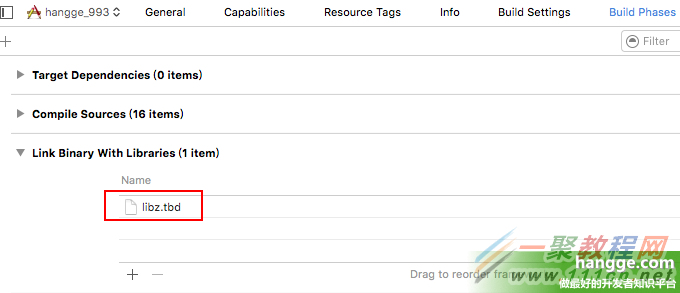
到 target → Build Phases → Link Binary With Libraries,點加號加入 libz.dylib。
三、使用範例
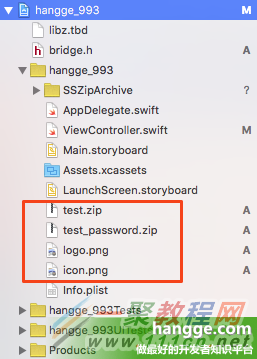
為了方便測試,先在專案裡放兩張圖片與兩個壓縮檔(其中 test_password.zip 帶有密碼:hangge.com)。
另外定義一個輔助方法,每次呼叫都在 Caches 下開一個隨機資料夾並回傳路徑,避免連續測試時目標位置互相覆蓋:
// 在 Caches 下隨機建立資料夾並回傳路徑
func tempDestPath() -> String? {
    var path = NSSearchPathForDirectoriesInDomains(.CachesDirectory,
                                                  .UserDomainMask, true)[0]
    path += "/\(NSUUID().UUIDString)"
    let url = NSURL(fileURLWithPath: path)

    do {
        try NSFileManager.defaultManager().createDirectoryAtURL(url,
                                                               withIntermediateDirectories: true,
                                                               attributes: nil)
    } catch {
        return nil
    }

    if let path = url.path {
        print("path:\(path)")
        return path
    }

    return nil
}
1. 解壓一般 zip
let zipPath = NSBundle.mainBundle().pathForResource("test", ofType: "zip")
SSZipArchive.unzipFileAtPath(zipPath, toDestination: tempDestPath())
2. 解壓含密碼的 zip
let zipPath2 = NSBundle.mainBundle().pathForResource("test_password", ofType: "zip")

do {
    try SSZipArchive.unzipFileAtPath(zipPath2, toDestination: tempDestPath(),
                                     overwrite: true, password: "hangge.com")
} catch {
}
3. 把多個檔案打包
let files = [NSBundle.mainBundle().pathForResource("logo", ofType: "png")!,
             NSBundle.mainBundle().pathForResource("icon", ofType: "png")!]

let zipPath3 = tempDestPath()! + "/hangge.zip"

SSZipArchive.createZipFileAtPath(zipPath3, withFilesAtPaths: files)
要加密碼只需多帶一個參數:
SSZipArchive.createZipFileAtPath(zipPath3, withFilesAtPaths: files,
                                withPassword: "hangge.com")
4. 打包整個資料夾
// 要壓縮的資料夾
let filePath: String = NSHomeDirectory() + "/Documents"

// 先丟一個檔案進去測試
let image = UIImage(named: "logo.png")
let data: NSData = UIImagePNGRepresentation(image!)!
data.writeToFile(filePath + "/logo.png", atomically: true)

let zipPath5 = tempDestPath()! + "/hangge.zip"
SSZipArchive.createZipFileAtPath(zipPath5, withContentsOfDirectory: filePath)
同樣可以帶密碼:
SSZipArchive.createZipFileAtPath(zipPath6, withContentsOfDirectory: filePath,
                                withPassword: "hangge.com")
值得注意的是,overwrite 參數在解壓時扮演重要角色:設為 true 時會直接覆蓋目標位置的同名檔案,適合快取還原類型的場景;若來源不完全可信,則應謹慎評估。另外,壓縮與解壓都是 I/O 密集操作,實務上建議放到背景佇列執行,避免卡住主執行緒。
- 上一篇文章: Swift 操作集合猶如 LINQ:原生寫法與 SINQ 擴展對照
- 下一篇文章: Swift 側滑菜單實作:主頁右移露出下方菜單頁