
Swift 自訂 UITableViewCell 的選中態樣式(背景色與文字顏色)
編輯:iOS 7 技巧
使用 UITableView 時,點選某一列的預設回饋是一塊灰色底。若這個灰不符合設計稿,就得自己動手改。本文示範兩件事:把選中背景換成指定顏色,以及讓文字在選中時變色。
預設的樣子
不做任何處理時,點擊後整列會被系統塗成灰色:
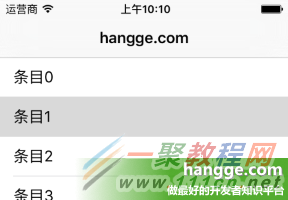
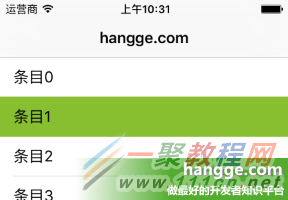
一、改用自訂的選中背景色
關鍵在於 UITableViewCell 的 selectedBackgroundView 屬性——塞一個自己配好顏色的 UIView 進去即可。
import UIKit

class ViewController: UIViewController, UITableViewDelegate, UITableViewDataSource {

    var tableView: UITableView?

    override func viewDidLoad() {
        super.viewDidLoad()

        // 建立表視圖
        self.tableView = UITableView()
        self.tableView!.frame = CGRectMake(0, 0, self.view.frame.width,
                                          self.view.frame.height)
        self.tableView!.delegate = self
        self.tableView!.dataSource = self

        // 註冊可重複使用的單元格
        self.tableView!.registerClass(UITableViewCell.self,
                                     forCellReuseIdentifier: "SwiftCell")
        self.view.addSubview(self.tableView!)
    }

    // 本例只有一個分區
    func numberOfSectionsInTableView(tableView: UITableView) -> Int {
        return 1
    }

    // 回傳列數
    func tableView(tableView: UITableView, numberOfRowsInSection section: Int) -> Int {
        return 20
    }

    // 產生每一列的內容
    func tableView(tableView: UITableView, cellForRowAtIndexPath indexPath: NSIndexPath)
        -> UITableViewCell {
            let identify: String = "SwiftCell"
            let cell = tableView.dequeueReusableCellWithIdentifier(identify,
                                                                  forIndexPath: indexPath) as UITableViewCell
            cell.textLabel?.text = "條目\(indexPath.row)"

            // 把選中背景換成綠色
            cell.selectedBackgroundView = UIView()
            cell.selectedBackgroundView?.backgroundColor =
                UIColor(red: 135/255, green: 191/255, blue: 49/255, alpha: 1)

            return cell
    }

    override func didReceiveMemoryWarning() {
        super.didReceiveMemoryWarning()
    }
}
這裡刻意在每一列的設定裡重新指定 selectedBackgroundView,是為了避免 Cell 被回收重用後顏色錯亂;若想全域統一,也可以改在自訂的 UITableViewCell 子類別中設定一次。
二、改變選中時的文字顏色
cell 內建的 textLabel 提供了兩個屬性:textColor 負責一般狀態,highlightedTextColor 負責被點選(highlight)時的顏色。
// 一般為黑色,選中時變白色
cell.textLabel?.textColor = UIColor.blackColor()
cell.textLabel?.highlightedTextColor = UIColor.whiteColor()
兩者搭配使用,就能做出「深色底 + 亮色字」這類對比鮮明的選取效果。若背景色是自行指定的淺色,記得把 highlightedTextColor 調成深色系,才不會看不清字。