
Swift 用 UIRefreshControl 實作下拉更新
上拉載入更多通常要借助第三方庫,但如果只需要下拉更新,那麼 iOS 自帶的 UIRefreshControl 就完全夠用,簡單又穩定。
使用步驟
1. 建立 UIRefreshControl,設定文字、顏色等外觀。
2. 把它加到 table view 上。
3. 為它註冊值變更事件,用來觸發資料請求。
4. 資料請求完成後呼叫 endRefreshing 收起轉圈動畫。
效果預覽
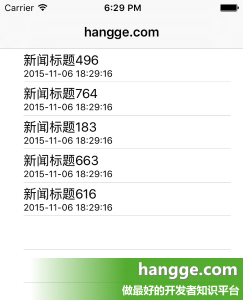
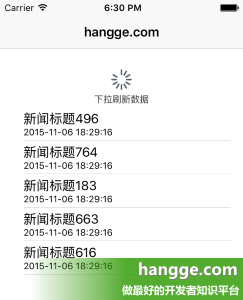
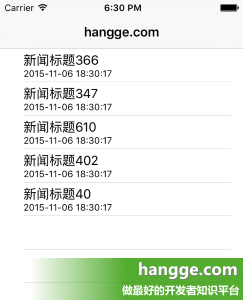
程式碼
import UIKit

class ViewController: UIViewController, UITableViewDelegate, UITableViewDataSource {

    // 新聞列表
    @IBOutlet weak var newsTableView: UITableView!

    // 新聞資料集合
    var dataArray: [HanggeArticle] = [HanggeArticle]()

    // 下拉刷新控制器
    var refreshControl = UIRefreshControl()

    override func viewDidLoad() {
        super.viewDidLoad()

        self.automaticallyAdjustsScrollViewInsets = false

        // 綁定刷新事件
        refreshControl.addTarget(self, action: "refreshData",
                                 forControlEvents: UIControlEvents.ValueChanged)
        refreshControl.attributedTitle = NSAttributedString(string: "下拉刷新數據")
        newsTableView.addSubview(refreshControl)

        refreshData()
    }

    // 刷新資料
    func refreshData() {
        // 移除舊資料
        self.dataArray.removeAll()

        // 隨機產生 5 筆新資料
        for _ in 0..<5 {
            let atricle = HanggeArticle(title: "新聞標題\(Int(arc4random() % 1000))",
                                        createDate: NSDate())
            self.dataArray.append(atricle)
        }

        self.newsTableView.reloadData()

        // 收起刷新動畫
        self.refreshControl.endRefreshing()
    }

    // 列數
    func tableView(tableView: UITableView, numberOfRowsInSection section: Int) -> Int {
        return dataArray.count
    }

    // cell 內容
    func tableView(tableView: UITableView, cellForRowAtIndexPath indexPath: NSIndexPath)
        -> UITableViewCell {
        let cell = UITableViewCell(style: UITableViewCellStyle.Subtitle,
                                   reuseIdentifier: "myCell")

        let atricle: HanggeArticle = dataArray[indexPath.row]
        cell.textLabel?.text = atricle.title

        let dateFormatter = NSDateFormatter()
        dateFormatter.dateFormat = "yyyy-MM-dd HH:mm:ss"
        cell.detailTextLabel?.text = dateFormatter.stringFromDate(atricle.createDate)

        return cell
    }

    override func didReceiveMemoryWarning() {
        super.didReceiveMemoryWarning()
    }
}

// 新聞結構體
struct HanggeArticle {
    var title: String
    var createDate: NSDate
}
幾個實務上必須補強的地方
1. endRefreshing 一定要呼叫,而且要在資料真正回來之後。範例是同步產生假資料,所以馬上呼叫沒問題。真實場景中若把 endRefreshing() 寫在發出網路請求之後,轉圈會立刻消失,使用者完全看不到更新中狀態;若請求失敗又忘了呼叫,轉圈就會永遠轉下去。正確寫法是把它放在網路回呼的最後,成功與失敗分支都要處理。
2. 用 iOS 10 之後的建議寫法。更簡潔的方式是把 refresh control 直接指派給 table view 的 refreshControl 屬性,不必自己 addSubview:
tableView.refreshControl = refreshControl
3. iOS 10 起建議改用 UIRefreshControl 的 titleLabel。若要做出「最後更新時間」這種效果,可持續更新 attributedTitle。
4. 想加上拉載入更多。UIRefreshControl 只做單一方向。若需要上拉載入,可以在 scrollViewDidScroll 中判斷是否接近底部觸發載入,或改用 UIScrollView 的 refreshControl 搭配自訂 footer,第三方庫(如 MJRefresh)則把兩者與動畫都處理好了。
5. 注意 Swift 版本差異。範例為早期 Swift 2 語法(addTarget(self, action: "refreshData", ...) 的字串 selector、NSDate、UITableViewCellStyle.Subtitle)。在目前的 Swift 中應寫成 #selector(refreshData)、Date() 與 .subtitle,且 @objc 標記與 private 修飾可能影響 selector 是否可被找到。
- 上一篇文章: 設計模式(二):樣板方法模式
- 下一篇文章: 用 Swift 打造 iOS 全景照片:OpenCV2 圖像拼接實戰