
UITableView 分組列表與可折疊 Section 完整實作
UITableView 是 iOS 列表開發的核心元件。本文示範如何用分組(section)組織資料,並進一步做出「點擊標題展開/收合」的效果,最後再說明如何自訂 section header 的樣式。
UITableView 有兩種 style:UITableViewStylePlain 與 UITableViewStyleGrouped。兩者在 API 使用上並無本質差異,只是後者會以分組樣式呈現(section 之間有間距、header 浮動效果不同)。
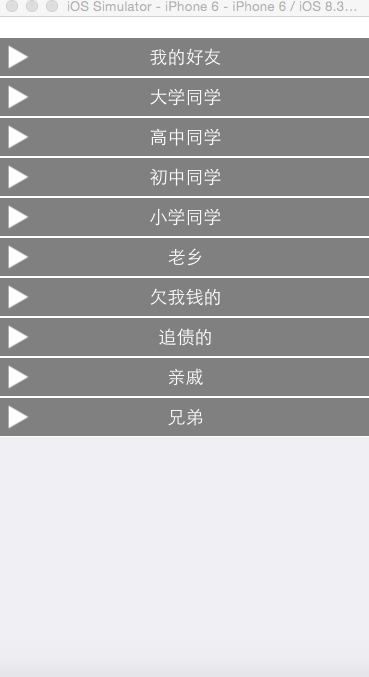
1. 初始化分組表格
#pragma mark - 載入表視圖
- (void)loadTableView {
    _tableView = [[UITableView alloc] initWithFrame:CGRectMake(0, 20, kWidth, kHeight)
                                              style:UITableViewStyleGrouped];
    _tableView.delegate = self;
    _tableView.dataSource = self;
    _tableView.rowHeight = 60;
    _tableView.sectionFooterHeight = 0;   // 隱藏分組間距
    [self.view addSubview:_tableView];
}
2. 載入分組資料
資料以 plist 描述,每個元素代表一個 section,內含 group 標題與 friends 陣列:
#pragma mark - 載入數據
- (void)loadData {
    NSString *path = [[NSBundle mainBundle] pathForResource:@"friends.plist" ofType:nil];
    _array = [NSArray arrayWithContentsOfFile:path];
}
3. 實作 dataSource 與自訂 header
#pragma mark - 分組數量
- (NSInteger)numberOfSectionsInTableView:(UITableView *)tableView {
    return _array.count;
}

#pragma mark - 分組頭高度
- (CGFloat)tableView:(UITableView *)tableView heightForHeaderInSection:(NSInteger)section {
    return 40;
}

#pragma mark - 自訂分組頭
- (UIView *)tableView:(UITableView *)tableView viewForHeaderInSection:(NSInteger)section {
    NSDictionary *dic = _array[section];
    NSString *title = dic[@"group"];

    // 1. 建立容器並加上框線
    UIView *view = [[UIView alloc] init];
    view.backgroundColor = [UIColor grayColor];
    view.layer.borderWidth = 1;
    view.layer.borderColor = [UIColor whiteColor].CGColor;

    // 2. 標題按鈕(點擊用來展開/收合)
    UIButton *button = [UIButton buttonWithType:UIButtonTypeCustom];
    [button setTitle:title forState:UIControlStateNormal];
    button.frame = CGRectMake(0, 0, kWidth, 40);
    button.tag = section;
    [button addTarget:self action:@selector(clickTheGroup:) forControlEvents:UIControlEventTouchUpInside];
    [view addSubview:button];

    // 3. 左側箭頭圖示
    UIImageView *imageView = [[UIImageView alloc] initWithFrame:CGRectMake(5, 40/2.0-30/2.0, 30, 30)];
    imageView.image = [UIImage imageNamed:@"disclosure.png"];
    imageView.tag = 101;
    [button addSubview:imageView];
    [_headImageView setObject:imageView forKey:@(section)];

    return view;
}

#pragma mark - 每組的列數
- (NSInteger)tableView:(UITableView *)tableView numberOfRowsInSection:(NSInteger)section {
    return 0;
}
此時執行會看到只有分組標題、沒有內容的列表:
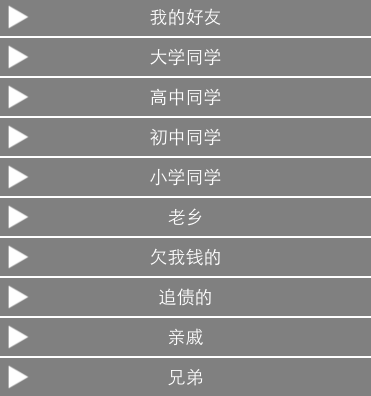
4. 用狀態字典控制展開與收合
點擊某個分組要能刷新其內容,關鍵是透過回傳不同的列數來控制顯示與隱藏。由於每個 section 各有開/關兩種狀態,需要一個字典記錄:key 是 section 索引,值為 1 代表展開、0 代表收合。
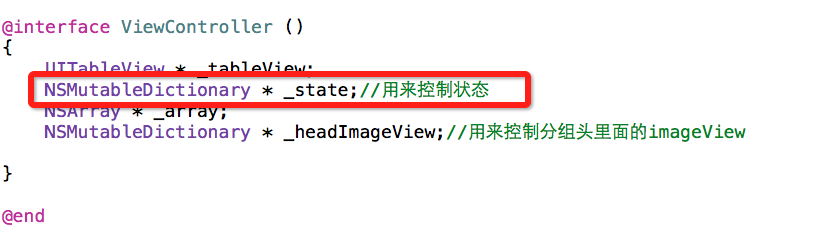
- (NSInteger)tableView:(UITableView *)tableView numberOfRowsInSection:(NSInteger)section {
    int flag = [_state[@(section)] intValue];
    NSArray *friends = _array[section][@"friends"];

    // 展開時回傳實際筆數,收合時回傳 0
    return flag ? friends.count : 0;
}
5. 點擊時切換狀態並轉動箭頭
#pragma mark - 點擊分組
- (void)clickTheGroup:(UIButton *)button {
    int groupIndex = (int)button.tag;
    int flag = 0;

    if ([_state[@(groupIndex)] intValue] == 0) {
        [_state setObject:@(1) forKey:@(groupIndex)];   // 展開
        flag = 0;
    } else {
        [_state setObject:@(0) forKey:@(groupIndex)];   // 收合
        flag = 1;
    }

    // 只刷新這個 section
    NSIndexSet *set = [[NSIndexSet alloc] initWithIndex:groupIndex];
    [_tableView reloadSections:set withRowAnimation:UITableViewRowAnimationNone];

    UIImageView *imageView = _headImageView[@(groupIndex)];

    // 刷新後 transform 會重置,收合時先補回旋轉狀態
    if (flag) {
        imageView.transform = CGAffineTransformRotate(imageView.transform, M_PI_2);
    }

    [UIView animateWithDuration:0.3 animations:^{
        if (flag == 0) {
            imageView.transform = CGAffineTransformMakeRotation(M_PI_2);
        } else {
            imageView.transform = CGAffineTransformMakeRotation(0);
        }
    }];
}
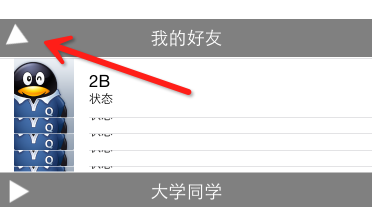
完成後的效果:
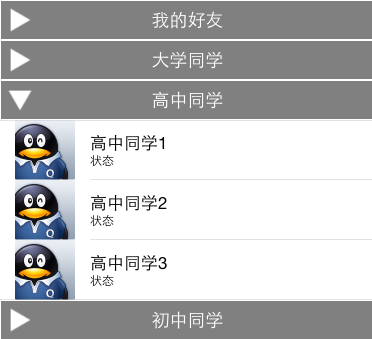
動畫過程中的瞬間畫面:
自訂 section header 的進階寫法
若 header 需要放多個子元件(例如左側日期、右側附註),可以如下組裝,並依 section 給不同高度:
// section 標題欄高度
- (CGFloat)tableView:(UITableView *)tableView heightForHeaderInSection:(NSInteger)section {
    if (section == 0) return 46;
    return 30.0f;
}

- (UIView *)tableView:(UITableView *)tableView viewForHeaderInSection:(NSInteger)section {
    CGRect headerFrame = CGRectMake(0, 0, 300, 30);
    CGFloat y = 2;
    if (section == 0) {
        headerFrame = CGRectMake(0, 0, 300, 100);
        y = 18;
    }

    UIView *headerView = [[UIView alloc] initWithFrame:headerFrame];

    UILabel *dateLabel = [[UILabel alloc] initWithFrame:CGRectMake(20, y, 240, 24)];
    dateLabel.font = [UIFont boldSystemFontOfSize:16.0f];
    dateLabel.textColor = [UIColor darkGrayColor];
    dateLabel.backgroundColor = [UIColor clearColor];

    UILabel *ageLabel = [[UILabel alloc] initWithFrame:CGRectMake(216, y, 88, 24)];
    ageLabel.font = [UIFont systemFontOfSize:14.0];
    ageLabel.textAlignment = NSTextAlignmentRight;
    ageLabel.textColor = [UIColor darkGrayColor];
    ageLabel.backgroundColor = [UIColor clearColor];

    NSDateFormatter *dateFormatter = [[NSDateFormatter alloc] init];
    dateFormatter.dateFormat = @"MM dd, yyyy";
    dateLabel.text = [NSString stringWithFormat:@"%@",
                      [dateFormatter stringFromDate:[NSDate date]]];
    ageLabel.text = @"1歲 2天";

    [headerView addSubview:dateLabel];
    [headerView addSubview:ageLabel];
    return headerView;
}
幾個實務上該改進的地方
1. 用 insertRows/deleteRows 取代 reloadSections。直接重載整個 section 會讓該組所有 cell 重畫,失去動畫的連貫性,也可能造成閃爍。折疊列表更恰當的做法是針對「被插入或刪除的那些 row」呼叫 insertRowsAtIndexPaths:withRowAnimation: 與 deleteRowsAtIndexPaths:withRowAnimation:,系統會自動做高度動畫,箭頭旋轉也交給動畫區塊處理即可,不需要像範例那樣手動補 transform。
2. 箭頭狀態存在 imageView 上不可靠。header 視圖也可能被重複使用或重建,把狀態存進 _state 字典並在 viewForHeaderInSection 中依狀態設定旋轉角度,才是可靠做法。
3. cell 內容記得在 cellForRow 中完整設定。由於重用機制,未展開時回傳 0 列能避免這個問題,但若同一個 section 內資料會變動,仍須在 cellForRowAtIndexPath 中重設所有狀態。
4. 現代寫法可考慮 diffable data source。iOS 13 之後的 UITableViewDiffableDataSource 搭配 snapshot,能自動計算增刪並產生正確動畫,可省下大量手動管理 index path 的工作,折疊效果只需切換 snapshot 即可。