
詳解 iOS 開發中 UIDatePicker 日期選擇器的使用方法
UIDatePicker 是 iOS 中用來選擇日期與時間的標準元件,支援 Time、Date、Date and Time、Count Down Timer 四種模式。本文從建立專案到實作取值,再逐一介紹 Locale、時區、日期範圍等常用參數設定。
四種顯示模式
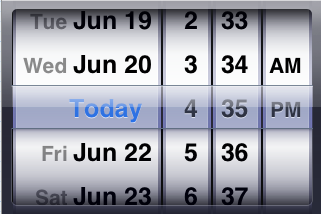
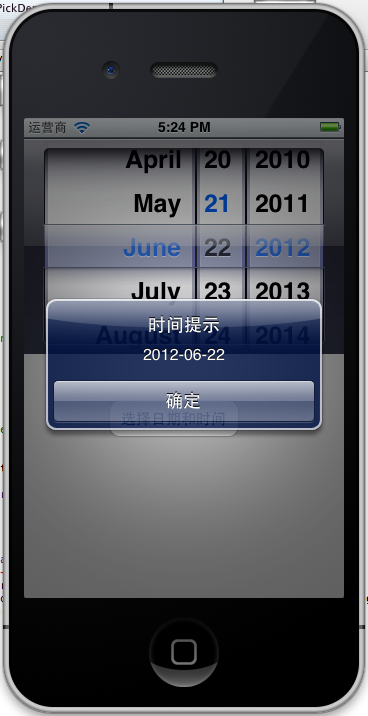
左圖是時間與日期混合模式,右圖則是純日期模式。你可以依需求選擇 Time、Date、Date and Time、Count Down Timer 四種模式:
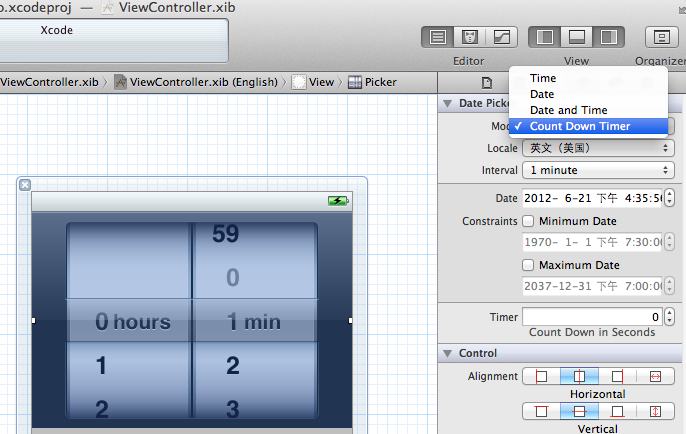
基本實作
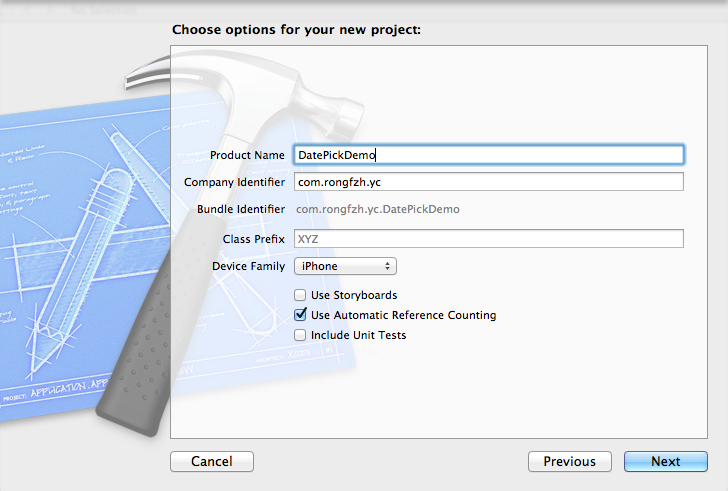
1、建立專案:新增一個 Single View Application,命名為 DatePickDemo。
2、放置控制項:打開 ViewController.xib,拖一個 DatePicker 和一個 Button 到介面上,雙擊 Button 輸入「選擇日期時間」。
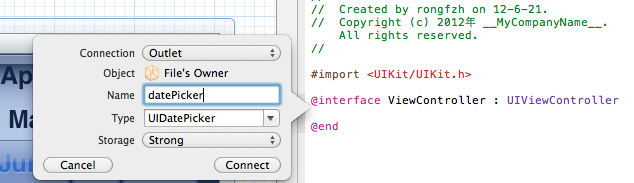
3、建立關聯:按 command + alt + enter 開啟 Assistant Editor,選中 DatePicker 拖到 ViewController.h 建立 Outlet datePicker;以同樣方式為 Button 建立命名為 selectDate 的 Action,事件類型為預設的 Touch Up Inside。
4、實作取值程式碼:
- (IBAction)selectDate:(id)sender {
    NSDate *select = [datePicker date];
    NSDateFormatter *dateFormatter = [[NSDateFormatter alloc] init];
    [dateFormatter setDateFormat:@"yyyy-MM-dd HH:mm"];
    NSString *dateAndTime = [dateFormatter stringFromDate:select];
    UIAlertView *alert = [[UIAlertView alloc] initWithTitle:@"時間提示"
        message:dateAndTime delegate:self cancelButtonTitle:@"確定" otherButtonTitles:nil, nil];
    [alert show];
}
執行後按下按鈕即可看到選到的時間:
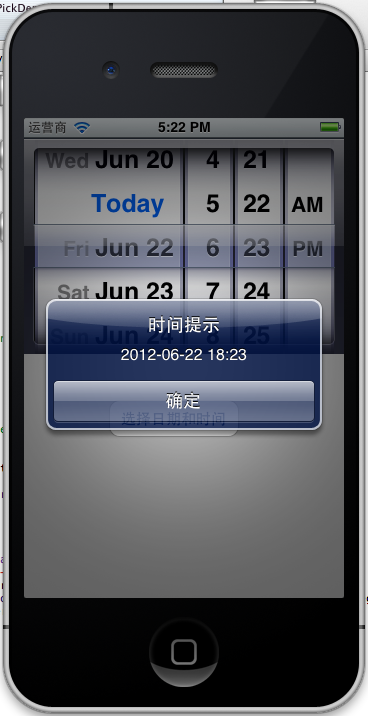
若只想顯示日期,把格式改成 @"yyyy-MM-dd" 即可:
常用參數
1. Locale(地區語言)
可查詢所有可用地區,再取出想要的:
NSLog(@"%@", [NSLocale availableLocaleIdentifiers]);
[datePicker setLocale:[[NSLocale alloc] initWithLocaleIdentifier:@"zh_Hans_CN"]];
2. Calendar(日曆)
預設為當天日曆:
[datePicker setCalendar:[NSCalendar currentCalendar]];
3. timeZone(時區)
[datePicker setTimeZone:[NSTimeZone defaultTimeZone]];
4. date(日期)
[datePicker setDate:[NSDate date]];
5. minimumDate / maximumDate(日期範圍)
透過這兩個屬性可指定可選擇的日期範圍。若使用者試圖滾動超出範圍,表盤會回滾到最近的有效日期:
NSDate* minDate = [[NSDate alloc] initWithString:@"1900-01-01 00:00:00 -0500"];
NSDate* maxDate = [[NSDate alloc] initWithString:@"2099-01-01 00:00:00 -0500"];
datePicker.minimumDate = minDate;
datePicker.maximumDate = maxDate;
若未設定範圍,預設允許選擇過去或未來的任意日期。例如選擇生日時,可把上限設為當前日期。若想設定預設顯示的日期,並以動畫滾動到該處:
[datePicker setDate:maxDate animated:YES];
6. countDownDuration(倒計時長度)
需先設定模式為倒數計時,再指定時長(以秒為單位):
[self.datePicker setDatePickerMode:UIDatePickerModeCountDownTimer];
[self.datePicker setCountDownDuration:10 * 60];
7. minuteInterval(分鐘間隔)
可設定分鐘表盤的顯示間隔,前提是該間隔能整除 60,預設為 1 分鐘:
datePicker.minuteInterval = 15;
8. datePickerMode(顯示模式)
UIDatePickerModeTime          // 顯示時、分、AM/PM
UIDatePickerModeDate          // 顯示年、月、日
UIDatePickerModeDateAndTime   // 預設模式,顯示日期與時間
UIDatePickerModeCountDownTimer // 顯示時與分(倒數計時)
9. 監聽數值變化
[datePicker addTarget:self action:@selector(dateChange:) forControlEvents:UIControlEventValueChanged];
掌握以上參數,就能依各種場景靈活設定 UIDatePicker,打造順手的日期與時間選擇體驗。
- 上一篇文章: 解析 iOS 開發中的 FirstResponder 第一響應對象
- 下一篇文章: iOS 系統快取的開發基礎知識詳解