
iOS 繪圖實戰:Quartz2D 基本圖形繪製與自訂 UIImageView 控件
一、繪製基本圖形
先搞懂「圖形上下文」
圖形上下文(Graphics Context)是一個 CGContextRef 型別的資料結構,負責保存繪圖資訊與繪圖狀態,並決定繪製的輸出目標——也就是「畫到哪裡去」。輸出目標可以是 PDF 檔、Bitmap,或是螢幕上的視窗。
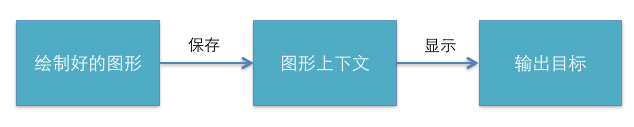
這帶來一個很漂亮的設計:同一套繪圖序列,只要換一個 Graphics Context,就能把相同的圖形畫到不同的目標上。
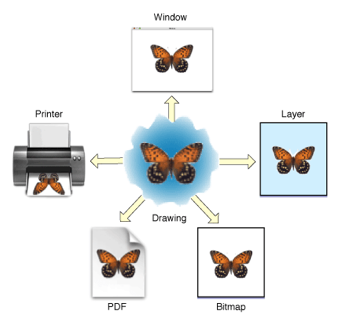
Quartz2D 提供這幾種類型的上下文:
- Bitmap Graphics Context
- PDF Graphics Context
- Window Graphics Context
- Layer Graphics Context
- Printer Graphics Context
上下文不同,畫出來的地方就不同。本文要示範的是把圖形繪製到 Bitmap 上,也就是產生一張帶有繪圖結果的圖片檔。所謂 Bitmap 就是圖片,對應到系統層級就是 UIImage——一個 UIImage 的本質就是一張 Bitmap。
怎麼畫到 Bitmap 上
這裡有個關鍵:不能在 drawRect: 方法中直接取得 Bitmap 的上下文,必須自己建立。
//
//  YYViewController.m
//  06-繪制基本圖形
//
#import "YYViewController.h"

@interface YYViewController ()
@property (weak, nonatomic) IBOutlet UIImageView *iv;
@end
@implementation YYViewController

- (void)viewDidLoad
{
    [super viewDidLoad];

    // 0. 建立一個 Bitmap 上下文
    // C 語言原生方法
    // CGBitmapContextCreate(void *data, size_t width, size_t height,
    //                       size_t bitsPerComponent, size_t bytesPerRow,
    //                       CGColorSpaceRef space, CGBitmapInfo bitmapInfo)

    // Objective-C 封裝的方法
    // 方法一
    // UIGraphicsBeginImageContext(CGSize size);

    // 方法二
    UIGraphicsBeginImageContextWithOptions(CGSizeMake(200, 200), NO, 0);

    // 1. 取得 bitmap 上下文
    CGContextRef ctx = UIGraphicsGetCurrentContext();

    // 2. 繪圖(畫一個圓)
    CGContextAddEllipseInRect(ctx, CGRectMake(0, 0, 100, 100));

    // 3. 渲染
    CGContextStrokePath(ctx);

    // 4. 取得生成的圖片
    UIImage *image = UIGraphicsGetImageFromCurrentImageContext();

    // 5. 把生成的圖片顯示到 imageView
    self.iv.image = image;

    // 6. 保存繪製好的圖片到檔案
    // 先把圖片轉為二進位資料,再寫入檔案
    // UIImageJPEGRepresentation(image, 1); // 第二個參數為壓縮品質
    NSData *data = UIImagePNGRepresentation(image);
    [data writeToFile:@"/Users/apple/Desktop/abc.png" atomically:YES];
}

- (void)didReceiveMemoryWarning
{
    [super didReceiveMemoryWarning];
    // Dispose of any resources that can be recreated.
}

@end
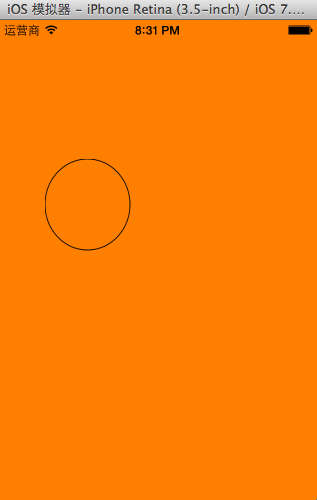
執行效果:
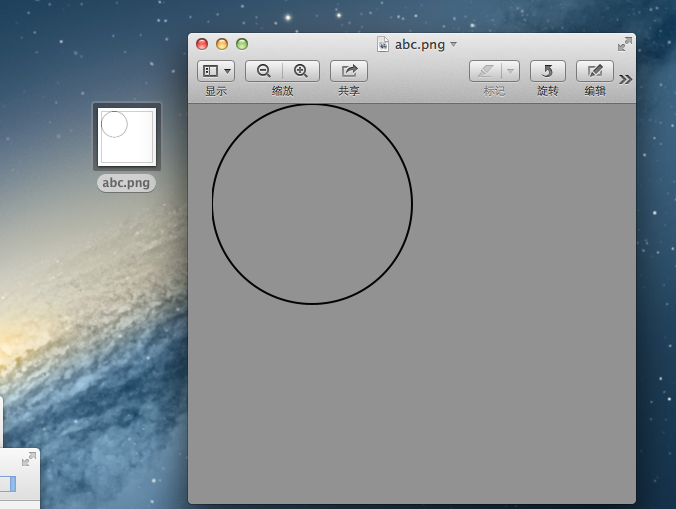
程式跑完後,指定路徑下會多出一張 abc.png:
補充說明
建立 Bitmap 上下文的兩種寫法:
// 方法一
UIGraphicsBeginImageContext(CGSize size);

// 方法二
UIGraphicsBeginImageContextWithOptions(CGSize size, BOOL opaque, CGFloat scale)
兩者都能用,但方法一產生的圖片清晰度與品質不如方法二。方法二接收三個參數:
- CGSize size:指定未來產出的 bitmap 尺寸
- BOOL opaque:是否不透明,YES 代表不透明
- CGFloat scale:縮放比例,傳 0 代表不縮放(此時會採用螢幕的預設 scale)
建立好的 bitmap 就對應一個 UIImage 物件。
Quartz2D 的記憶體管理規則:
凡是函式名稱含有 “Create” 或 “Copy” 的建立型函式,用完之後必須手動釋放,否則會造成記憶體洩漏。
反之,不含 “Create” 或 “Copy” 的取得型函式,回傳的物件不需要釋放。
如果曾經 retain 過某個物件,不再使用時要記得 release。Quartz 2D 提供了專屬的 CGColorSpaceRetain 與 CGColorSpaceRelease 之類的函式;也可以使用 Core Foundation 的 CFRetain 與 CFRelease。注意:不能向這些函式傳入 NULL 值。
二、自訂 UIImageView 控件
實作思路
Quartz2D 最大的用武之地在於自訂 View。當系統提供的控件無法滿足需求時,我們就得自己畫一個。入門的方式,就是模仿系統 UIImageView 的使用流程,一步步追問「它做了什麼、我要怎麼補上」:
- 建立物件。
- 設定圖片。
- 設定 frame。
- 把這個自訂 view 加入畫面——這一步反推出:自訂的 View 裡必須有一個 image 屬性來接收圖片參數。
- 拿到 image 之後呢?得把它渲染出來。自訂的 view 怎麼把圖片顯示出來?答案是「畫出來」,因此必須重寫
drawRect:。 - 在
drawRect:內部把圖形畫出來。
對照組:系統 UIImageView 的用法
//
//  YYViewController.m
//  02-自定義UIimageview
//
#import "YYViewController.h"

@interface YYViewController ()
@end

@implementation YYViewController

- (void)viewDidLoad
{
    [super viewDidLoad];

    // 系統的 UIImageView 使用方式
    // 1. 建立一個 UIImageView
    UIImageView *iv = [[UIImageView alloc] init];

    // 2. 設定圖片
    iv.image = [UIImage imageNamed:@"me"];

    // 3. 設定 frame
    iv.frame = CGRectMake(100, 100, 100, 100);

    // 4. 把 view 加入畫面
    [self.view addSubview:iv];
}

@end
實現效果:
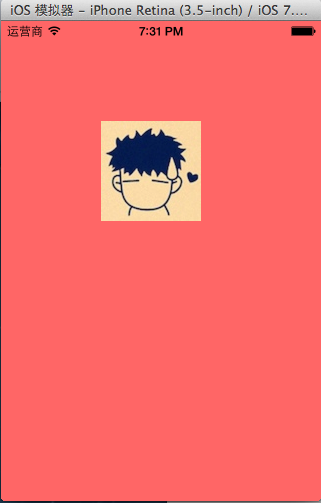
用 Quartz2D 自訂一份
先新增一個繼承自 UIView 的類別 YYimageView:
//
//  YYimageView.m
//  02-自定義UIimageview
//
#import "YYimageView.h"

@implementation YYimageView

// 重寫 drawRect: 方法
- (void)drawRect:(CGRect)rect
{
    [self.image drawInRect:rect];
}

@end
在主控制器中,照著系統 UIImageView 的使用順序做一遍,就能得到完全一樣的效果:
//
//  YYViewController.m
//  02-自定義UIimageview
//
#import "YYViewController.h"
#import "YYimageView.h"

@interface YYViewController ()
@end
@implementation YYViewController

- (void)viewDidLoad
{
    [super viewDidLoad];

    // 自定義 UIImageView
    // 1. 建立
    YYimageView *yyiv = [[YYimageView alloc] init];

    // 2. 設定圖片
    yyiv.image = [UIImage imageNamed:@"me"];

    // 3. 設定 frame
    yyiv.frame = CGRectMake(100, 100, 100, 100);

    // 4. 把自訂的 view 加入畫面
    [self.view addSubview:yyiv];
}

@end
進一步完善:點擊切換圖片
加上一個按鈕,點擊時切換圖片,看看會發生什麼:
//
//  YYViewController.m
//  02-自定義UIimageview
//
#import "YYViewController.h"
#import "YYimageView.h"

@interface YYViewController ()
@property (nonatomic, strong) UIImageView *imageView;
@end
@implementation YYViewController

- (void)viewDidLoad
{
    [super viewDidLoad];

    // 系統的 UIImageView 使用方式
    UIImageView *iv = [[UIImageView alloc] init];
    iv.image = [UIImage imageNamed:@"me"];
    iv.frame = CGRectMake(100, 100, 100, 100);
    [self.view addSubview:iv];
    self.imageView = iv;

    // 加入一個 button,點擊時切換圖片
    UIButton *btn = [[UIButton alloc] initWithFrame:CGRectMake(100, 300, 100, 50)];
    [btn setTitleColor:[UIColor blackColor] forState:UIControlStateNormal];
    [btn setTitle:@"點擊切換" forState:UIControlStateNormal];
    [btn addTarget:self action:@selector(btnClick) forControlEvents:UIControlEventTouchUpInside];
    [self.view addSubview:btn];
}

- (void)btnClick
{
    UIImage *image = [UIImage imageNamed:@"psb.jpeg"];
    self.imageView.image = image;
}

@end
點擊按鈕後,圖片順利切換:
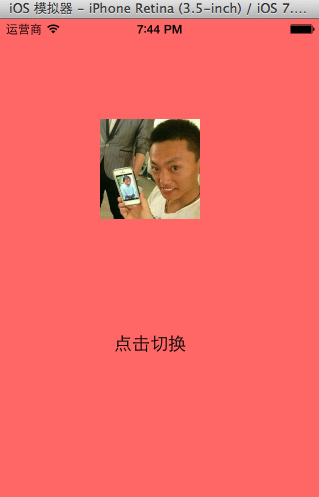
但這裡藏著一個關鍵差異:系統的 UIImageView 換圖片會立即生效,而自訂的 view 不會。原因在於,自訂 view 的內容是「畫」出來的,圖片一旦畫上去就成了像素,單純改動 image 屬性並不會觸發重繪。所以必須在拿到新圖片時主動要求重畫一次——做法是在 setImage: 裡呼叫 setNeedsDisplay。
完善後的程式碼如下。
主控制器 YYViewController.m:
//
//  YYViewController.m
//  02-自定義UIimageview
//
#import "YYViewController.h"
#import "YYimageView.h"

@interface YYViewController ()
@property (nonatomic, strong) UIImageView *imageView;
@property (nonatomic, strong) YYimageView *yyimageView;
@end
@implementation YYViewController

- (void)viewDidLoad
{
    [super viewDidLoad];

    // 自定義 UIImageView
    // 1. 建立
    YYimageView *yyiv = [[YYimageView alloc] init];

    // 2. 設定圖片
    yyiv.image = [UIImage imageNamed:@"me"];

    // 3. 設定 frame
    yyiv.frame = CGRectMake(100, 100, 100, 100);

    // 4. 把自訂的 view 加入畫面
    [self.view addSubview:yyiv];
    self.yyimageView = yyiv;

    // 加入一個 button,點擊時切換圖片
    UIButton *btn = [[UIButton alloc] initWithFrame:CGRectMake(100, 300, 100, 50)];
    [btn setTitleColor:[UIColor blackColor] forState:UIControlStateNormal];
    [btn setTitle:@"點擊切換" forState:UIControlStateNormal];
    [btn addTarget:self action:@selector(btnClick) forControlEvents:UIControlEventTouchUpInside];
    [self.view addSubview:btn];
}

- (void)btnClick
{
    NSLog(@"按鈕被點擊了");
    UIImage *image = [UIImage imageNamed:@"psb.jpeg"];
    self.yyimageView.image = image;
}

@end
YYimageView.m:
//
//  YYimageView.m
//  02-自定義UIimageview
//
#import "YYimageView.h"

@implementation YYimageView

// 重寫 drawRect: 方法
- (void)drawRect:(CGRect)rect
{
    [self.image drawInRect:rect];
}

// 重寫 setImage: 方法
- (void)setImage:(UIImage *)image
{
    _image = image;
    [self setNeedsDisplay]; // 通知系統重新繪製
}

@end
這段補充說明了自訂 View 與系統 View 在思維上的根本差別:系統控件把「資料變了就重繪」這件事封裝好了,而自訂控件需要你自己把這條閉環補齊。