
iOS 毛玻璃效果的四種實現方式與圖片模糊的三種算法
毛玻璃(背景模糊)效果從 iOS 7 的通知中心開始成為蘋果設計語言的重要一環,如今在登入頁、彈窗、導航欄等位置幾乎無處不在。本文整理四種在 iOS 上實現毛玻璃效果的方案,並附上三種直接對圖片做模糊處理的算法。
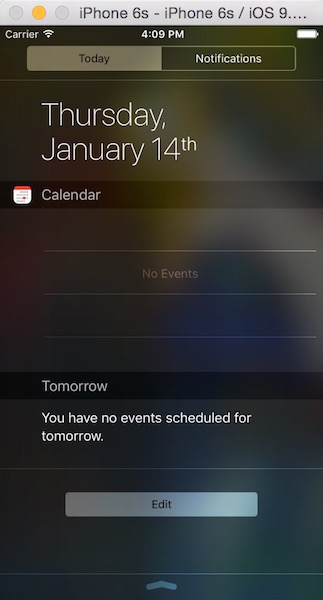
方案一:UIToolbar(iOS 7 及以前的主力方案)
iOS 7 的 SDK 並沒有開放官方的毛玻璃 API,但系統自身的界面早就用上了。實際上在此之前就有一個現成的類能做到這件事——UIToolbar。用法非常簡單,幾行代碼搞定。
關鍵在於 barStyle 屬性,通過不同的枚舉值控制模糊樣式:
/* 毛玻璃樣式枚舉 */
UIBarStyleDefault
UIBarStyleBlack
UIBarStyleBlackOpaque
UIBarStyleBlackTranslucent
UIImageView *bgImgView = [[UIImageView alloc] initWithFrame:self.view.bounds];
bgImgView.image = [UIImage imageNamed:@"huoying.jpg"];
[self.view addSubview:bgImgView];

UIToolbar *toolbar = [[UIToolbar alloc] initWithFrame:CGRectMake(0, 0,
                                            bgImgView.frame.size.width * 0.8,
                                            bgImgView.frame.size.height)];
toolbar.barStyle = UIBarStyleBlackTranslucent;
[bgImgView addSubview:toolbar];
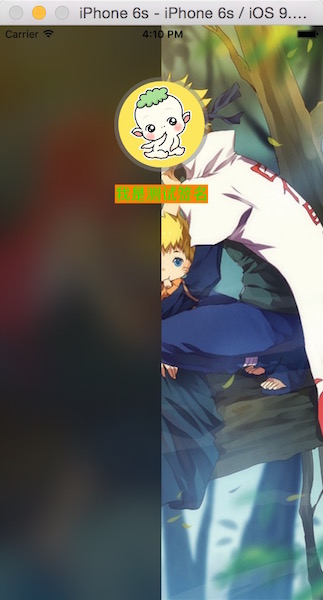
觀察視圖結構可以找到答案:UIToolbar 內部包含一個背景圖片視圖、一個背景 view 和一個背景特效 view,正是這幾層疊加產生了毛玻璃的視覺效果。
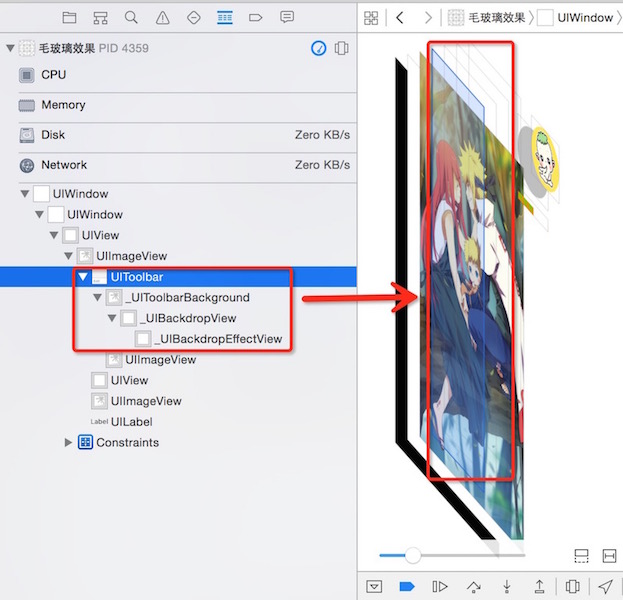
方案二:UIVisualEffectView(iOS 8 之後的官方方案)
iOS 8 引入了 UIVisualEffectView,效率和效果都更好,使用難度與 UIToolbar 相當。
它是一個抽象類,不能直接使用,需要通過 UIBlurEffect 描述模糊樣式,再交給 UIVisualEffectView 渲染。UIBlurEffect 提供一個類方法快速創建效果對象,參數是樣式枚舉;UIVisualEffectView 則提供了便捷構造方法,可以把效果直接綁定到視圖上。
需要注意的是,這個類只適用於 iOS 8 及以上,如果項目還要兼容 iOS 7,就必須保留方案一。
UIImageView *bgImgView = [[UIImageView alloc] initWithFrame:self.view.bounds];
bgImgView.image = [UIImage imageNamed:@"huoying.jpg"];
bgImgView.contentMode = UIViewContentModeScaleAspectFill;
bgImgView.userInteractionEnabled = YES;
[self.view addSubview:bgImgView];

/* 樣式枚舉 */
// UIBlurEffectStyleExtraLight
// UIBlurEffectStyleLight
// UIBlurEffectStyleDark

UIBlurEffect *effect = [UIBlurEffect effectWithStyle:UIBlurEffectStyleDark];
UIVisualEffectView *effectView = [[UIVisualEffectView alloc] initWithEffect:effect];
effectView.frame = CGRectMake(0, 0,
                              bgImgView.frame.size.width * 0.8,
                              bgImgView.frame.size.height);
[bgImgView addSubview:effectView];
視圖結構與 UIToolbar 方案不同:UIVisualEffectView 的構造方法內部為我們創建了一個專門的 view,並在其上做了模糊處理,再覆蓋到背景圖之上。
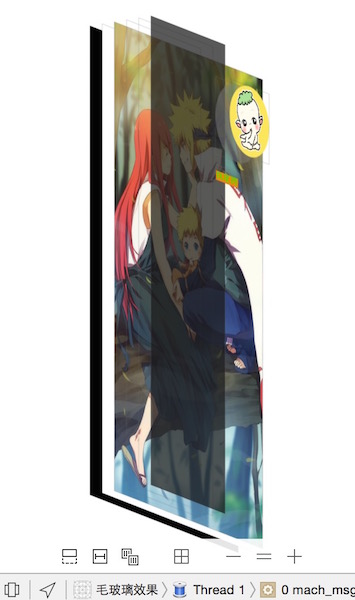
方案三:UIImageView 分類(一行代碼接入)
開源社區有一個封裝得很好的 UIImageView 分類,內部實現方式不重要,接入成本極低:
UIImageView *bgImgView = [[UIImageView alloc] initWithFrame:self.view.bounds];
bgImgView.contentMode = UIViewContentModeScaleAspectFill;

// 對背景圖片做模糊處理
// blurRadius 為模糊半徑,最後的 block 回調可以傳 nil
[bgImgView setImageToBlur:[UIImage imageNamed:@"huoying.jpg"]
               blurRadius:10
            completionBlock:nil];

bgImgView.userInteractionEnabled = YES;
[self.view addSubview:bgImgView];
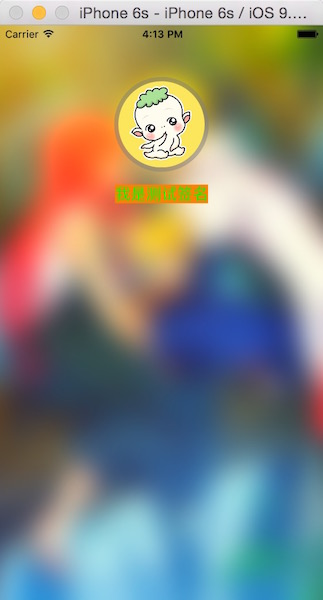
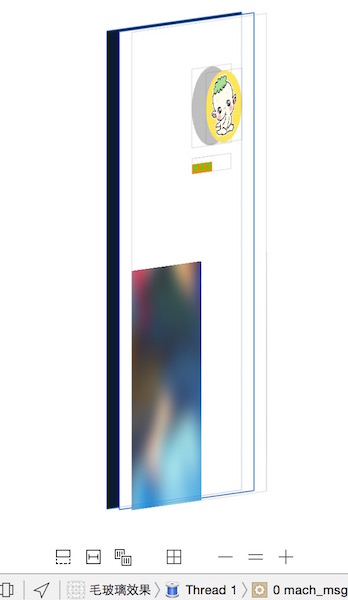
從視圖結構可以看出,它是直接對圖片本身做了高斯模糊,並沒有引入額外的層級。
三種方案各有取捨:UIToolbar 兼容性最好,UIVisualEffectView 是官方推薦且性能最佳,第三方分類則勝在接入成本。按項目的部署目標選擇即可。
圖片模糊的三種算法
如果需求是「拿到一張已經模糊好的 UIImage」(例如做緩存或過濾列表縮略圖),而不是實時的視圖效果,那麼直接對圖處理更合適。
算法一:Core Image
代碼最短,但需要注意 CIContext 的創建與 GL 上下文管理:
- (UIImage *)blurryImage:(UIImage *)image withBlurLevel:(CGFloat)blur
{
    CIImage *inputImage = [CIImage imageWithCGImage:image.CGImage];

    CIFilter *filter = [CIFilter filterWithName:@"CIGaussianBlur"
                                  keysAndValues:kCIInputImageKey, inputImage,
                                                  @"inputRadius", @(blur),
                                                  nil];
    CIImage *outputImage = filter.outputImage;

    CGImageRef outImage = [self.context createCGImage:outputImage fromRect:[outputImage extent]];
    return [UIImage imageWithCGImage:outImage];
}
算法二:vImage API
直接操作位圖像素,性能好但需要自己管理內存:
- (UIImage *)blurryImage:(UIImage *)image withBlurLevel:(CGFloat)blur
{
    if (blur < 0.f || blur > 1.f)
    {
        blur = 0.5f;
    }

    // 盒式模糊的尺寸必須是奇數
    int boxSize = (int)(blur * 100);
    boxSize = boxSize - (boxSize % 2) + 1;

    CGImageRef img = image.CGImage;

    vImage_Buffer inBuffer, outBuffer;
    vImage_Error error;
    void *pixelBuffer;

    CGDataProviderRef inProvider = CGImageGetDataProvider(img);
    CFDataRef inBitmapData = CGDataProviderCopyData(inProvider);

    inBuffer.width  = CGImageGetWidth(img);
    inBuffer.height = CGImageGetHeight(img);
    inBuffer.rowBytes = CGImageGetBytesPerRow(img);
    inBuffer.data = (void*)CFDataGetBytePtr(inBitmapData);

    pixelBuffer = malloc(CGImageGetBytesPerRow(img) * CGImageGetHeight(img));
    if (pixelBuffer == NULL)
    {
        NSLog(@"No pixelbuffer");
    }

    outBuffer.data     = pixelBuffer;
    outBuffer.width    = CGImageGetWidth(img);
    outBuffer.height   = CGImageGetHeight(img);
    outBuffer.rowBytes = CGImageGetBytesPerRow(img);

    error = vImageBoxConvolve_ARGB8888(&inBuffer, &outBuffer, NULL, 0, 0,
                                       boxSize, boxSize, NULL, kvImageEdgeExtend);
    if (error)
    {
        NSLog(@"error from convolution %ld", error);
    }

    CGColorSpaceRef colorSpace = CGColorSpaceCreateDeviceRGB();
    CGContextRef ctx = CGBitmapContextCreate(outBuffer.data,
                                            outBuffer.width,
                                            outBuffer.height,
                                            8,
                                            outBuffer.rowBytes,
                                            colorSpace,
                                            kCGImageAlphaNoneSkipLast);

    CGImageRef imageRef = CGBitmapContextCreateImage(ctx);
    UIImage *returnImage = [UIImage imageWithCGImage:imageRef];

    // 清理資源
    CGContextRelease(ctx);
    CGColorSpaceRelease(colorSpace);
    free(pixelBuffer);
    CFRelease(inBitmapData);
    CGImageRelease(imageRef);

    return returnImage;
}
算法三:可自定義色調與飽和度的完整實現
這個版本除了模糊,還支持疊加染色(tintColor)、調整飽和度以及用遮罩限定作用範圍,靈活度最高。核心是用三次盒式模糊近似高斯模糊:
// 參數:模糊半徑、染色顏色、飽和度變化係數、遮罩圖片
- (UIImage *)imageBluredWithRadius:(CGFloat)blurRadius
                         tintColor:(UIColor *)tintColor
             saturationDeltaFactor:(CGFloat)saturationDeltaFactor
                         maskImage:(UIImage *)maskImage
{
    CGRect imageRect = { CGPointZero, self.size };
    UIImage *effectImage = self;

    BOOL hasBlur = blurRadius > __FLT_EPSILON__;
    BOOL hasSaturationChange = fabs(saturationDeltaFactor - 1.) > __FLT_EPSILON__;

    if (hasBlur || hasSaturationChange)
    {
        UIGraphicsBeginImageContextWithOptions(self.size, NO, [[UIScreen mainScreen] scale]);
        CGContextRef effectInContext = UIGraphicsGetCurrentContext();
        CGContextScaleCTM(effectInContext, 1.0, -1.0);
        CGContextTranslateCTM(effectInContext, 0, -self.size.height);
        CGContextDrawImage(effectInContext, imageRect, self.CGImage);

        vImage_Buffer effectInBuffer;
        effectInBuffer.data     = CGBitmapContextGetData(effectInContext);
        effectInBuffer.width    = CGBitmapContextGetWidth(effectInContext);
        effectInBuffer.height   = CGBitmapContextGetHeight(effectInContext);
        effectInBuffer.rowBytes = CGBitmapContextGetBytesPerRow(effectInContext);

        UIGraphicsBeginImageContextWithOptions(self.size, NO, [[UIScreen mainScreen] scale]);
        CGContextRef effectOutContext = UIGraphicsGetCurrentContext();
        vImage_Buffer effectOutBuffer;
        effectOutBuffer.data     = CGBitmapContextGetData(effectOutContext);
        effectOutBuffer.width    = CGBitmapContextGetWidth(effectOutContext);
        effectOutBuffer.height   = CGBitmapContextGetHeight(effectOutContext);
        effectOutBuffer.rowBytes = CGBitmapContextGetBytesPerRow(effectOutContext);

        if (hasBlur)
        {
            // 以屏幕縮放因子換算實際半徑,並確保為奇數
            CGFloat inputRadius = blurRadius * [[UIScreen mainScreen] scale];
            NSUInteger radius = floor(inputRadius * 3. * sqrt(2 * M_PI) / 4 + 0.5);
            if (radius % 2 != 1)
            {
                radius += 1;
            }

            // 三次盒式模糊疊加近似高斯
            vImageBoxConvolve_ARGB8888(&effectInBuffer, &effectOutBuffer, NULL, 0, 0,
                                       (short)radius, (short)radius, 0, kvImageEdgeExtend);
            vImageBoxConvolve_ARGB8888(&effectOutBuffer, &effectInBuffer, NULL, 0, 0,
                                       (short)radius, (short)radius, 0, kvImageEdgeExtend);
            vImageBoxConvolve_ARGB8888(&effectInBuffer, &effectOutBuffer, NULL, 0, 0,
                                       (short)radius, (short)radius, 0, kvImageEdgeExtend);
        }

        BOOL effectImageBuffersAreSwapped = NO;

        if (hasSaturationChange)
        {
            CGFloat s = saturationDeltaFactor;
            CGFloat floatingPointSaturationMatrix[] = {
                0.0722 + 0.9278 * s, 0.0722 - 0.0722 * s, 0.0722 - 0.0722 * s, 0,
                0.7152 - 0.7152 * s, 0.7152 + 0.2848 * s, 0.7152 - 0.7152 * s, 0,
                0.2126 - 0.2126 * s, 0.2126 - 0.2126 * s, 0.2126 + 0.7873 * s, 0,
                0, 0, 0, 1,
            };

            const int32_t divisor = 256;
            NSUInteger matrixSize = sizeof(floatingPointSaturationMatrix)
                                    / sizeof(floatingPointSaturationMatrix[0]);
            int16_t saturationMatrix[matrixSize];

            for (NSUInteger i = 0; i < matrixSize; ++i)
            {
                saturationMatrix[i] = (int16_t)roundf(floatingPointSaturationMatrix[i] * divisor);
            }

            if (hasBlur)
            {
                vImageMatrixMultiply_ARGB8888(&effectOutBuffer, &effectInBuffer,
                                              saturationMatrix, divisor, NULL, NULL, kvImageNoFlags);
                effectImageBuffersAreSwapped = YES;
            }
            else
            {
                vImageMatrixMultiply_ARGB8888(&effectInBuffer, &effectOutBuffer,
                                              saturationMatrix, divisor, NULL, NULL, kvImageNoFlags);
            }
        }

        if (!effectImageBuffersAreSwapped)
        {
            effectImage = UIGraphicsGetImageFromCurrentImageContext();
        }
        UIGraphicsEndImageContext();

        if (effectImageBuffersAreSwapped)
        {
            effectImage = UIGraphicsGetImageFromCurrentImageContext();
        }
        UIGraphicsEndImageContext();
    }

    // 開始合成:先畫原圖
    UIGraphicsBeginImageContextWithOptions(self.size, NO, [[UIScreen mainScreen] scale]);
    CGContextRef outputContext = UIGraphicsGetCurrentContext();
    CGContextScaleCTM(outputContext, 1.0, -1.0);
    CGContextTranslateCTM(outputContext, 0, -self.size.height);
    CGContextDrawImage(outputContext, imageRect, self.CGImage);

    // 疊上模糊結果,可用 maskImage 限定範圍
    if (hasBlur)
    {
        CGContextSaveGState(outputContext);
        if (maskImage)
        {
            CGContextClipToMask(outputContext, imageRect, maskImage.CGImage);
        }
        CGContextDrawImage(outputContext, imageRect, effectImage.CGImage);
        CGContextRestoreGState(outputContext);
    }

    // 疊加染色層
    if (tintColor)
    {
        CGContextSaveGState(outputContext);
        CGContextSetFillColorWithColor(outputContext, tintColor.CGColor);
        CGContextFillRect(outputContext, imageRect);
        CGContextRestoreGState(outputContext);
    }

    UIImage *outputImage = UIGraphicsGetImageFromCurrentImageContext();
    UIGraphicsEndImageContext();

    return outputImage;
}
選型建議:追求開發效率用 UIVisualEffectView 或第三方分類;需要把模糊結果持久化(例如列表快速滑動時用預處理過的縮略圖)則用圖片算法;需要精細控制染色與作用範圍時,第三個實現最合適。