
iOS 如何裁剪圓形頭像並加上邊框
編輯:iOS 相關教學
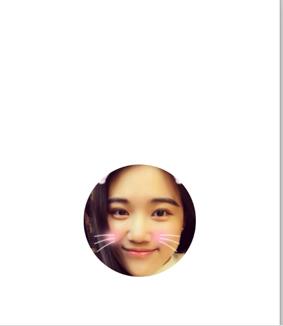
圓形頭像幾乎是每個 App 都會用到的效果。實現方式其實很簡單:開啟位圖上下文 → 建立圓形路徑並設為裁剪區域 → 畫入原圖 → 從上下文取出新圖片。
一、裁剪圓形頭像
- (void)viewDidLoad {
    [super viewDidLoad];

    // 載入圖片
    UIImage *image = [UIImage imageNamed:@"菲哥"];

    // 開啟位圖上下文,尺寸與原圖一致
    UIGraphicsBeginImageContextWithOptions(image.size, NO, 0);

    // 建立圓形路徑
    UIBezierPath *path = [UIBezierPath bezierPathWithOvalInRect:CGRectMake(0, 0,
                                                                          image.size.width,
                                                                          image.size.height)];
    [path addClip];   // 設為裁剪區域,之後的繪製只會保留在圓內

    [image drawAtPoint:CGPointZero];

    // 從上下文取出裁剪後的圖片
    _imageView.image = UIGraphicsGetImageFromCurrentImageContext();

    UIGraphicsEndImageContext();
}
裁剪後的效果:
二、加上圓形邊框
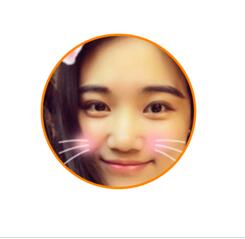
思路是兩層圓:先畫一個直徑較大的圓並填色當作邊框,再在它的範圍內畫一個剛好等於圖片大小的圓作為裁剪區域。
- (void)viewDidLoad {
    [super viewDidLoad];

    UIImage *image = [UIImage imageNamed:@"大菲哥"];

    CGFloat border = 3;                        // 邊框寬度
    CGFloat imageWH = image.size.width;
    CGFloat ovalWH = imageWH + 2 * border;     // 外圓直徑 = 圖片 + 左右各一條邊框

    UIGraphicsBeginImageContextWithOptions(image.size, NO, 0);

    // 先畫外圈大圓並填色
    UIBezierPath *path = [UIBezierPath bezierPathWithOvalInRect:CGRectMake(0, 0, ovalWH, ovalWH)];
    [[UIColor orangeColor] set];
    [path fill];

    // 內圈設為裁剪區域
    UIBezierPath *path1 = [UIBezierPath bezierPathWithOvalInRect:CGRectMake(border, border, imageWH, imageWH)];
    [path1 addClip];

    [image drawAtPoint:CGPointMake(border, border)];

    _imageView.image = UIGraphicsGetImageFromCurrentImageContext();
    UIGraphicsEndImageContext();
}
效果如下:
三、延伸:整個畫面的截屏
原理完全相同,只是把渲染的來源換成整個 view 的 layer,再存進相簿:
- (void)viewDidLoad {
    [super viewDidLoad];

    // 開啟上下文
    UIGraphicsBeginImageContextWithOptions(self.view.bounds.size, NO, 0);
    CGContextRef ctx = UIGraphicsGetCurrentContext();

    // 把整個 view 的圖層渲染到上下文
    [self.view.layer renderInContext:ctx];

    UIImage *image = UIGraphicsGetImageFromCurrentImageContext();
    UIGraphicsEndImageContext();

    // 保存到相簿
    UIImageWriteToSavedPhotosAlbum(image, nil, nil, nil);
}
小結一下這類離屏繪製的固定套路:UIGraphicsBeginImageContextWithOptions 開畫布、addClip 決定形狀、renderInContext: 或 drawAtPoint: 決定內容、UIGraphicsGetImageFromCurrentImageContext 取結果,最後別忘了 UIGraphicsEndImageContext 收尾,避免上下文洩漏。
- 上一篇文章: iOS 仿郵箱大師的九宮格手勢密碼解鎖實作
- 下一篇文章: iOS 抽屜效果開發案例:手勢拖動與縮放動畫