
layoutSubviews 完全指南:iOS 子檢視布局與橫豎屏自適應實作
編輯:iOS 相關教學
概念釐清
UIView 裡有這麼一個方法:
- (void)layoutSubviews;  // override point. called by layoutIfNeeded automatically.
                          // As of iOS 6.0, when constraints-based layout is used the base
                          // implementation applies the constraints-based layout, otherwise it does nothing.
layoutSubviews 的職責是重新布局 subviews。當你想更新子檢視的位置或尺寸,重寫這個方法是最合適的入口。它預設不做任何事,需要時由子類覆寫。
要特別注意的是:蘋果官方文件強調不要直接呼叫 layoutSubviews,而應透過 setNeedsLayout 或 layoutIfNeeded 觸發。
實戰:iPad 橫豎屏不同布局
iPad 的橫屏與豎屏寬高比差異大,好的應用會針對兩個方向設計不同的版面。以下兩張截圖來自同一個頁面的橫豎屏版本,內容相同但布局完全不同。


實作思路是:把 view 設為自動適配,當使用者旋轉裝置時系統會呼叫 layoutSubviews,我們在裡面判斷方向,再重新計算各子檢視的 frame。
簡化版原型
版面可以拆成兩塊:左邊是圖片,右邊是「圖片 + 文字」的組合檢視。
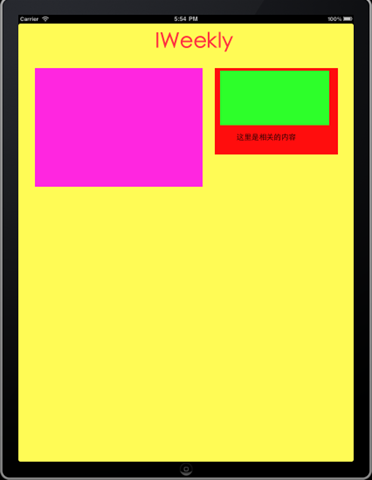
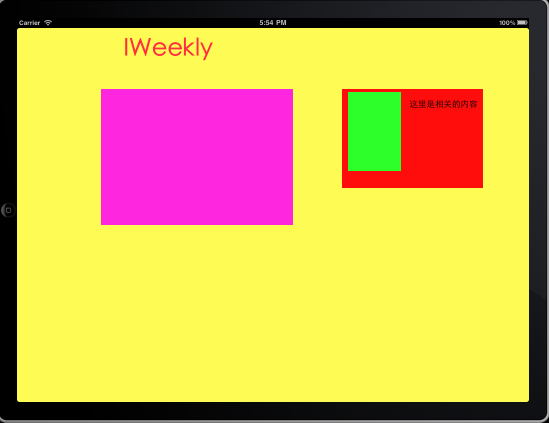
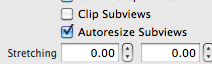
右側的文字與綠色區塊用一個子檢視封裝。整體結構是:主檢視 → ContentView → ArticleView,兩者的 xib 都開啟了。
在 ContentView 中判斷方向
- (void)layoutSubviews
{
    [super layoutSubviews];
    UIDeviceOrientation interfaceOrientation = [[UIApplication sharedApplication] statusBarOrientation];

    if (interfaceOrientation == UIDeviceOrientationPortrait ||
        interfaceOrientation == UIDeviceOrientationPortraitUpsideDown) {
        // 豎屏
        [self setVerticalFrame];
    } else if (interfaceOrientation == UIDeviceOrientationLandscapeLeft ||
               interfaceOrientation == UIDeviceOrientationLandscapeRight) {
        // 横屏
        [self setHorizontalFrame];
    }
}

- (void)setVerticalFrame
{
    NSLog(@"豎屏");
    [titleLable setFrame:CGRectMake(283, 0, 239, 83)];
    [leftView  setFrame:CGRectMake(38, 102, 384, 272)];
    [rightView setFrame:CGRectMake(450, 102, 282, 198)];
}

- (void)setHorizontalFrame
{
    NSLog(@"橫屏");
    [titleLable setFrame:CGRectMake(183, 0, 239, 83)];
    [leftView  setFrame:CGRectMake(168, 122, 384, 272)];
    [rightView setFrame:CGRectMake(650, 122, 282, 198)];
}
從 xib 載入 ArticleView
- (id)initWithCoder:(NSCoder *)aDecoder
{
    if ((self = [super initWithCoder:aDecoder])) {
        NSArray *arrayContentView = [[NSBundle mainBundle] loadNibNamed:@"ArticleView" owner:self options:nil];
        rightView = [arrayContentView objectAtIndex:0];
        [self addSubview:rightView];
    }
    return self;
}
ArticleView 內部同樣處理方向
- (void)layoutSubviews
{
    [super layoutSubviews];
    UIDeviceOrientation interfaceOrientation = [[UIApplication sharedApplication] statusBarOrientation];

    CGRect rect = self.frame;
    rect.size.width  = 282;
    rect.size.height = 198;
    [self setFrame:rect];

    if (interfaceOrientation == UIDeviceOrientationPortrait ||
        interfaceOrientation == UIDeviceOrientationPortraitUpsideDown) {
        [self setVerticalFrame];
    } else if (interfaceOrientation == UIDeviceOrientationLandscapeLeft ||
               interfaceOrientation == UIDeviceOrientationLandscapeRight) {
        [self setHorizontalFrame];
    }
}

- (void)setVerticalFrame
{
    NSLog(@"豎屏");
    [contentView setFrame:CGRectMake(12, 6, 250, 125)];
    [textLable   setFrame:CGRectMake(50, 139, 182, 39)];
}

- (void)setHorizontalFrame
{
    NSLog(@"橫屏");
    [contentView setFrame:CGRectMake(12, 6, 106, 158)];
    [textLable   setFrame:CGRectMake(135, 11, 147, 39)];
}
layoutSubviews 何時會被呼叫
整理實測後的觸發時機:
- addSubview 時。
- view 的 frame 改變時。
- 滑動 UIScrollView 時。
- 旋轉螢幕時,會觸發父 UIView 的 layoutSubviews。
- 改變某個 UIView 大小時,也會觸發父層的 layoutSubviews。
- 直接呼叫(不建議,但確實會觸發)。
一個容易忽略的細節:當 view 的 frame 值為 0 時,addSubview 不會觸發 layoutSubviews。
掌握這個機制之後,處理自適應版面會輕鬆很多,建議動手做個小 demo 把觸發時機實際印出來觀察一次。