
iOS 自訂導覽列按鈕:UIBarButtonItem 的四種建立方式完整解析
編輯:iOS 相關教學
在 iOS 的導覽列(UINavigationBar)上,系統預設提供了 leftBarButtonItem 與 rightBarButtonItem 兩個位置。只要透過 navigationItem 把對應的 UIBarButtonItem 換掉,就能做出符合自家產品調性的按鈕樣式。
一、系統提供的幾種初始化方式
UIBarButtonItem 一共提供了幾組常用的初始化器,分別對應系統樣式、圖片、文字以及自訂檢視:
- (instancetype)initWithBarButtonSystemItem:(UIBarButtonSystemItem)systemItem target:(id)target action:(SEL)action;
- (instancetype)initWithImage:(UIImage *)image style:(UIBarButtonItemStyle)style target:(id)target action:(SEL)action;
- (instancetype)initWithTitle:(NSString *)title style:(UIBarButtonItemStyle)style target:(id)target action:(SEL)action;
- (instancetype)initWithCustomView:(UIView *)customView;
二、使用系統內建樣式
最省力的做法,就是直接挑一個系統圖示。以下在右上角放上一個「完成」按鈕:
self.navigationItem.rightBarButtonItem =
    [[UIBarButtonItem alloc] initWithBarButtonSystemItem:UIBarButtonSystemItemDone
                                                target:self
                                                action:@selector(right:)];
可選的系統樣式相當豐富,常用的有:
typedef NS_ENUM(NSInteger, UIBarButtonSystemItem) {
    UIBarButtonSystemItemDone,
    UIBarButtonSystemItemCancel,
    UIBarButtonSystemItemEdit,
    UIBarButtonSystemItemSave,
    UIBarButtonSystemItemAdd,
    UIBarButtonSystemItemFlexibleSpace,
    UIBarButtonSystemItemFixedSpace,
    UIBarButtonSystemItemCompose,
    UIBarButtonSystemItemReply,
    UIBarButtonSystemItemAction,
    UIBarButtonSystemItemOrganize,
    UIBarButtonSystemItemBookmarks,
    UIBarButtonSystemItemSearch,
    UIBarButtonSystemItemRefresh,
    UIBarButtonSystemItemStop,
    UIBarButtonSystemItemCamera,
    UIBarButtonSystemItemTrash,
    UIBarButtonSystemItemPlay,
    UIBarButtonSystemItemPause,
    UIBarButtonSystemItemRewind,
    UIBarButtonSystemItemFastForward,
    UIBarButtonSystemItemUndo,
    UIBarButtonSystemItemRedo,
    UIBarButtonSystemItemPageCurl,
};
其中 FlexibleSpace 與 FixedSpace 並不是真正的按鈕,而是用來做間距的空白項,常搭配 toolbar 排版使用。
記得補上按下後要執行的方法:
- (void)right:(id)sender
{
    NSLog(@"rightBarButtonItem");
}
三、純文字按鈕
如果只需要一行文字,用 initWithTitle:style:target:action: 最合適:
self.navigationItem.leftBarButtonItem =
    [[UIBarButtonItem alloc] initWithTitle:@"back"
                                    style:UIBarButtonItemStylePlain
                                   target:self
                                   action:@selector(back:)];
樣式列舉只有三個值,其中 Bordered 從 iOS 8 起已被標記為不建議使用:
typedef NS_ENUM(NSInteger, UIBarButtonItemStyle) {
    UIBarButtonItemStylePlain,
    UIBarButtonItemStyleBordered NS_ENUM_DEPRECATED_IOS(2_0, 8_0, "Use UIBarButtonItemStylePlain when minimum deployment target is iOS7 or later"),
    UIBarButtonItemStyleDone,
};
- (void)back:(id)sender
{
    [self.navigationController popViewControllerAnimated:YES];
}
四、圖片按鈕
self.navigationItem.rightBarButtonItem =
    [[UIBarButtonItem alloc] initWithImage:[UIImage imageNamed:@"test"]
                                    style:UIBarButtonItemStylePlain
                                   target:self
                                   action:@selector(right:)];
五、自訂 UIView:自由度最高的做法
把任意檢視包成 BarButtonItem,是彈性最大的一種方式:
UIView *testView = [[UIView alloc] initWithFrame:CGRectMake(0, 0, 40, 60)];
self.navigationItem.rightBarButtonItem = [[UIBarButtonItem alloc] initWithCustomView:testView];
有讀者問過:既想換掉系統原生的返回箭頭,又想改返回文字,該怎麼做?答案就在這裡——自訂的 UIView 裡可以同時塞入 UIImageView 與 UILabel,想怎麼排就怎麼排。
六、進階範例:會旋轉的導覽列按鈕
需求很單純:做一個持續旋轉的 rightBarButtonItem,點擊可在旋轉與暫停之間切換。
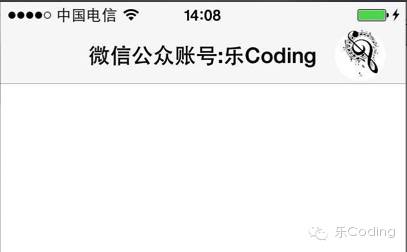
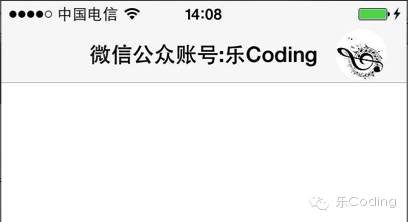
核心就是那個音符圖示的不停轉動。關鍵程式碼如下(已加上註解):
#import "ViewController.h"
#define DEGREES_TO_RADIANS(angle) ((angle) / 180.0 * M_PI)

/// ImageView 旋轉狀態
typedef enum {
    RotateStateStop,
    RotateStateRunning,
} RotateState;

@interface ViewController ()
{
    /// 旋轉角度
    CGFloat imageviewAngle;
    /// 旋轉的 ImageView
    UIImageView *imageView;
    /// 旋轉狀態
    RotateState rotateState;
}
@end

@implementation ViewController

- (void)viewDidLoad
{
    [super viewDidLoad];
    self.title = @"微信公眾賬號:樂Coding";
    [self buildBarButtonItem];
}

#pragma mark 建立 RightBarButtonItem
- (void)buildBarButtonItem
{
    imageView = [[UIImageView alloc] initWithImage:[UIImage imageNamed:@"icon"]];
    imageView.autoresizingMask = UIViewAutoresizingNone;
    imageView.contentMode = UIViewContentModeScaleToFill;
    imageView.bounds = CGRectMake(0, 0, 40, 40);
    // 設為圓形
    imageView.layer.masksToBounds = YES;
    imageView.layer.cornerRadius = 20.f;

    UIButton *button = [UIButton buttonWithType:UIButtonTypeCustom];
    button.frame = CGRectMake(0, 0, 40, 40);
    [button addSubview:imageView];
    [button addTarget:self action:@selector(animate) forControlEvents:UIControlEventTouchUpInside];
    imageView.center = button.center;

    UIBarButtonItem *barItem = [[UIBarButtonItem alloc] initWithCustomView:button];
    self.navigationItem.rightBarButtonItem = barItem;
}

#pragma mark 點擊事件
- (void)animate
{
    if (rotateState == RotateStateStop) {
        rotateState = RotateStateRunning;
        [self rotateAnimate];
    } else {
        rotateState = RotateStateStop;
    }
}

#pragma mark 旋轉動畫
- (void)rotateAnimate
{
    imageviewAngle += 50;
    // 0.5 秒旋轉 50 度
    [UIView animateWithDuration:0.5 delay:0.0 options:UIViewAnimationOptionCurveLinear animations:^{
        imageView.transform = CGAffineTransformMakeRotation(DEGREES_TO_RADIANS(imageviewAngle));
    } completion:^(BOOL finished) {
        if (rotateState == RotateStateRunning) {
            [self rotateAnimate];
        }
    }];
}
@end
小結一下:只要需求超出系統預設樣式,優先考慮 initWithCustomView:。它讓你把 UIButton、UIImageView、UILabel 甚至自訂的複合檢視直接放進導覽列,後續要加動畫、換狀態都好處理。