
iOS 粒子動畫:用 CAEmitterLayer 做出雨滴與櫻花特效
編輯:iOS 相關教學
先看效果圖:
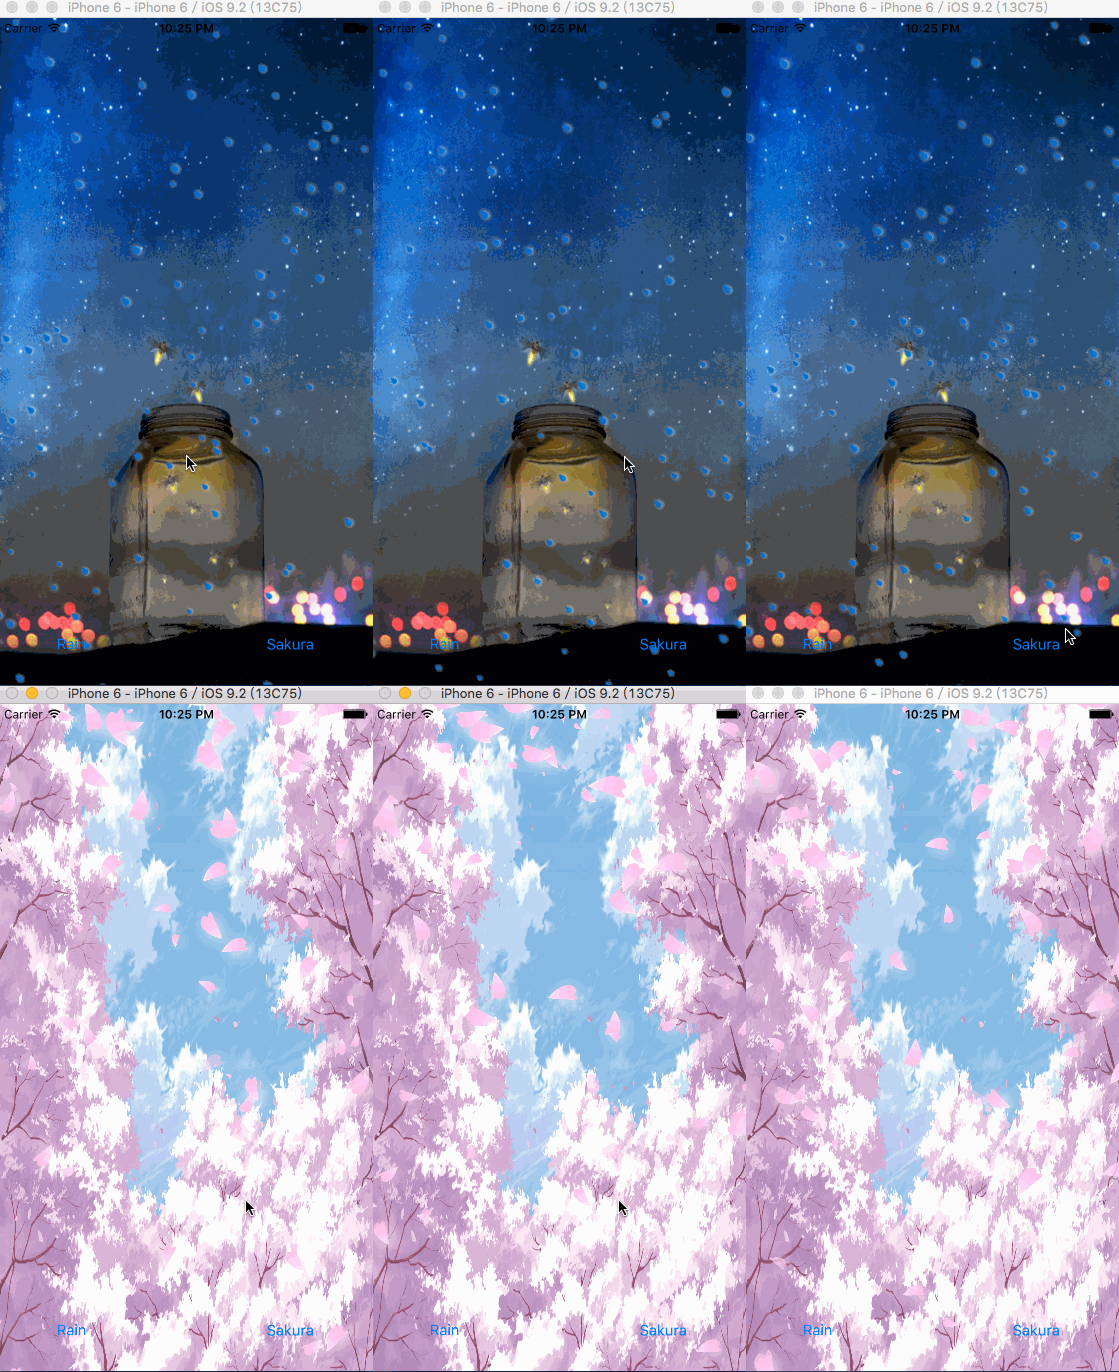
直接上程式碼
說到粒子特效,還是得服蘋果自家的 CAEmitter。它提供了非常豐富的屬性,雨滴、雪花、流星都能做出來,用法簡單、格調又不低。基本三步:建立 CAEmitterLayer 發射器圖層、建立 CAEmitterCell 粒子單元,然後依需求調整粒子屬性,最後別忘了把發射器圖層加到背景 view 的 sublayer 上。
@interface XMWeatherView () @property(nonatomic,strong) CAEmitterLayer *sunshineEmitterLayer; @property(nonatomic,strong) CAEmitterLayer *rainDropEmitterLayer; @property(nonatomic,strong) UIImageView *backgroundView; @end
每個屬性都有註解,剩下的就交給你的想像力了。
#pragma mark - 下雨特效 -(void)addRainningEffect{ self.backgroundView.image=[UIImage imageNamed:@"rainning.jpeg"]; //粒子發射器圖層 self.rainDropEmitterLayer=[CAEmitterLayer layer]; //發射器位置 _rainDropEmitterLayer.emitterPosition=CGPointMake(100, -30); //發射器的範圍 _rainDropEmitterLayer.emitterSize=CGSizeMake(self.bounds.size.width*4, 0); //發射模式 _rainDropEmitterLayer.emitterMode=kCAEmitterLayerOutline; //粒子形狀 _rainDropEmitterLayer.emitterShape=kCAEmitterLayerLine; //建立粒子 CAEmitterCell *emitterCell=[CAEmitterCell emitterCell]; //粒子內容 emitterCell.contents=(__bridge id)([UIImage imageNamed:@"42-Raindrop"].CGImage); //粒子縮放比例 emitterCell.scale=0.9; //縮放範圍 emitterCell.scaleRange=0.5; //每秒產生數量 emitterCell.birthRate=130; //粒子生命週期 emitterCell.lifetime=5; //透明度變化速度 emitterCell.alphaSpeed=-0.1; //粒子速度 emitterCell.velocity=280; emitterCell.velocityRange=100; //發射角度 emitterCell.emissionLongitude=-M_PI; // emitterCell.emissionRange=M_PI; //粒子自轉角速度 // emitterCell.spin=M_PI_4; //陰影不透明度 _rainDropEmitterLayer.shadowOpacity=1.0; //陰影圓角 _rainDropEmitterLayer.shadowRadius=2; //陰影偏移 _rainDropEmitterLayer.shadowOffset=CGSizeMake(1, 1); //陰影顏色 _rainDropEmitterLayer.shadowColor=[UIColor whiteColor].CGColor ; //設定 layer 的粒子 _rainDropEmitterLayer.emitterCells=@[emitterCell]; _rainDropEmitterLayer.transform=CATransform3DMakeRotation(-M_PI/4, 0, 0, 1); [self.layer addSublayer:_rainDropEmitterLayer]; }
櫻花的寫法大同小異,只要換一張貼圖、把 birthRate 調低、velocityRange 調大,再讓 spin 有值讓花瓣翻轉飄落,氣氛就出來了。
這篇就到這裡,有想法或問題歡迎隨時交流,希望對做 iOS 動畫的朋友有所幫助。
- 上一篇文章: iOS 封裝實作:打造可複用的 QR Code 掃描元件
- 下一篇文章: iOS 動畫:手勢驅動的 3D 抽屜側邊欄