
iOS 日曆翻頁動畫:用 CATransition 做出四角翻頁效果
本文主要談兩件事:
1. 日曆(大致講一下原理)
2. 翻頁動畫(重點)
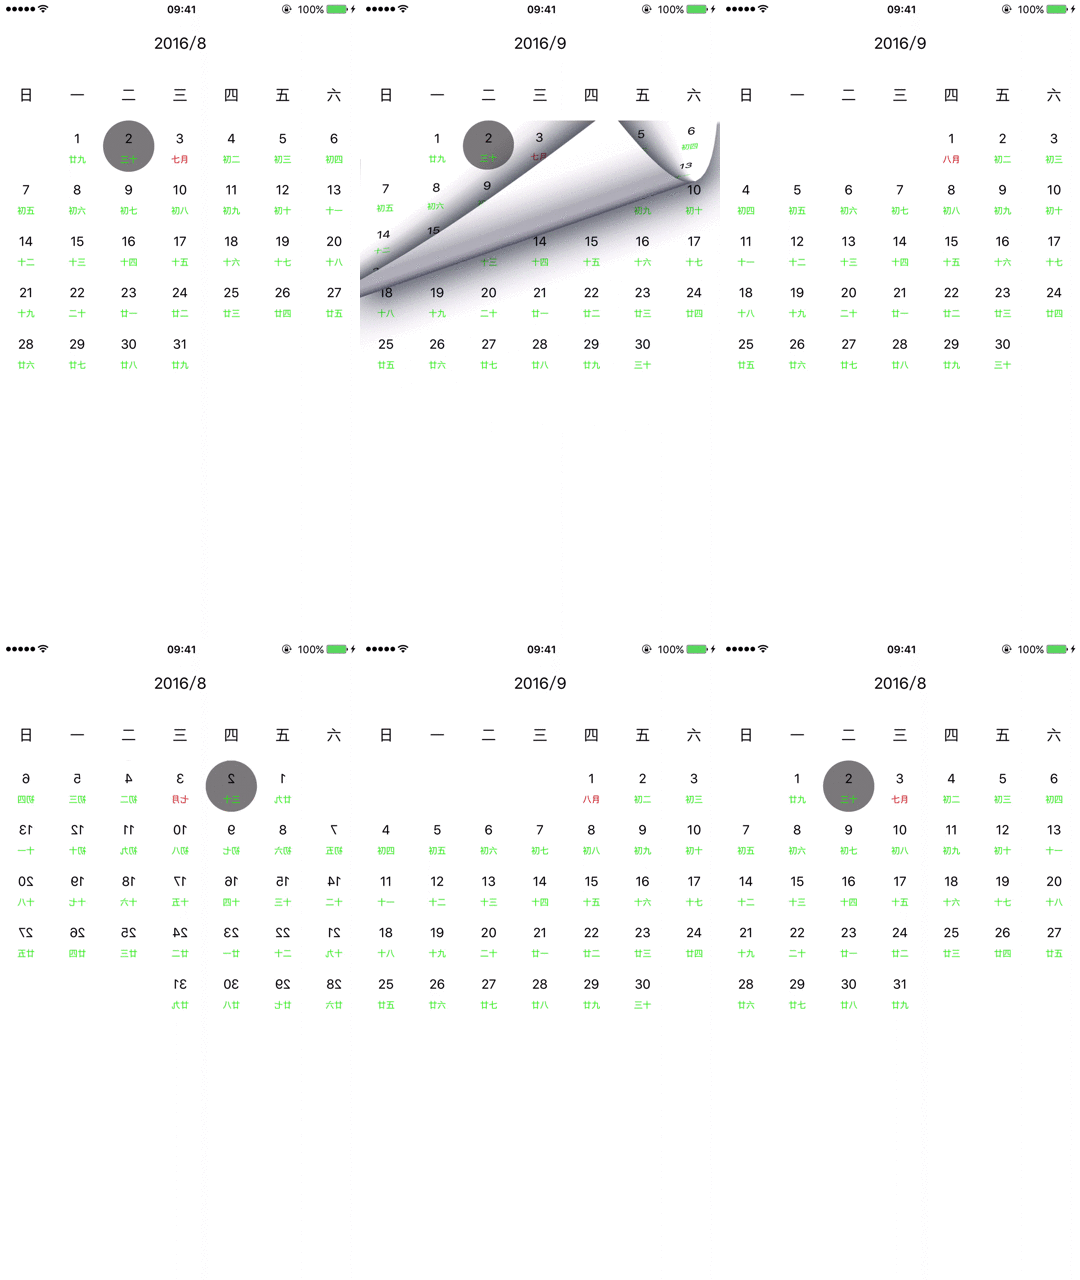
最終效果如下圖:
圖中沿四個對角進行的翻頁,對應四個方向的滑動手勢。
一、日曆
要做一個日曆,原理其實很單純,只要掌握三個資訊:
1. 今天是哪一天
2. 這個月的第一天是星期幾
3. 這個月總共有幾天
有了這三個數字,就能把日期填進格子裡。至於用什麼來呈現,個人偏好 UICollectionView,一個 cell 代表一天;當然也可以用一堆 label 或 button 拼出來。
1. 取得今天日期
這一步最簡單:NSDate() 就能拿到當前日期。
2. 取得本月第一天是星期幾
下面的方法都是掛在 NSDate 上的 extension:
//本月第一天 func firstDateOfCurrentMonth() ->NSDate{ let calendar = NSCalendar(identifier:NSCalendarIdentifierGregorian ) let currentDateComponents = calendar!.components([.Year,.Month], fromDate: self) let startOfMonth = calendar!.dateFromComponents(currentDateComponents) let date = startOfMonth?.dateByAddingTimeInterval(8*60*60) return date! } //本月第一天是星期幾 func firstDayOfCurrentMonth() -> Int { let calendar = NSCalendar.currentCalendar() let components = calendar.components(.Weekday, fromDate: firstDateOfCurrentMonth()) return components.weekday-1 }
3. 取得本月總天數
有了上面這些資訊,日曆裡每個格子該顯示幾號就都能推出來。至於具體的渲染,以及日期處理的三個關鍵類:NSDate、NSCalendar、NSDateComponents,由於不是本文重點,這裡就不展開了,有興趣的可以去翻官方文件(下次或許會專門寫一篇細講這三個類)。
二、翻頁動畫
思路:
這屬於轉場動畫的一種,所以可以用 CATransition 來做。它的用法相當簡單,設定時長、時間函數、fillMode 等屬性就能得到想要的動畫。其中 type 決定過渡的視覺效果,subType 一般代表方向。不過查文件會發現,官方只預定義了四種轉場效果:
NSString * const kCATransitionFade; NSString * const kCATransitionMoveIn; NSString * const kCATransitionPush; NSString * const kCATransitionReveal;
我們要的翻頁效果並不在其中。搜尋之後找到一個還不錯的作法:直接把 type 設成 "pageCurl" 或 "pageUnCurl"。這兩個值官方文件並沒有寫,也不知道是哪位先人挖出來的。
但預設的向上翻頁只有左上角翻起的效果,向下翻頁只有右下角翻起:
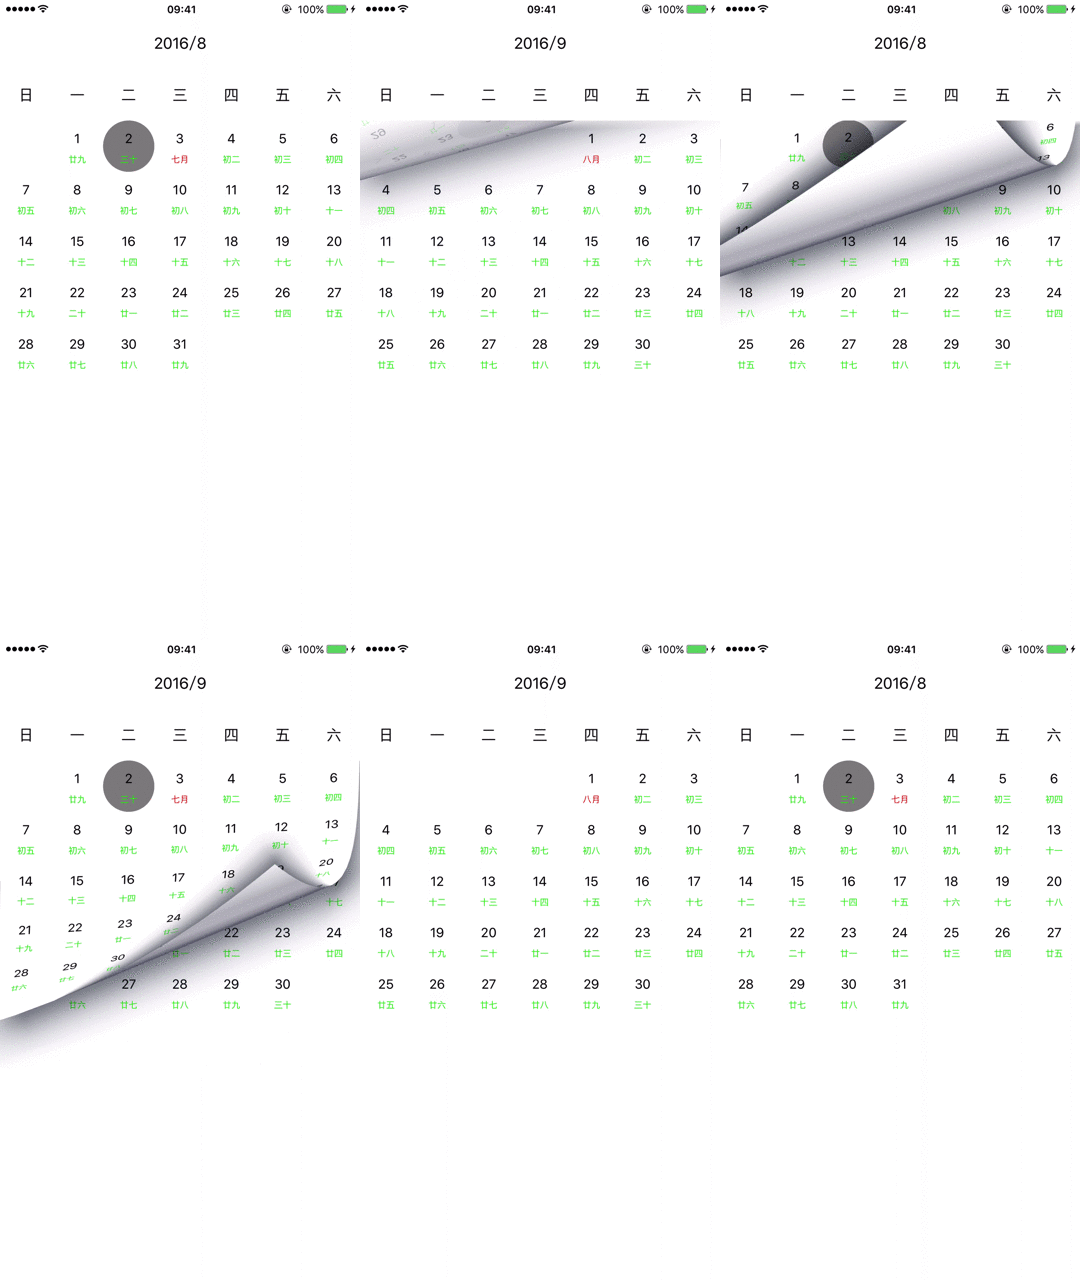
沒辦法做到沿四個對角都能翻頁。
想達成四個對角都能翻的效果,可以事先在最底層放一個 containerView,再把 dayView(本文提到的 dayView 都指作為日曆的那個 collectionView)放進去。
若要往右上角翻,只要先把 containerView 的 layer 沿 y 軸 旋轉 M_PI,原本右下角的翻起方向就被導到右上角去了。
但為了讓日曆內容顯示正確,需要把 dayView 的 layer 反向轉回來。這樣一來,containerView 是反的,但我們眼睛看到的日期仍是正的。左下角翻頁同理。
具體程式碼如下:
//為 dayView(代表日曆的 collectionview)加上滑動手勢 func addPanGestureToDayView() { let swipe = UIPanGestureRecognizer(target: self, action: #selector(self.panOnDayView(_:))) dayView.addGestureRecognizer(swipe) } //在 dayView 上滑動時觸發 func panOnDayView(pan: UIPanGestureRecognizer) { //手勢結束,且目前沒有動畫在跑(避免上一個翻頁還沒結束就接下一個) //就把轉場動畫加到 dayView 上 if pan.state == .Ended && !animatiing{ addAnimationToDayView(pan) } } let pageCurlDuration = 0.5 //動畫時長 let kPageCurlKey = "pageCurl" //往上翻頁的 type let kPageUnCurlKey = "pageUnCurl" //往下翻頁的 type //把動畫加到日曆上 func addAnimationToDayView(pan: UIPanGestureRecognizer) { let translation = pan.translationInView(dayView) //建立轉場動畫 let transitioin = CATransition() transitioin.duration = pageCurlDuration transitioin.timingFunction = CAMediaTimingFunction(name: "default") //動畫結束後保留最終狀態(這兩個屬性必須同時設定) transitioin.fillMode = kCAFillModeForwards transitioin.removedOnCompletion = false //設定代理,方便在動畫開始與結束時做額外處理 transitioin.delegate = self if translation.y < 0 {//手勢向上 * * if translation.x > 0 {//往右上滑,朝右上角翻頁 //沿 y 軸把 containerView 轉 M_PI,讓它的右下角變成左下角 animationContainerView.layer.transform = CATransform3DMakeRotation(CGFloat(M_PI), 0, 1, 0) //dayView 是加在 containerView 上的,不轉回來畫面會是顛倒的 dayView.layer.transform = CATransform3DMakeRotation(CGFloat(-M_PI), 0, 1, 0) } //轉場動畫的視覺效果 transitioin.type = kPageCurlKey //轉場方向 transitioin.subtype = kCATransitionFromBottom //用一個 month 的 key,方便動畫結束時判斷是上一月還是下一月 transitioin.setValue("next", forKey: "month") }else{//下 if translation.x < 0 {//往左下滑,朝左下角翻頁 animationContainerView.layer.transform = CATransform3DMakeRotation(CGFloat(M_PI), 0, 1, 0) dayView.layer.transform = CATransform3DMakeRotation(CGFloat(-M_PI), 0, 1, 0) } transitioin.type = kPageUnCurlKey transitioin.subtype = kCATransitionFromTop transitioin.setValue("pre", forKey: "month") } dayView.layer.addAnimation(transitioin, forKey: "pageCurl") }
動畫開始與結束時的收尾處理:
//由於上面設了 transitioin.delegate = self,這兩個代理方法會自動被呼叫 override func animationDidStart(anim: CAAnimation) { //動畫開始時判斷是往上還往下翻,據此更新日曆日期 animatiing = true let components = GregorianCalendar?.components([.Year,.Month,.Day], fromDate: date) if anim.valueForKey("month") as! String == "next" { components?.month += 1 }else if anim.valueForKey("month") as! String == "pre"{ components?.month -= 1 } date = (GregorianCalendar?.dateFromComponents(components!))! dateDidChaged!(date: date) } //動畫結束時把 transform 還原,並移除翻頁動畫 override func animationDidStop(anim: CAAnimation, finished flag: Bool) { if flag { animatiing = false animationContainerView.layer.transform = CATransform3DIdentity dayView.layer.transform = CATransform3DIdentity dayView.layer.removeAnimationForKey("pageCurl") } }
總結:
這篇沒有把每個細節都講透,其實翻頁動畫還有別的實作路線,只是因為我特別想要「四個對角都能翻」的效果,最後才選了這個方案。如果有些地方看不太懂,建議先把 CATransition 的用法摸熟再回頭看,會順暢很多。希望對正在做 iOS 動畫的朋友有幫助。