
iOS 多表視圖滑動切換實作(仿新聞客戶端)
編輯:iOS 相關資訊
今天分享一個新聞客戶端「多家別切換」的實作範例。Demo 中對所需元件做了簡單封裝,全部以純程式碼撰寫,想在專案中 reuse 只需稍作調整即可。
功能說明
畫面最上方左側的 TabBarButtonItem 用來減少類別數量,右側則用來增加。點擊對應按鈕會切換到該表視圖,下方紅色的長條是滑動指示器,同時也支援手勢左右滑動切換。
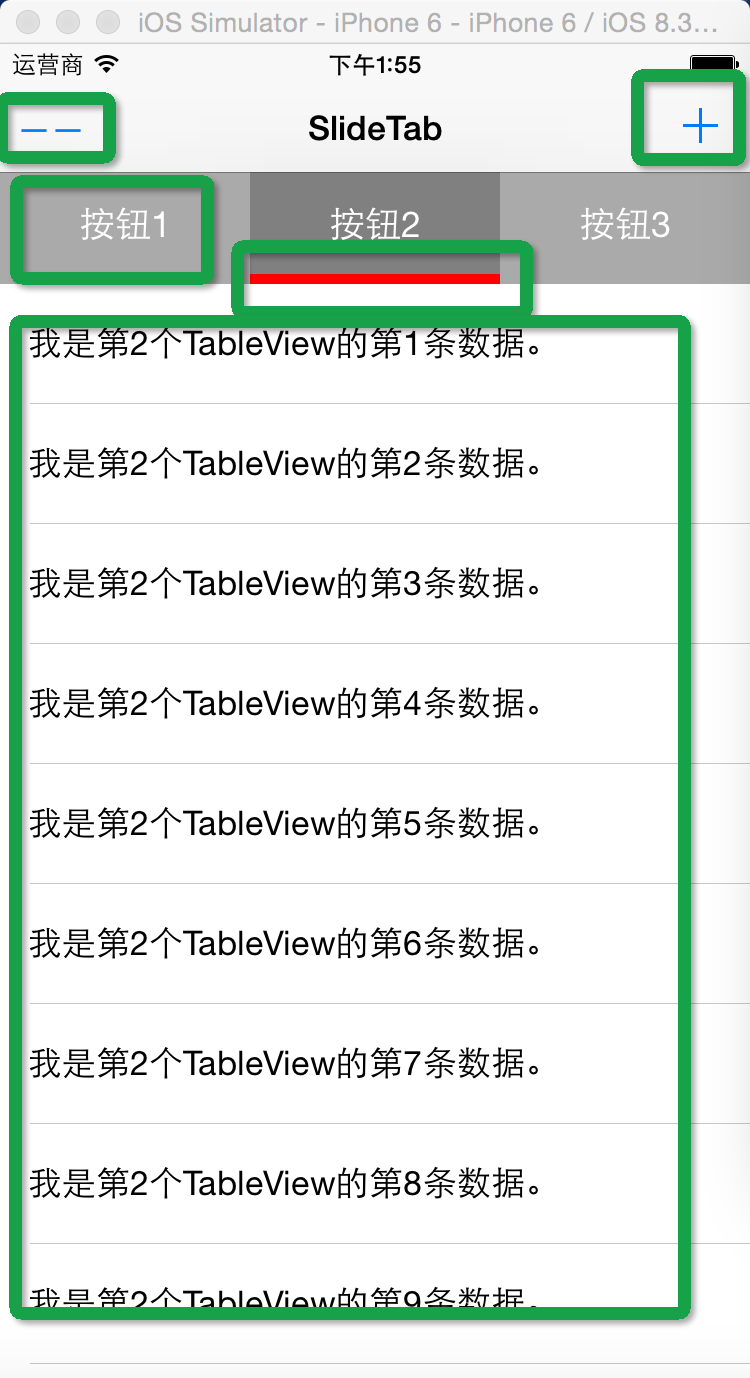
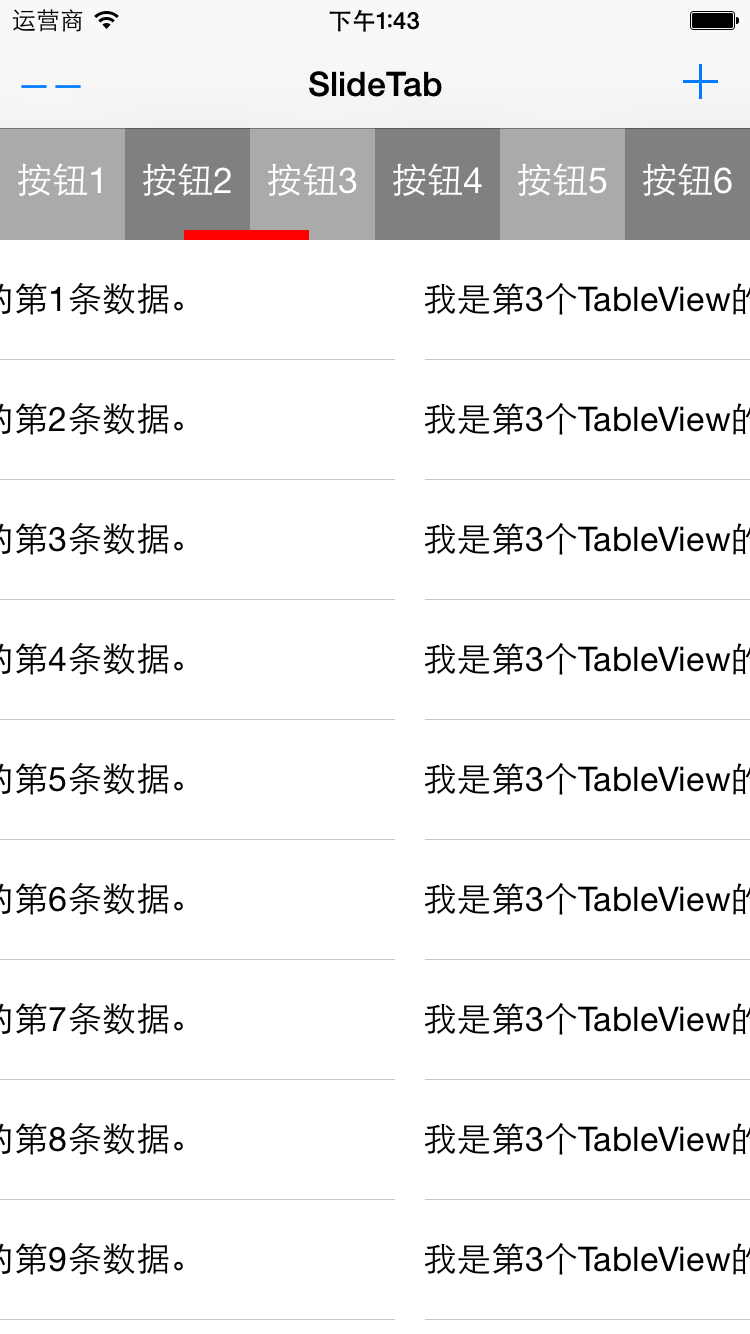
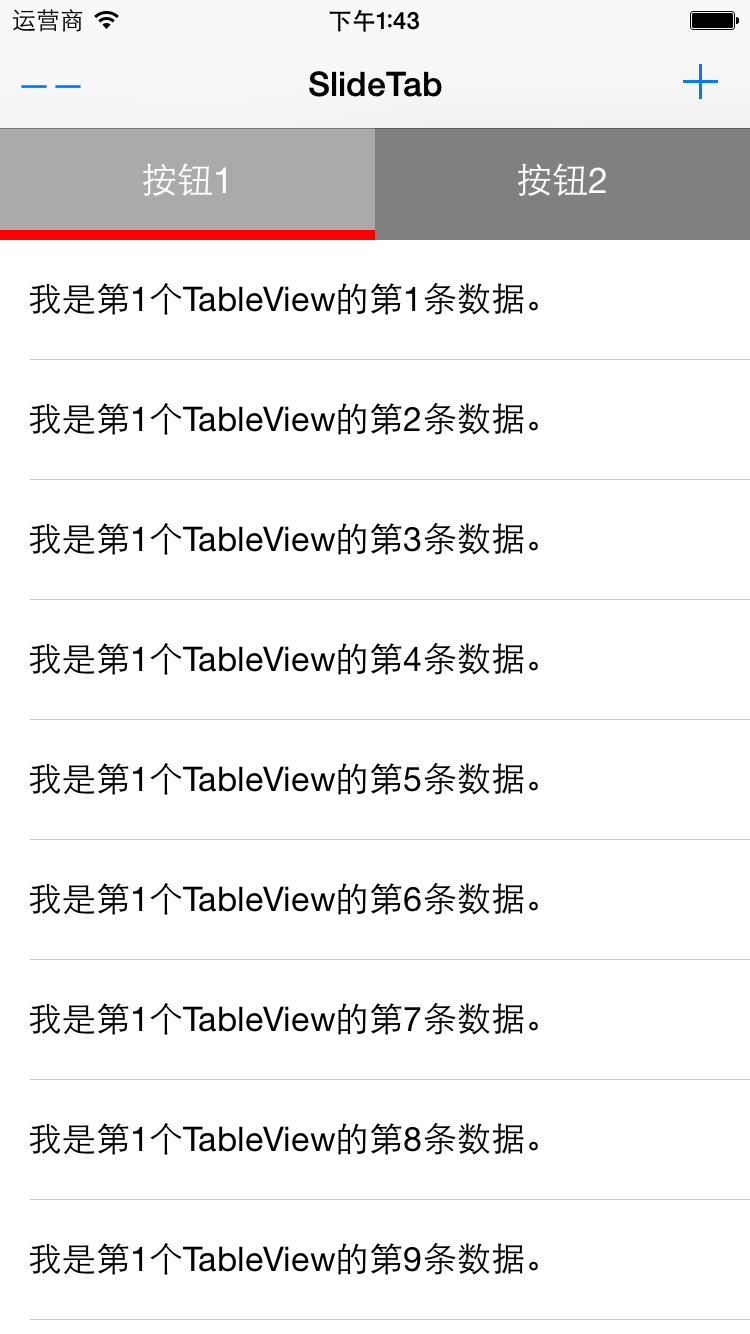
一、實作方案
最上方是一個 View,上面放了平分螢幕寬度的按鈕;下方是一個 ScrollView,裡面放著多個 TableView。點擊不同按鈕就滑動到對應的 TableView,除了點擊,也可以直接滑動切換,切換時紅色指示器會同步移動。
核心技術點在於透過 ScrollView 的 delegate 回呼,依 contentOffset 的變化計算指示器的偏移量,並在事件回應中改變 contentOffset 的值。
二、核心程式碼
1. 主要屬性
@interface SlideTabBarView () <UIScrollViewDelegate, UITableViewDataSource, UITableViewDelegate>

/// @brief 整個視圖的大小
@property (assign) CGRect mViewFrame;

/// @brief 下方的 ScrollView
@property (strong, nonatomic) UIScrollView *scrollView;

/// @brief 上方的按鈕陣列
@property (strong, nonatomic) NSMutableArray *topViews;

/// @brief 下方的表格陣列
@property (strong, nonatomic) NSMutableArray *scrollTableViews;

/// @brief TableView 的資料源
@property (strong, nonatomic) NSMutableArray *dataSource;

/// @brief 當前選中頁數
@property (assign) NSInteger currentPage;

/// @brief 下方滑動的 View
@property (strong, nonatomic) UIView *slideView;

@end
2. 初始化
呼叫時需傳入 SlideTabBarView 的 frame 與類別數量,內部會依序呼叫各個初始化方法。
-(instancetype)initWithFrame:(CGRect)frame WithCount:(NSInteger)count {
    self = [super initWithFrame:frame];
    if (self) {
        _mViewFrame = frame;
        _tabCount = count;
        _topViews = [[NSMutableArray alloc] init];
        _scrollTableViews = [[NSMutableArray alloc] init];

        [self initDataSource];
        [self initScrollView];
        [self initTopTabs];
        [self initDownTables];
        [self initDataSource];
        [self initSlideView];
    }
    return self;
}
3. 產生模擬資料
#pragma mark -- 初始化表格的資料源
-(void)initDataSource {
    _dataSource = [[NSMutableArray alloc] initWithCapacity:_tabCount];
    for (int i = 1; i <= _tabCount; i++) {
        NSMutableArray *tempArray = [[NSMutableArray alloc] initWithCapacity:20];
        for (int j = 1; j <= 20; j++) {
            NSString *tempStr = [NSString stringWithFormat:@"我是第%d個TableView的第%d條數據。", i, j];
            [tempArray addObject:tempStr];
        }
        [_dataSource addObject:tempArray];
    }
}
4. 紅色滑動指示器
#pragma mark -- 初始化滑動的指示View
-(void)initSlideView {
    CGFloat width = _mViewFrame.size.width / _tabCount;
    _slideView = [[UIView alloc] initWithFrame:CGRectMake(0, TOPHEIGHT - 5, width, 5)];
    [_slideView setBackgroundColor:[UIColor redColor]];
    [self addSubview:_slideView];
}
5. ScrollView 初始化
#pragma mark -- 實例化 ScrollView
-(void)initScrollView {
    _scrollView = [[UIScrollView alloc] initWithFrame:
        CGRectMake(0, _mViewFrame.origin.y,
                   _mViewFrame.size.width,
                   _mViewFrame.size.height - TOPHEIGHT)];
    _scrollView.contentSize = CGSizeMake(_mViewFrame.size.width * _tabCount,
                                         _mViewFrame.size.height - 60);
    _scrollView.backgroundColor = [UIColor grayColor];
    _scrollView.pagingEnabled = YES;
    _scrollView.delegate = self;
    [self addSubview:_scrollView];
}
6. 頂部按鈕
#pragma mark -- 實例化頂部的 tab
-(void)initTopTabs {
    CGFloat width = _mViewFrame.size.width / _tabCount;

    for (int i = 0; i < _tabCount; i++) {
        UIView *view = [[UIView alloc] initWithFrame:CGRectMake(i * width, 0, width, TOPHEIGHT)];
        view.backgroundColor = (i % 2) ? [UIColor grayColor] : [UIColor lightGrayColor];

        UIButton *button = [[UIButton alloc] initWithFrame:CGRectMake(0, 0, width, TOPHEIGHT)];
        button.tag = i;
        [button setTitle:[NSString stringWithFormat:@"Tab%d", i] forState:UIControlStateNormal];
        [button addTarget:self action:@selector(tabButton:) forControlEvents:UIControlEventTouchUpInside];

        [view addSubview:button];
        [_topViews addObject:view];
        [self addSubview:view];
    }
}
7. 點擊按鈕
#pragma mark -- 點擊頂部的按鈕所觸發的方法
-(void)tabButton:(id)sender {
    UIButton *button = sender;
    [_scrollView setContentOffset:CGPointMake(button.tag * _mViewFrame.size.width, 0)
                         animated:YES];
}
8. 下方多個 TableView
#pragma mark -- 初始化下方的 TableViews
-(void)initDownTables {
    for (int i = 0; i < _tabCount; i++) {
        UITableView *tableView = [[UITableView alloc] initWithFrame:
            CGRectMake(i * _mViewFrame.size.width, 0,
                       _mViewFrame.size.width,
                       _mViewFrame.size.height - TOPHEIGHT)];
        tableView.delegate = self;
        tableView.dataSource = self;

        [_scrollTableViews addObject:tableView];
        [_scrollView addSubview:tableView];
    }
}
9. ScrollView 的 delegate 方法
#pragma mark -- scrollView 的代理方法
-(void)scrollViewDidEndScrollingAnimation:(UIScrollView *)scrollView {
    [self scrollViewDidEndDecelerating:scrollView];
}

- (void)scrollViewDidEndDecelerating:(UIScrollView *)scrollView
{
    _currentPage = _scrollView.contentOffset.x / _mViewFrame.size.width;

    UITableView *currentTable = _scrollTableViews[_currentPage];
    [currentTable reloadData];
}

-(void)scrollViewDidScroll:(UIScrollView *)scrollView {
    if ([_scrollView isEqual:scrollView]) {
        CGRect frame = _slideView.frame;
        frame.origin.x = scrollView.contentOffset.x / _tabCount;
        _slideView.frame = frame;
    }
}
最後一個方法依 ScrollView 的偏移量計算紅色指示器的位置;第二個方法則在滑動結束後載入對應 TableView 的資料。
10. TableView 的 delegate 方法
#pragma mark -- tableView 的代理方法
-(NSInteger)numberOfSectionsInTableView:(UITableView *)tableView {
    return 1;
}

-(NSInteger)tableView:(UITableView *)tableView numberOfRowsInSection:(NSInteger)section {
    NSMutableArray *tempArray = _dataSource[_currentPage];
    return tempArray.count;
}

-(CGFloat)tableView:(UITableView *)tableView heightForRowAtIndexPath:(NSIndexPath *)indexPath {
    return 60;
}

-(UITableViewCell *)tableView:(UITableView *)tableView cellForRowAtIndexPath:(NSIndexPath *)indexPath
{
    BOOL nibsRegistered = NO;
    if (!nibsRegistered) {
        UINib *nib = [UINib nibWithNibName:@"SlideBarCell" bundle:nil];
        [tableView registerNib:nib forCellReuseIdentifier:@"SlideBarCell"];
        nibsRegistered = YES;
    }

    SlideBarCell *cell = [tableView dequeueReusableCellWithIdentifier:@"SlideBarCell"];
    if ([tableView isEqual:_scrollTableViews[_currentPage]]) {
        cell.tipTitle.text = _dataSource[_currentPage][indexPath.row];
    }
    return cell;
}
小結
整個元件的關鍵是「一個 ScrollView 承載多個 TableView,加上分頁啟用(pagingEnabled)」,剩下的都是圍繞 contentOffset 的計算。指示器的位置由偏移量除以類別數量得出,因此滑動過程能與手指同步;而資料載入則等到滑動停止後才觸發,避免不必要的效能消耗。
Demo 已分享於 GitHub:https://github.com/lizelu/SliderTabBar
- 上一篇文章: 【C 語言】巨集定義 #define 的完整說明
- 下一篇文章: 【學習筆記】【C 語言】typedef 的用法整理