
iPhone 進階:基於 XMPP 的 iOS 聊天客戶端實作
編輯:iOS 相關資訊
本文將實作一個基於 XMPP 通訊協定(搭配 XMPPFramework)的 iOS 聊天客戶端,涵蓋連線、登入、好友狀態更新、訊息收發與聊天介面等完整流程。
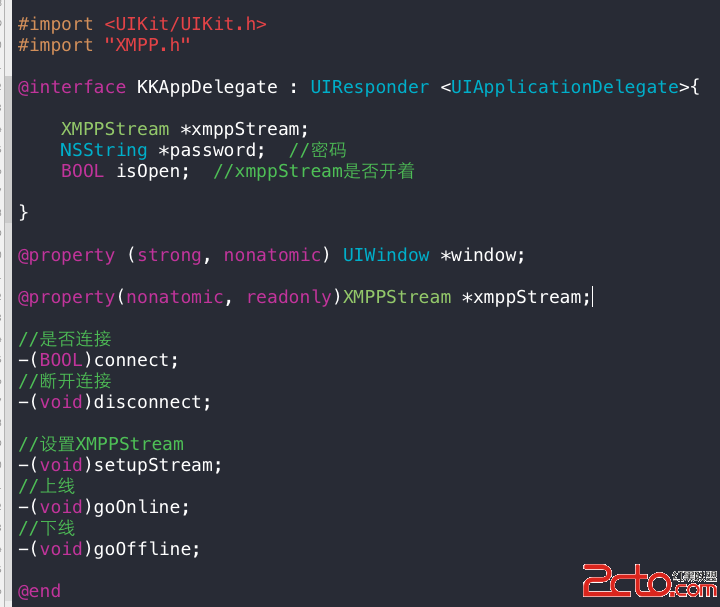
一、在 AppDelegate 中封裝 XMPP 主要方法
為了方便各處呼叫,我們把 XMPP 的核心方法寫在 AppDelegate 中,包含初始化串流、上下線、連線與斷線:
- (void)setupStream {
    // 初始化 XMPPStream
    xmppStream = [[XMPPStream alloc] init];
    [xmppStream addDelegate:self delegateQueue:dispatch_get_current_queue()];
}

- (void)goOnline {
    // 發送在線狀態
    XMPPPresence *presence = [XMPPPresence presence];
    [[self xmppStream] sendElement:presence];
}

- (void)goOffline {
    // 發送離線狀態
    XMPPPresence *presence = [XMPPPresence presenceWithType:@"unavailable"];
    [[self xmppStream] sendElement:presence];
}

- (BOOL)connect {
    [self setupStream];

    // 從本地取得使用者名稱、密碼與伺服器位址
    NSUserDefaults *defaults = [NSUserDefaults standardUserDefaults];
    NSString *userId = [defaults stringForKey:USERID];
    NSString *pass   = [defaults stringForKey:PASS];
    NSString *server = [defaults stringForKey:SERVER];

    if (![xmppStream isDisconnected]) {
        return YES;
    }
    if (userId == nil || pass == nil) {
        return NO;
    }

    [xmppStream setMyJID:[XMPPJID jidWithString:userId]]; // 設定使用者
    [xmppStream setHostName:server];                       // 設定伺服器
    password = pass;                                       // 設定密碼

    // 連線到伺服器
    NSError *error = nil;
    if (![xmppStream connect:&error]) {
        NSLog(@"cant connect %@", server);
        return NO;
    }
    return YES;
}

- (void)disconnect {
    [self goOffline];
    [xmppStream disconnect];
}
二、XMPPStreamDelegate:接收好友狀態與訊息
接下來是接收好友狀態與訊息的關鍵代理方法:
// 連上伺服器
- (void)xmppStreamDidConnect:(XMPPStream *)sender {
    isOpen = YES;
    NSError *error = nil;
    // 驗證密碼
    [[self xmppStream] authenticateWithPassword:password error:&error];
}

// 驗證通過
- (void)xmppStreamDidAuthenticate:(XMPPStream *)sender {
    [self goOnline];
}

// 收到訊息
- (void)xmppStream:(XMPPStream *)sender didReceiveMessage:(XMPPMessage *)message {
    NSString *msg  = [[message elementForName:@"body"] stringValue];
    NSString *from = [[message attributeForName:@"from"] stringValue];

    NSMutableDictionary *dict = [NSMutableDictionary dictionary];
    [dict setObject:msg forKey:@"msg"];
    [dict setObject:from forKey:@"sender"];

    // 透過訊息代理通知
    [messageDelegate newMessageReceived:dict];
}

// 收到好友狀態
- (void)xmppStream:(XMPPStream *)sender didReceivePresence:(XMPPPresence *)presence {
    NSString *presenceType = [presence type];           // online / offline
    NSString *userId = [[sender myJID] user];           // 當前使用者
    NSString *presenceFromUser = [[presence from] user]; // 上線使用者

    if (![presenceFromUser isEqualToString:userId]) {
        if ([presenceType isEqualToString:@"available"]) {
            // 好友上線
            [chatDelegate newBuddyOnline:[NSString stringWithFormat:@"%@@%@", presenceFromUser, @"nqc1338a"]];
        } else if ([presenceType isEqualToString:@"unavailable"]) {
            // 好友離線
            [chatDelegate buddyWentOffline:[NSString stringWithFormat:@"%@@%@", presenceFromUser, @"nqc1338a"]];
        }
    }
}
這裡定義了兩個代理:一個是「好友列表代理」,用來取得上線好友並更新好友列表 TableView;另一個是「訊息代理」,用來接收好友訊息並更新訊息 TableView。兩者位於不同的 Controller 中。
三、好友列表 Controller
讓好友 Controller 實作 KKChatDelegate,並在 viewDidLoad 中設定代理:
- (KKAppDelegate *)appDelegate {
    return (KKAppDelegate *)[[UIApplication sharedApplication] delegate];
}

- (XMPPStream *)xmppStream {
    return [[self appDelegate] xmppStream];
}

// 好友上線
- (void)newBuddyOnline:(NSString *)buddyName {
    if (![onlineUsers containsObject:buddyName]) {
        [onlineUsers addObject:buddyName];
        [self.tView reloadData];
    }
}

// 好友離線
- (void)buddyWentOffline:(NSString *)buddyName {
    [onlineUsers removeObject:buddyName];
    [self.tView reloadData];
}

// 於 viewDidLoad 中設定代理
KKAppDelegate *del = [self appDelegate];
del.chatDelegate = self;
在 viewWillAppear 中判斷本地是否已存有 userId,若無則跳轉登入頁;有的話直接呼叫 connect 登入並顯示好友列表:
- (void)viewWillAppear:(BOOL)animated {
    [super viewWillAppear:animated];
    NSString *login = [[NSUserDefaults standardUserDefaults] objectForKey:@"userId"];
    if (login) {
        if ([[self appDelegate] connect]) {
            NSLog(@"show buddy list");
        }
    } else {
        [self Account:self]; // 跳轉登入頁
    }
}
點選好友後,透過 segue 將對方名稱傳給聊天頁面:
- (void)tableView:(UITableView *)tableView didSelectRowAtIndexPath:(NSIndexPath *)indexPath {
    chatUserName = (NSString *)[onlineUsers objectAtIndex:indexPath.row];
    [self performSegueWithIdentifier:@"chat" sender:self];
}

- (void)prepareForSegue:(UIStoryboardSegue *)segue sender:(id)sender {
    if ([segue.identifier isEqualToString:@"chat"]) {
        KKChatController *chatController = segue.destinationViewController;
        chatController.chatWithUser = chatUserName;
    }
}
四、聊天 Controller
聊天頁面用一個陣列 messages 存放訊息,每則訊息以字典表示。顯示訊息的 cell 設定如下:
- (UITableViewCell *)tableView:(UITableView *)tableView cellForRowAtIndexPath:(NSIndexPath *)indexPath {
    static NSString *identifier = @"msgCell";
    UITableViewCell *cell = [tableView dequeueReusableCellWithIdentifier:identifier];
    if (cell == nil) {
        cell = [[UITableViewCell alloc] initWithStyle:UITableViewCellStyleSubtitle reuseIdentifier:identifier];
    }
    NSMutableDictionary *dict = [messages objectAtIndex:indexPath.row];
    cell.textLabel.text = [dict objectForKey:@"msg"];
    cell.detailTextLabel.text = [dict objectForKey:@"sender"];
    cell.accessoryType = UITableViewCellAccessoryNone;
    return cell;
}

// 於 viewDidLoad 中設定訊息代理
KKAppDelegate *del = [self appDelegate];
del.messageDelegate = self;

// 收到新訊息
- (void)newMessageReceived:(NSDictionary *)messageContent {
    [messages addObject:messageContent];
    [self.tView reloadData];
}
五、發送訊息
發送訊息時,透過 KissXML 組出 XMPP 所需的 XML 結構,再交給串流送出:
- (IBAction)sendButton:(id)sender {
    NSString *message = self.messageTextField.text;
    if (message.length > 0) {
        // 建立 <body> 節點
        NSXMLElement *body = [NSXMLElement elementWithName:@"body"];
        [body setStringValue:message];

        // 建立 <message> 節點
        NSXMLElement *mes = [NSXMLElement elementWithName:@"message"];
        [mes addAttributeWithName:@"type" stringValue:@"chat"];   // 訊息類型
        [mes addAttributeWithName:@"to" stringValue:chatWithUser]; // 收件者
        [mes addAttributeWithName:@"from" stringValue:[[NSUserDefaults standardUserDefaults] stringForKey:USERID]]; // 寄件者
        [mes addChild:body];

        // 發送訊息
        [[self xmppStream] sendElement:mes];

        self.messageTextField.text = @"";
        [self.messageTextField resignFirstResponder];

        // 將自己發送的訊息也加入列表
        NSMutableDictionary *dictionary = [NSMutableDictionary dictionary];
        [dictionary setObject:message forKey:@"msg"];
        [dictionary setObject:@"you" forKey:@"sender"];
        [messages addObject:dictionary];

        [self.tView reloadData];
    }
}
以上程式碼均附有註解,讀者應不難理解。後續章節將進一步美化訊息畫面,使其呈現效果接近 iOS 內建訊息 App;之後也會接續介紹 XMPP 的檔案傳輸等功能。
- 上一篇文章: 用 Cocos2D-x 打造《植物大戰殭屍》iOS 簡易版
- 下一篇文章: iOS 中 copy 關鍵字的用法與深拷貝解析