
Auto Layout 入門完全整理:Interface Builder、Size Class、VFL 與 Masonry
複習 Auto Layout 時翻了不少文章,寫得好的其實很多。但這麼基礎又這麼常用的東西,筆記裡沒有實在說不過去,於是有了這篇偏入門的整理。
- Interface Builder 工具列逐項說明(Align、Pin、Resolve Issues、Resizing)
- Size Class 與多螢幕適配、重寫布局
- 用 Xcode 6 Preview 省下反覆 Run 的時間
- VFL 語法概覽
- 常見疑問與 Masonry 對照
Interface Builder 工具列
Storyboard 右下角的四個圖示,滑鼠停留就會顯示名稱,由左至右是:
- Align:設定對齊相關約束
- Pin:設定相對大小與位置
- Resolve Auto Layout Issues:處理約束衝突與缺失
- Resizing Behavior:改變尺寸時如何影響其他物件

Align:對齊
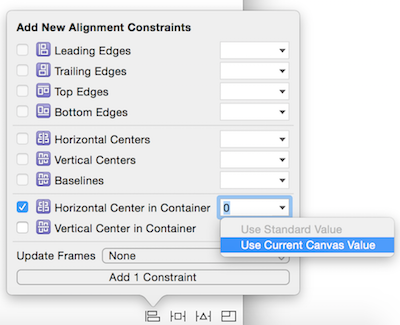
同層級 View 之間的對齊選項包括 Leading / Trailing Edges(頭尾對齊)、Top / Bottom Edges(頂底對齊)、Horizontal / Vertical Centers(水平與垂直中心對齊),以及 BaseLines——基線對齊,主要用於 UILabel、UIButton 這類含文字控件。
SuperView 與 SubView 之間則有 Horizontal Center in Container 與 Vertical Center in Container,用來表達子視圖中心與容器中心的相對距離。數值輸入框右側的下拉選單可選「Use Current Canvas Value」,代表直接沿用目前 Xib/Storyboard 上的差值。
最下方的 Update Frames 決定套用約束後如何更新 frame,共三個選項,預設為 None:
- None:不更新 frame
- Items of New Constraints:只更新新加入約束涉及的物件
- All Frames in Container:更新容器內全部 frame
Pin:相對大小與位置
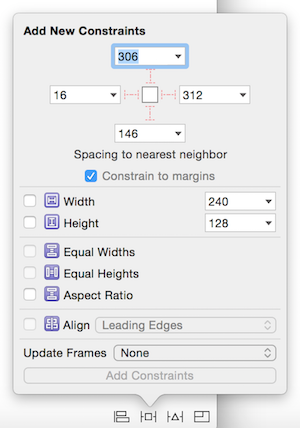
上方四個矩形框搭配四條虛線,用過舊式 autoresizing 的人會很熟悉。框內數字代表當前 View 到最近相鄰 View(注意不是 SuperView)的距離。
下方灰色選項「Constrain to margins」表示約束相對於 margins 建立,margin 預設為 16。所以若顯示上邊距 306,勾選此項後實際距離為 322。
其餘可設定的項目:
Width / Height     固定寬高
Equal Widths       兩個同層 View 寬度相等
Equal Heights      兩個同層 View 高度相等
Aspect Ratio       自身寬高比
Align              同前述 Align 功能
Resolve Auto Layout Issues
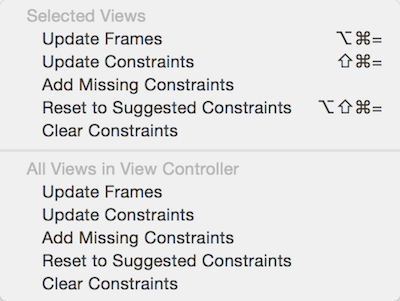
可選擇處理範圍是「當前選取的 Views」還是「Controller 內所有 Views」,動作則有:
Update Frames              更新 frame
Update Constraints         更新約束
Add Missing Constraints    補上缺失約束
Reset to Suggested Constraints  重置為建議約束
Clear Constraints          清除約束
Resizing Behavior

Siblings and Ancestors   影響同層與上層 Views
Descendants              影響下層 Views
這一項的實際差異在實測中並不明顯,官方文檔也只做了簡單文字說明,這裡如實記錄。
Size Class:多螢幕適配
Size Class 可以理解為「尺寸等級」,它把螢幕尺寸抽象成寬高兩個維度,每個維度有三種型態:Compact(緊湊)、Any(任意)、Regular(普通)。
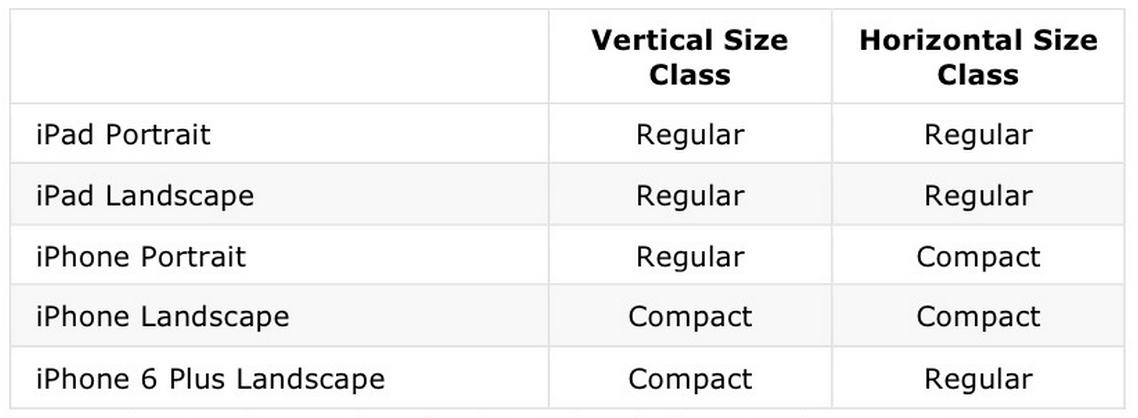
具體選擇某個尺寸後,IB 會顯示該尺寸的寬高型態、對應的裝置類型等資訊。
重寫布局
若某組約束在其他尺寸型態下表現不如預期,可以針對該型態「重寫」布局。例如下圖的 UIView 設定了 wAny|hAny 的四邊約束:
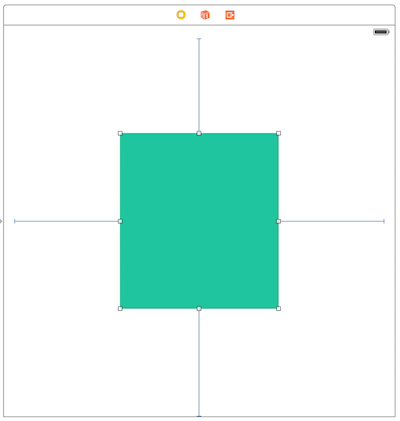
點選該 View,在 Attribute Inspector 中會看到 install 選項被勾選:
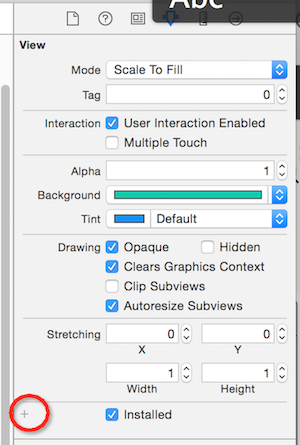
Installed / Uninstalled 表示這條約束是否作用於某尺寸型態;前面沒有標註時,代表作用於 wAny|hAny。若要為特定型態單獨設定,點擊加號選擇型態即可:
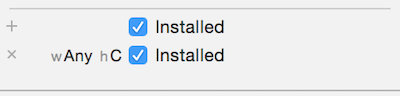
取消勾選後,該布局在此型態下失效,接著就能切換型態重新配置約束。
只想改單條約束時,可到 Size Inspector:
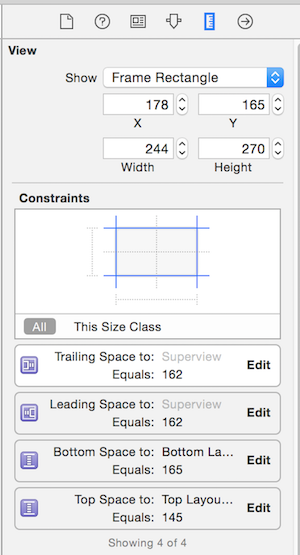
選擇 Constraints – All 列出全部約束,雙擊任一條會看到類似介面,Installed 前方同樣有加號:
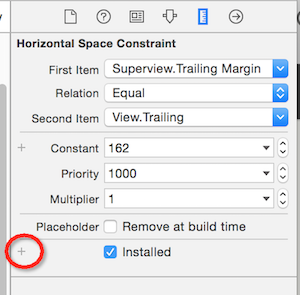
規律其實很簡單:Inspector 中某選項前方有加號,就代表它可以被重寫。上圖中 Constant 前方也有加號,說明它同樣能按尺寸型態分別設定。
但要留意一個例外:與布局不同,UILabel 的 font 等文字屬性一旦在不同 size class 中修改,會直接影響基礎布局中的文字,無法像約束那樣各自獨立。這類需求需要另尋解法(例如為不同型態準備不同的 Label 或改用程式動態設定)。
用 Preview 取代反覆 Run
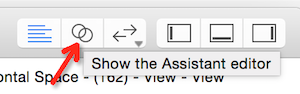
尺寸型態一多,每改一處就 Run 一次實在太耗時間。Xcode 6 的 Preview 功能正是為此而生。點擊工具列的 Assistant Editor:
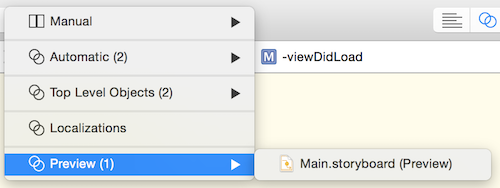
選擇 Preview 進入預覽:
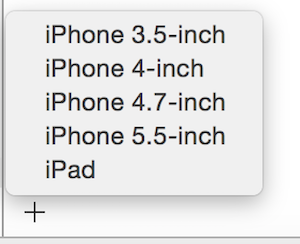
想同時看多種螢幕,點擊預覽介面左下角的加號:
要檢查橫向/縱向表現,點擊裝置下方的旋轉按鈕即可:
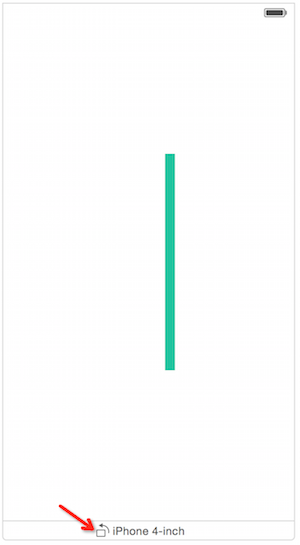
VFL(Visual Format Language)
VFL 的價值在於用極短的篇幅描述多個視圖的相對關係,帶有某種「象形文字」的直覺感;缺點是風格與 Swift / Objective-C 語法不太協調。具體語法建議直接參考官方文檔,圖示說明得相當清楚。
常見疑問
- 設了 Auto Layout 之後,還能在程式碼裡改 frame 嗎?
不能。frame 由約束系統決定,直接改會在下次排版時被覆蓋。 - 為什麼有些控件只約束 x、y 也不報錯?
UILabel、UIImageView 等具備內建尺寸,會依內容自適應,因此寬高可不約束。 - 同樣的約束用在 UIScrollView 上就出問題?
ScrollView 的 contentSize 與 bounds 是分離的,需要額外約束來定義內容範圍,這是最常見的踩坑點。
Masonry:用鏈式語法取代 NSLayoutConstraint
Masonry 目前公認是 Auto Layout 最好用的替代方案,語法直觀,也不容易出現意料之外的布局。先看原生寫法——只是讓 subview 填滿 superview 並留出 10pt 邊距,就要寫這麼多:
UIView *superview = self;
UIView *view1 = [[UIView alloc] init];
view1.translatesAutoresizingMaskIntoConstraints = NO;
view1.backgroundColor = [UIColor greenColor];
[superview addSubview:view1];

UIEdgeInsets padding = UIEdgeInsetsMake(10, 10, 10, 10);

[superview addConstraints:@[
    [NSLayoutConstraint constraintWithItem:view1 attribute:NSLayoutAttributeTop
        relatedBy:NSLayoutRelationEqual toItem:superview
        attribute:NSLayoutAttributeTop multiplier:1.0 constant:padding.top],
    [NSLayoutConstraint constraintWithItem:view1 attribute:NSLayoutAttributeLeft
        relatedBy:NSLayoutRelationEqual toItem:superview
        attribute:NSLayoutAttributeLeft multiplier:1.0 constant:padding.left],
    [NSLayoutConstraint constraintWithItem:view1 attribute:NSLayoutAttributeBottom
        relatedBy:NSLayoutRelationEqual toItem:superview
        attribute:NSLayoutAttributeBottom multiplier:1.0 constant:-padding.bottom],
    [NSLayoutConstraint constraintWithItem:view1 attribute:NSLayoutAttributeRight
        relatedBy:NSLayoutRelationEqual toItem:superview
        attribute:NSLayoutAttributeRight multiplier:1 constant:-padding.right],
]];
換成 Masonry:
UIEdgeInsets padding = UIEdgeInsetsMake(10, 10, 10, 10);

[view1 mas_makeConstraints:^(MASConstraintMaker *make) {
    make.top.equalTo(superview.mas_top).with.offset(padding.top);
    make.left.equalTo(superview.mas_left).with.offset(padding.left);
    make.bottom.equalTo(superview.mas_bottom).with.offset(-padding.bottom);
    make.right.equalTo(superview.mas_right).with.offset(-padding.right);
}];
程式碼少了一半以上。而如果是單純的四邊填滿,還能再短:
[view1 mas_makeConstraints:^(MASConstraintMaker *make) {
    make.edges.equalTo(superview).with.insets(padding);
}];
整个世界都清净了。