
UITableView 實作汽車品牌列表(完整 Demo)
研究 TableView 已有一段時間,一直想寫點東西卻總因故拖延,今晚終於靜下心來整理近期所學。UITableView 堪稱 UIKit 中最複雜的控件之一,使用起來不算難,但要用得恰到好處並不容易——必須兼顧後台資料設計、Cell 的設計與重用,以及整體效能等問題。
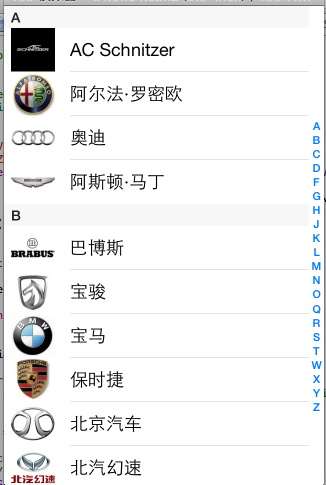
本文以「汽車品牌」為例,做一個分區列表的小程式。
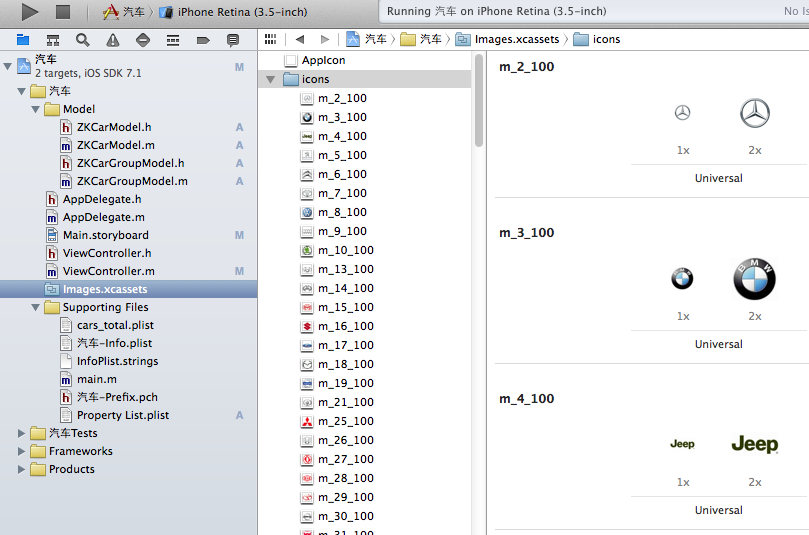
1.1 建立專案,把各汽車品牌圖片放入 images.xcassets。
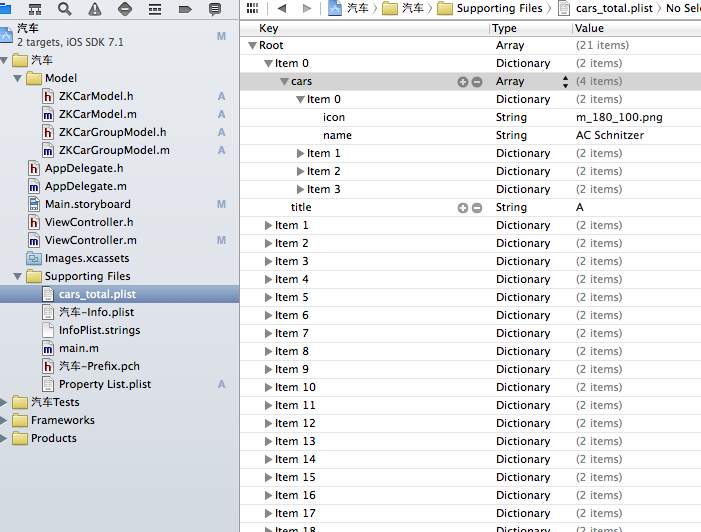
1.2 建立 plist 資料:每個 array 代表一個汽車品牌分組,array 內再嵌套一個 array,存放該分組下所有品牌資料。
1.3 設計頁面:直接放置一個 UITableView 即可。
2.1 導入代理協議:
<UITableViewDataSource, UITableViewDelegate, UIAlertViewDelegate>
2.2 建立表格屬性與資料陣列:
@property (weak, nonatomic) IBOutlet UITableView *tableView;
@property (nonatomic, strong) NSArray *carGroups;
2.3 建立模型類:由於資料是本地 plist 的嵌套陣列結構,需要兩個模型類——一個保存外層 array,一個保存內層子 array,並在模型中建立與 plist 對應的屬性與方法。
// ZKCarModel.h
@interface ZKCarModel : NSObject
@property (nonatomic, copy) NSString *icon; // 頭像
@property (nonatomic, copy) NSString *name; // 名字
+ (instancetype)carWithDict:(NSDictionary *)dic;
- (instancetype)initWithDict:(NSDictionary *)dic;
@end

// ZKCarModel.m
@implementation ZKCarModel
- (instancetype)initWithDict:(NSDictionary *)dic {
    if (self = [super init]) {
        [self setValuesForKeysWithDictionary:dic];
    }
    return self;
}
+ (instancetype)carWithDict:(NSDictionary *)dic {
    return [[self alloc] initWithDict:dic];
}
@end

// ZKCarGroupModel.m
@implementation ZKCarGroupModel
- (instancetype)initWithDict:(NSDictionary *)dic {
    if (self = [super init]) {
        self.title = dic[@"title"];
        NSMutableArray *array = [NSMutableArray array];
        for (NSDictionary *dict in dic[@"cars"]) {
            ZKCarModel *car = [ZKCarModel carWithDict:dict];
            [array addObject:car];
        }
        self.cars = array;
    }
    return self;
}
@end
2.4 資料懶加載:讀取本地 plist 並轉換為模型陣列,供表格使用。
2.5 實作表格代理方法:
// 分區數量
- (NSInteger)numberOfSectionsInTableView:(UITableView *)tableView {
    return self.carGroups.count;
}
// 每個分區的行數
- (NSInteger)tableView:(UITableView *)tableView numberOfRowsInSection:(NSInteger)section {
    ZKCarGroupModel *model = self.carGroups[section];
    return model.cars.count;
}
// 每一行的內容
- (UITableViewCell *)tableView:(UITableView *)tableView cellForRowAtIndexPath:(NSIndexPath *)indexPath {
    static NSString *ID = @"A";
    UITableViewCell *cell = [tableView dequeueReusableCellWithIdentifier:ID];
    if (cell == nil) {
        cell = [[UITableViewCell alloc] initWithStyle:UITableViewCellStyleSubtitle reuseIdentifier:ID];
    }
    ZKCarGroupModel *groupModel = self.carGroups[indexPath.section];
    ZKCarModel *carModel = groupModel.cars[indexPath.row];
    cell.textLabel.text = carModel.name;
    cell.imageView.image = [UIImage imageNamed:carModel.icon];
    return cell;
}
以上三個是 UITableView 最常用的代理方法,寫完即可運行看到資料。此時所有品牌都由上而下排列、缺乏分組,查找不便,因此需為每個分區加上標題,使用 titleForHeaderInSection:
- (NSString *)tableView:(UITableView *)tableView titleForHeaderInSection:(NSInteger)section {
    ZKCarGroupModel *model = self.carGroups[section];
    return model.title;
}
2.6 加入右側索引列:透過 sectionIndexTitlesForTableView 代理方法回傳一個陣列,點擊索引即可跳到對應分區:
- (NSArray *)sectionIndexTitlesForTableView:(UITableView *)tableView {
    return [self.carGroups valueForKeyPath:@"title"];
}
2.7 加入點擊互動:由於螢幕上的圖片與文字往往可點擊,靜態顯示略嫌單調,因此為點擊事件加上一個提示框:
- (void)tableView:(UITableView *)tableView didSelectRowAtIndexPath:(NSIndexPath *)indexPath {
    UIAlertView *alertView = [[UIAlertView alloc] initWithTitle:@"汽車" message:@"取消" delegate:self cancelButtonTitle:@"確認" otherButtonTitles:@"取消", nil];
    [alertView show];
}
如此一來,一個具備分區、索引與點擊互動的汽車品牌列表便完成了。雖然這並非完整的 App,但已涵蓋 UITableView 的常用代理方法;更重要的是掌握其背後的思想,日後需要更多功能時再查文件即可。
- 上一篇文章: iOS 開發:使用 Storyboard 預覽 UI 在多種螢幕上的運行效果
- 下一篇文章: iOS 獲取各種檔案目錄路徑的方法整理