
iOS UINavigationController 與 UIBarButtonItem 導航列按鈕實作教學
一、UINavigationController 怎麼用
UINavigationController 可以翻譯為導航控制器,在 iOS 開發中極為常見。
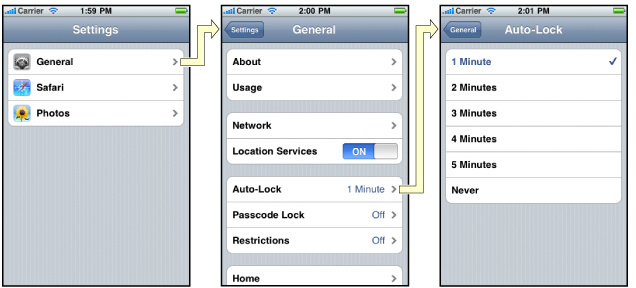
下圖展示了它的運作方式:最左側是根視圖,使用者點擊其中的 General 項時,General 視圖會滑入螢幕;繼續點擊 Auto-Lock 項,Auto-Lock 視圖再滑入。在物件管理上,導航控制器使用導航堆疊:根視圖控制器在堆疊最底層,接著依序入疊的是 General 與 Auto-Lock 視圖控制器。可以呼叫 pushViewController:animated: 把控制器推入堆疊頂端,也可以用 popViewControllerAnimated: 把它彈出。
二、結構組成
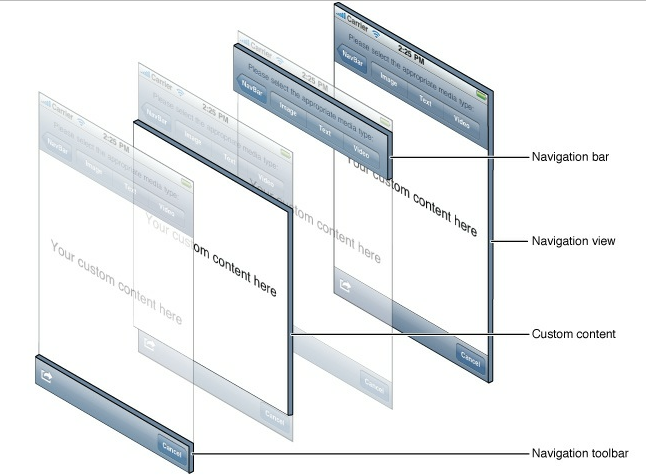
UINavigationController 由 navigation bar、navigation view、navigation toolbar 等部分組成。
三、建立示範專案
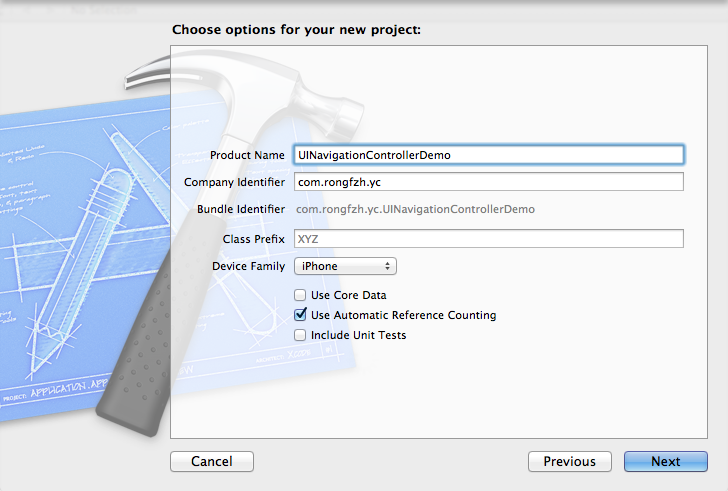
為了清楚理解每一個步驟,這裡選擇 Empty Application 模板,專案命名為 UINavigationControllerDemo。
接著建立一個 RootViewController(File → New → New File,記得勾選 With XIB for user interface):
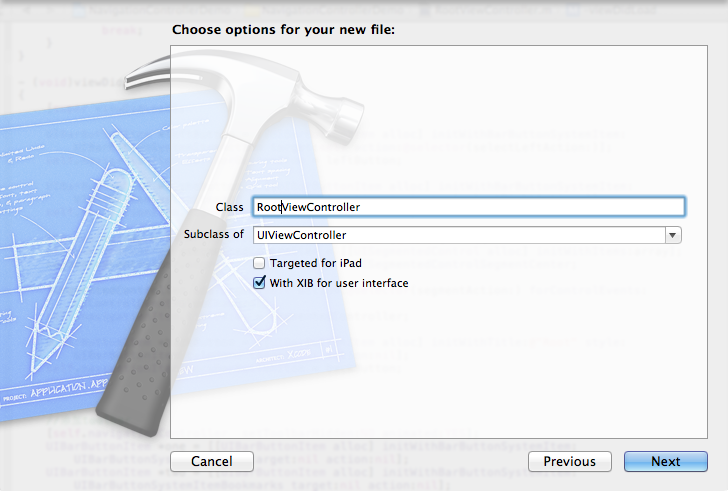
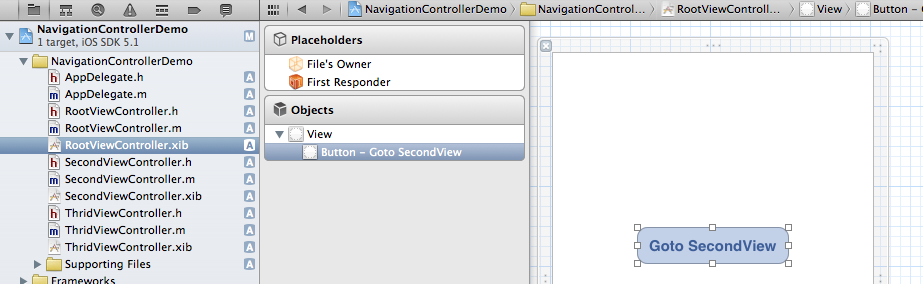
完成後專案會多出 RootViewController.h、.m、.xib 三個檔案。打開 xib,擺一個按鈕並把標題改為 Goto SecondView,作為跳轉準備。
四、在 AppDelegate 中建立導航控制器
先在 AppDelegate.h 增加一個屬性:
@property (strong, nonatomic) UINavigationController *navController;
完整的 AppDelegate.h:
#import <UIKit/UIKit.h>

@class ViewController;

@interface AppDelegate : UIResponder <UIApplicationDelegate>
@property (strong, nonatomic) UIWindow *window;
@property (strong, nonatomic) ViewController *viewController;
@property (strong, nonatomic) UINavigationController *navController;
@end
再在 AppDelegate.m 的 didFinishLaunchingWithOptions 中建立並掛上:
- (BOOL)application:(UIApplication *)application didFinishLaunchingWithOptions:(NSDictionary *)launchOptions {
    self.window = [[UIWindow alloc] initWithFrame:[[UIScreen mainScreen] bounds]];

    RootViewController *rootView = [[RootViewController alloc] init];
    rootView.title = @"Root View";   // 設定標題,方便辨識頁面切換關係

    self.navController = [[UINavigationController alloc] init];
    [self.navController pushViewController:rootView animated:YES];
    [self.window addSubview:self.navController.view];
    [self.window makeKeyAndVisible];

    return YES;
}
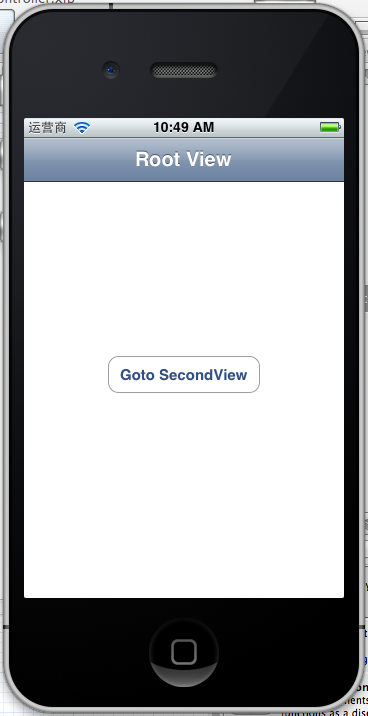
此時執行會看到畫面上只有標題,還沒有 navigation bar:
五、加上 UIBarButtonItem
bar button item 分左右兩側,我們把兩邊都補上。在 RootViewController.m 中:
- (void)viewDidLoad {
    [super viewDidLoad];

    UIBarButtonItem *leftButton = [[UIBarButtonItem alloc]
        initWithBarButtonSystemItem:UIBarButtonSystemItemAction
                             target:self action:@selector(selectLeftAction:)];
    self.navigationItem.leftBarButtonItem = leftButton;

    UIBarButtonItem *rightButton = [[UIBarButtonItem alloc]
        initWithBarButtonSystemItem:UIBarButtonSystemItemAdd
                             target:self action:@selector(selectRightAction:)];
    self.navigationItem.rightBarButtonItem = rightButton;
}
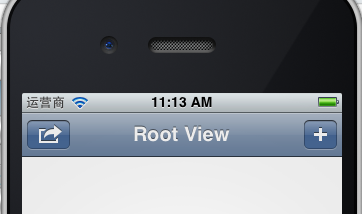
這裡的重點是 initWithBarButtonSystemItem:。系統已內建一整批圖示風格,不必每個都試:
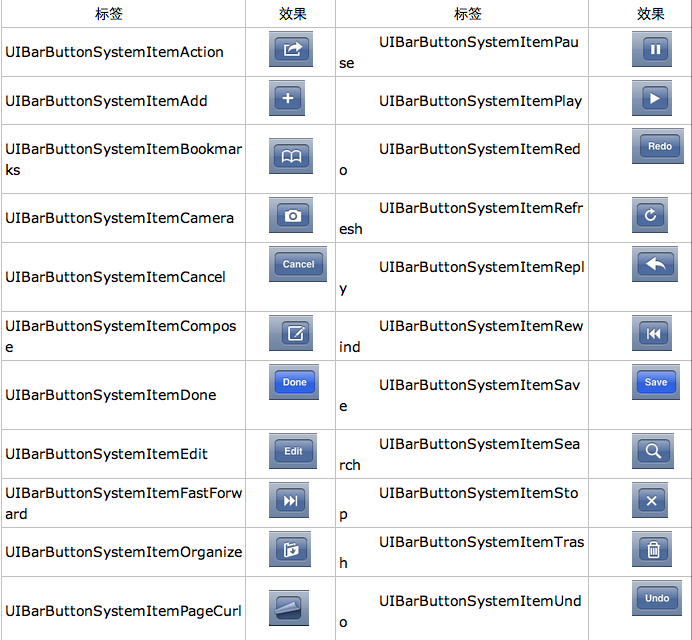
常見的有 Action、Add、Done、Edit、Save、Cancel、Trash、Compose、Reply、Organize、Bookmarks、Search、Refresh、Stop、Camera、Play、Pause、Rewind、FastForward 等,對照上圖即可找到需要的項目。
六、實作按鈕事件
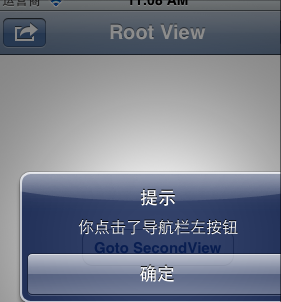
- (void)selectLeftAction:(id)sender {
    UIAlertView *alter = [[UIAlertView alloc] initWithTitle:@"提示"
                                                   message:@"你點擊了導航列左按鈕"
                                                  delegate:self
                                         cancelButtonTitle:@"確定"
                                         otherButtonTitles:nil, nil];
    [alter show];
}

- (void)selectRightAction:(id)sender {
    UIAlertView *alter = [[UIAlertView alloc] initWithTitle:@"提示"
                                                   message:@"你點擊了導航列右按鈕"
                                                  delegate:self
                                         cancelButtonTitle:@"確定"
                                         otherButtonTitles:nil, nil];
    [alter show];
}
七、按鈕切換與隱藏的實用範例
一個很常見的互動模式:導航列右側是 edit 按鈕,左側是 back 與 add 按鈕。點擊 edit 進入編輯模式時,back 隱藏、add 出現;編輯完成後反之。適時隱藏無關按鈕,對保持介面簡潔與引導操作都有幫助。
- (void)viewDidLoad {
    [super viewDidLoad];
    self.navigationItem.rightBarButtonItem = self.editButtonItem;
}

- (void)setEditing:(BOOL)editing animated:(BOOL)animated {
    [super setEditing:editing animated:animated];

    // 編輯時隱藏 Back 按鈕
    [self.navigationItem setHidesBackButton:editing animated:YES];

    if (editing) {
        self.navigationItem.leftBarButtonItem =
            [[[UIBarButtonItem alloc] initWithBarButtonSystemItem:UIBarButtonSystemItemAdd
                                                          target:self action:@selector(insertMe)] autorelease];
    } else {
        self.navigationItem.leftBarButtonItem = nil;
    }
}
最後補充兩個實務上的細節。第一,leftBarButtonItem 與 backBarButtonItem 是不同的屬性:前者是「目前這一頁要顯示的左側按鈕」,後者是「下一頁推入時,返回按鈕上要顯示的文字」,兩者用途不同不要混用。第二,若同時設定了 leftBarButtonItem 又呼叫 setHidesBackButton:YES,系統的返回按鈕會被隱藏,左側空位則由你的自訂按鈕填滿——這正是上面範例想要的效果。