
iOS 開發:UITableView 點擊行跳轉並實作「顯示更多」
編輯:iOS 開發綜合
列表頁點擊某一行後跳轉到詳情頁,是 iOS 應用中非常典型的互動模式。本文將示範如何在 UITableView 上實現點擊行跳轉,並在詳情頁中加上「顯示更多」的分批載入效果。先來看看成品樣貌。
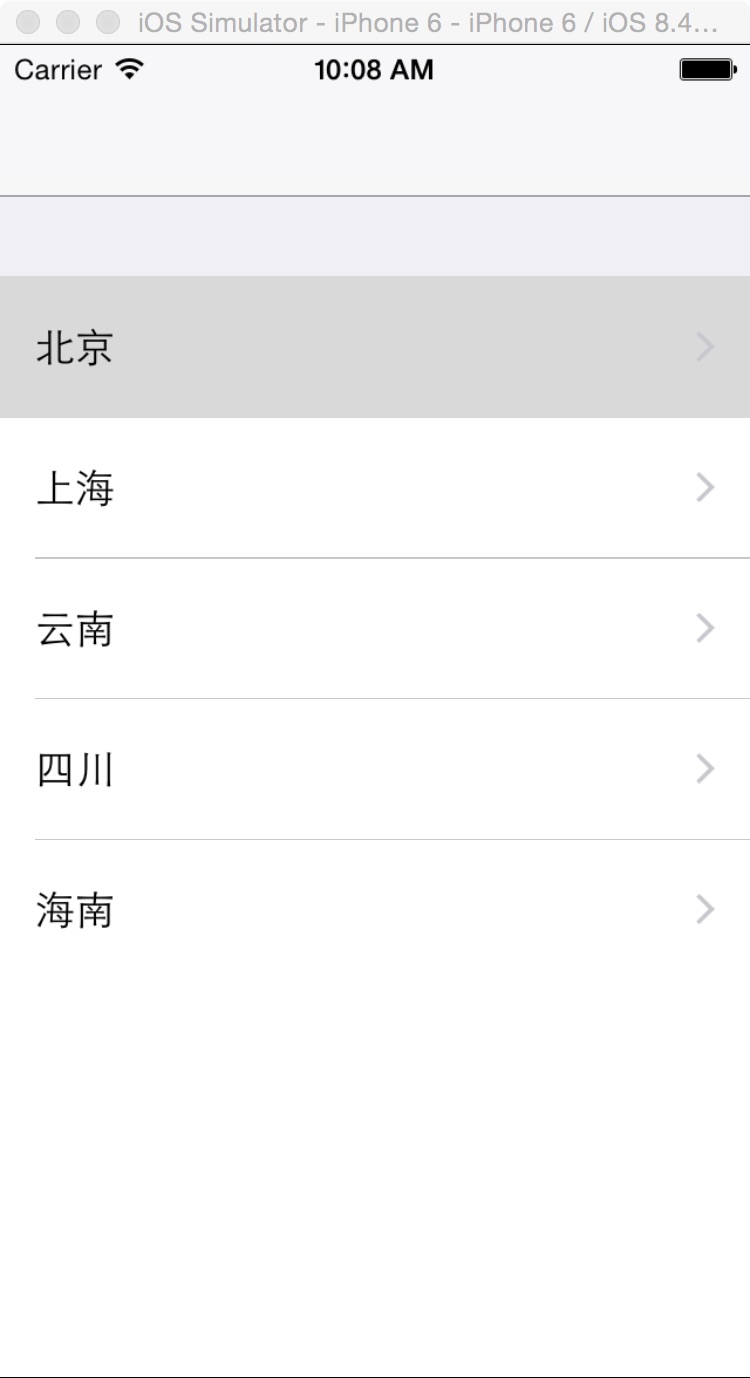
一、工程結構如下。
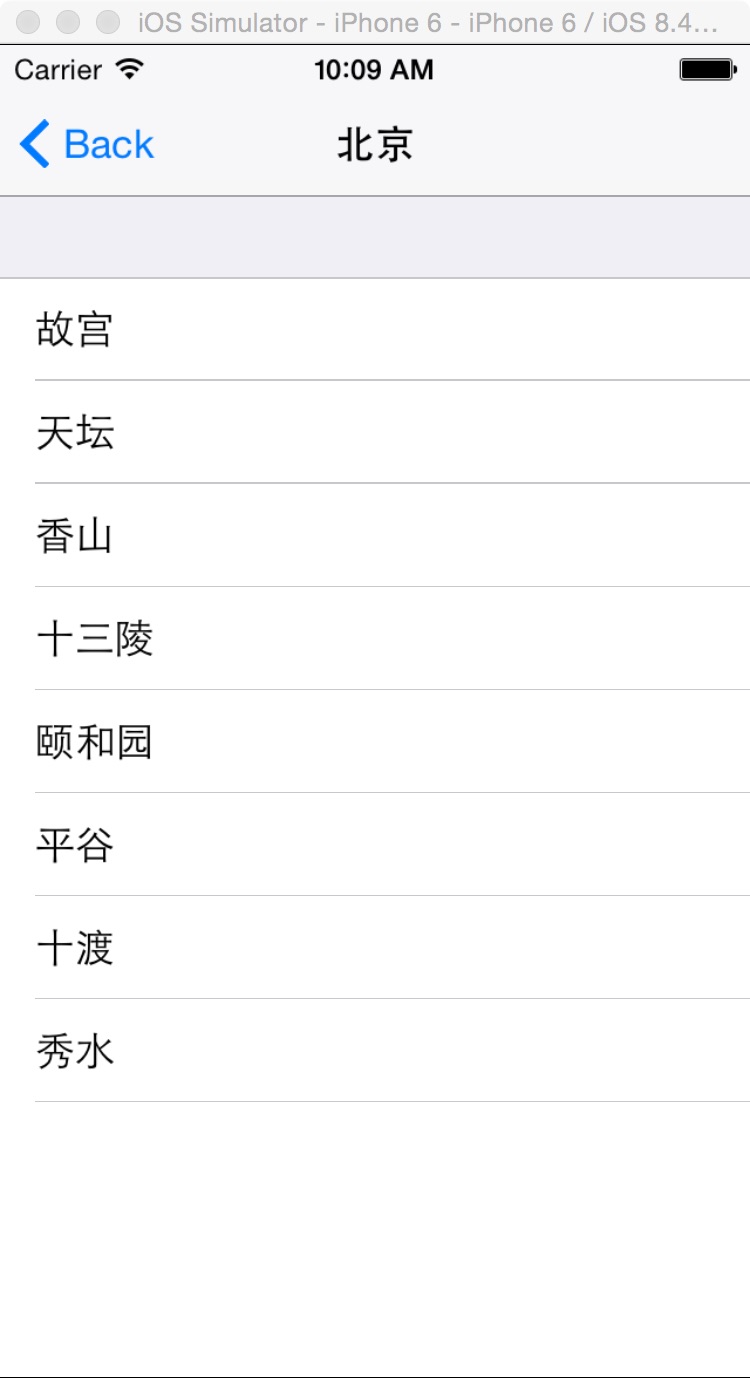
二、程式碼實現。
RootViewController.h
 #import <UIKit/UIKit.h>
@interface RootViewController : UIViewController <UITableViewDelegate,UITableViewDataSource> {
 UITableView * _tableView;
 NSMutableArray * provinceArray;
}
@end
RootViewController.m
#import "RootViewController.h"
// 詳情頁
#import "DetailViewController.h"
@interface RootViewController ()
@end
@implementation RootViewController
- (id)initWithNibName:(NSString *)nibNameOrNil bundle:(NSBundle *)nibBundleOrNil {
 self = [super initWithNibName:nibNameOrNil bundle:nibBundleOrNil];
 if (self) {
 // Custom initialization
 }
 return self;
}
- (void)viewDidLoad {
 [super viewDidLoad];
 provinceArray = [[NSMutableArray alloc] initWithObjects:@"北京", @"上海", @"雲南",@"四川",@"海南", @"江蘇", @"香港", @"澳門", @"西藏", nil];
 _tableView = [[UITableView alloc] initWithFrame:CGRectMake(0, 0, 320, 380) style:UITableViewStyleGrouped];
 _tableView.delegate = self;
 _tableView.dataSource = self;
 [self.view addSubview:_tableView];
}
#pragma -mark -UITableViewDelegate
- (UITableViewCell *)tableView:(UITableView *)tableView cellForRowAtIndexPath:(NSIndexPath *)indexPath {
 UITableViewCell* cell = [tableView dequeueReusableCellWithIdentifier:@"ID"];
 if (cell == nil) {
 cell = [[UITableViewCell alloc] initWithStyle:UITableViewCellStyleValue1 reuseIdentifier:@"ID"] ;
 }
 cell.textLabel.text = [provinceArray objectAtIndex:indexPath.row];
 cell.accessoryType = UITableViewCellAccessoryDisclosureIndicator;
 return cell;
}
- (NSInteger)tableView:(UITableView *)tableView numberOfRowsInSection:(NSInteger)section {
 return 9;
}
- (CGFloat)tableView:(UITableView *)tableView heightForRowAtIndexPath:(NSIndexPath *)indexPath {
 return 60;
}
// 點擊進入下一頁
- (void)tableView:(UITableView *)tableView didSelectRowAtIndexPath:(NSIndexPath *)indexPath {
 DetailViewController* svc = [[DetailViewController alloc] init];
 svc.title = [NSString stringWithFormat:@"%@",[provinceArray objectAtIndex:indexPath.row]];
 [self.navigationController pushViewController:svc animated:NO];
}
- (void)didReceiveMemoryWarning {
 [super didReceiveMemoryWarning];
}
@end
DetailViewController.h
 #import <UIKit/UIKit.h>
@interface DetailViewController : UIViewController <UITableViewDelegate,UITableViewDataSource> {
 UITableView* _tableView;
 NSArray* provinceArr;
 NSArray* cityArray;
 NSString* cityName;
 NSMutableArray* ditailName;
 NSString* ditialPlaceName;
 NSDictionary *dicForPlist;
}
@end
DetailViewController.m
 #import "DetailViewController.h"
static int rowNumber;
@interface DetailViewController ()
@end
@implementation DetailViewController
- (id)initWithNibName:(NSString *)nibNameOrNil bundle:(NSBundle *)nibBundleOrNil {
 self = [super initWithNibName:nibNameOrNil bundle:nibBundleOrNil];
 if (self) {
 // Custom initialization
 }
 return self;
}
- (void)viewDidLoad {
 [super viewDidLoad];
 // 傳過來的城市名稱
 cityName = self.title;
 // tableView 顯示行數
 rowNumber = 20;
 _tableView = [[UITableView alloc] initWithFrame:CGRectMake(0, 0, 320, 460 ) style:UITableViewStyleGrouped];
 _tableView.delegate = self;
 _tableView.dataSource = self;
 [self.view addSubview:_tableView];
 NSMutableArray* cityComparearr = [[NSMutableArray alloc] init];
 ditailName = [[NSMutableArray alloc] init];
 // 城市的 plist 檔案
 dicForPlist = [NSDictionary dictionaryWithContentsOfFile:[[NSBundle mainBundle] pathForResource:@"cityName" ofType:@"plist"]];
 provinceArr = [dicForPlist objectForKey:cityName];
 for (int j = 0; j < [provinceArr count]; j++) {
 cityArray = [provinceArr objectAtIndex:j];
 for (int i = 0; i < [cityArray count]; i++) {
 NSString* strstr = [cityArray objectAtIndex:i];
 if ([strstr isEqualToString:cityName] && j + 1 < [provinceArr count]) {
 cityComparearr = [provinceArr objectAtIndex:j + 1];
 if (![[cityArray objectAtIndex:i + 1] isEqualToString:[cityComparearr objectAtIndex:i + 1]]) {
 [ditailName addObject:[cityArray objectAtIndex:i + 1]];
 }
 }
 if ([strstr isEqualToString:cityName] && j + 1 == [provinceArr count]){
 NSLog(@"last one?");
 }
 }
 }
}
#pragma -mark -UITableViewDelegate
- (UITableViewCell *)tableView:(UITableView *)tableView cellForRowAtIndexPath:(NSIndexPath *)indexPath {
 UITableViewCell* cell = [tableView dequeueReusableCellWithIdentifier:@"ID"];
 if (cell == nil) {
 cell = [[UITableViewCell alloc] initWithStyle:UITableViewCellStyleValue1 reuseIdentifier:@"ID"];
 }
 if (indexPath.section == 0) {
 cell.textLabel.text = [ditailName objectAtIndex:indexPath.row];
 }
 if (indexPath.section == 1) {
 cell.textLabel.text = @"顯示更多";
 cell.textLabel.textAlignment = NSTextAlignmentCenter;
 }
 return cell;
}
- (NSInteger)tableView:(UITableView *)tableView numberOfRowsInSection:(NSInteger)section {
 if (section == 0) {
 if (rowNumber > [ditailName count]) {
 return [ditailName count];
 }
 return rowNumber;
 } else return 1;
}
- (NSInteger)numberOfSectionsInTableView:(UITableView *)tableView {
 return 2;
}
- (void)tableView:(UITableView *)tableView didSelectRowAtIndexPath:(NSIndexPath *)indexPath {
 if (indexPath.section == 1) {
 rowNumber += 20;
 [tableView reloadData];
 } else {
 NSLog(@"---跳轉到另外一個頁面----");
 }
}
- (void)didReceiveMemoryWarning {
 [super didReceiveMemoryWarning];
}
@end
以上就是關於 UITableView 點擊行跳轉並帶有「顯示更多」功能的完整實作。透過兩個 section 的分區設計,第一區展示數據、第二區放置「顯示更多」按鈕,每次點擊便增加顯示行數並刷新列表,即可達到分批載入的效果。如果你在實作過程中遇到任何問題,歡迎留言討論。
- 上一篇文章: iOS App 首次啟動用戶引導頁實作分享
- 下一篇文章: iOS 中 UITableView 左滑自定義選項與批量刪除實作