
iOS 中 SQLite 資料庫增刪改查的完整實作教學
編輯:iOS 開發綜合
在 iOS 平台上處理本機資料時,SQLite 是最常被使用的輕量級關聯式資料庫。只要已經具備 SQL 的基礎,要上手 SQLite 的操作其實並不困難。本文將完整示範 iOS 對資料庫的四項核心操作:新增、刪除、查詢與修改。
在正式寫程式之前,建議先用一個資料庫管理工具把資料表建好。這裡我們借助 Firefox 瀏覽器的附加元件 SQLite Manager 來建立一個小型資料庫。
用 Firefox 安裝 SQLite Manager
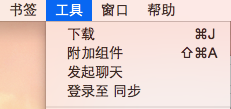
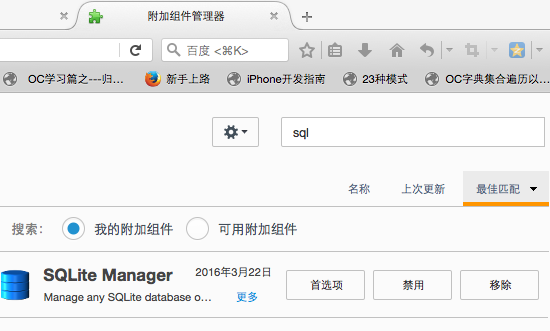
先開啟工具列中的「附加元件」,進入後搜尋 SQLite 相關套件,下載並安裝完成後重新啟動瀏覽器即可。
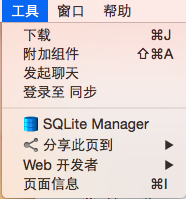
重新啟動後,在工具列選單中找到 SQLite Manager 並點擊開啟。
開啟後的 SQLite Manager 介面如下圖所示。
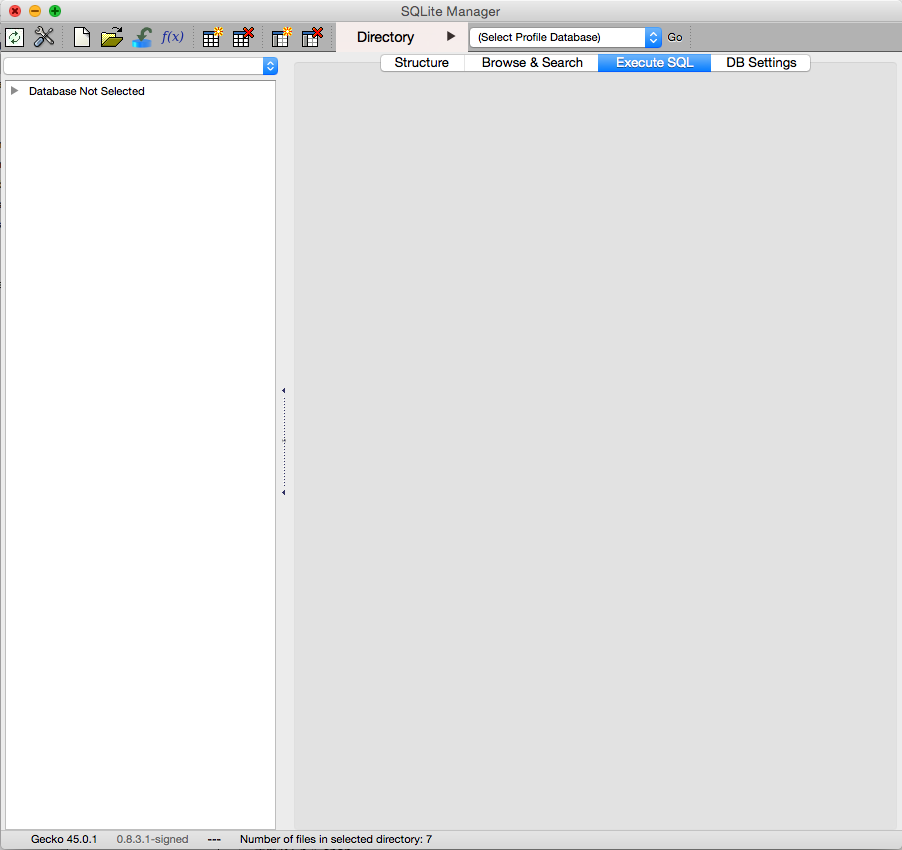
特別提醒:SQLite Manager 一次只能執行一句 SQL 指令,撰寫時請逐行執行。
建立資料庫與基本指令
 --建立名為 team 的資料表
create table team (
    stu_id integer primary key autoincrement,
    stu_name varchar(100),
    stu_password varchar(100),
    stu_login varchar(100)
)

--新增資料
insert into team(stu_name,stu_password,stu_login) values('xiaming','123456','xm')
insert into team(stu_name,stu_password,stu_login) values('zhangsan','123456','zs')

--查詢資料
select * from team

--刪除資料
delete from team where stu_id=3
回到 Xcode,工程目錄結構如下:
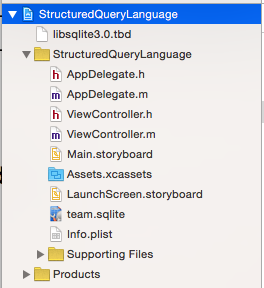
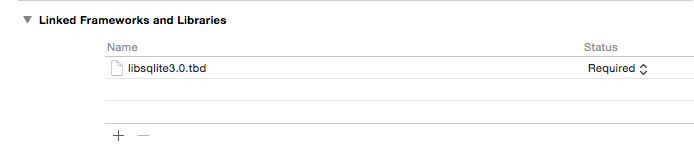
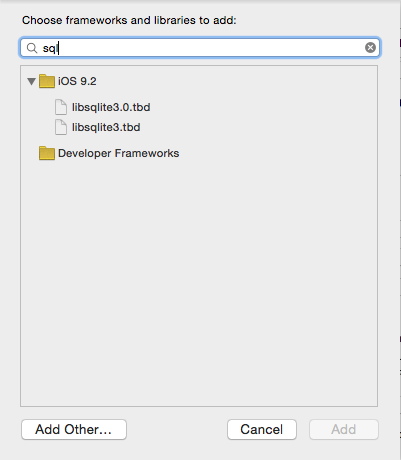
要在專案中使用 SQLite,必須先手動匯入系統自帶的 libsqlite3.0.tbd 函式庫,操作步驟如下:
實作程式碼
ViewController.h
 #import <UIKit/UIKit.h>
 #import <sqlite3.h>

 @interface ViewController : UIViewController
 @property(strong,nonatomic)UIButton *showbtn;
 @property(strong,nonatomic)UIButton *insertbtn;
 @property(strong,nonatomic)UIButton *updatebtn;
 @property(strong,nonatomic)UIButton *deletebtn;
 @end
ViewController.m
 #import "ViewController.h"

 #define PATH [[NSSearchPathForDirectoriesInDomains(NSDocumentDirectory, NSUserDomainMask, YES) lastObject] stringByAppendingPathComponent:@"team.sqlite"]

 @interface ViewController ()
 @end

 @implementation ViewController

 - (void)viewDidLoad {
     [super viewDidLoad];
     // 取得沙盒 Documents 目錄路徑
     NSLog(@"%@",[NSSearchPathForDirectoriesInDomains(NSDocumentDirectory, NSUserDomainMask, YES) lastObject]);
     [self button];
 }

 -(void)button {
     self.showbtn=[UIButton buttonWithType:UIButtonTypeSystem];
     self.showbtn.frame=CGRectMake(100, 50, 200, 50);
     [self.showbtn setTitle:@"資料庫顯示" forState:UIControlStateNormal];
     [self.showbtn addTarget:self action:@selector(showSql) forControlEvents:UIControlEventTouchUpInside];
     [self.view addSubview:self.showbtn];

     self.insertbtn=[UIButton buttonWithType:UIButtonTypeSystem];
     self.insertbtn.frame=CGRectMake(100, 100, 200, 50);
     [self.insertbtn setTitle:@"資料庫添加" forState:UIControlStateNormal];
     [self.insertbtn addTarget:self action:@selector(insertSql) forControlEvents:UIControlEventTouchUpInside];
     [self.view addSubview:self.insertbtn];

     self.updatebtn=[UIButton buttonWithType:UIButtonTypeSystem];
     self.updatebtn.frame=CGRectMake(100, 150, 200, 50);
     [self.updatebtn setTitle:@"資料庫修改" forState:UIControlStateNormal];
     [self.updatebtn addTarget:self action:@selector(updateSql) forControlEvents:UIControlEventTouchUpInside];
     [self.view addSubview:self.updatebtn];

     self.deletebtn=[UIButton buttonWithType:UIButtonTypeSystem];
     self.deletebtn.frame=CGRectMake(100, 200, 200, 50);
     [self.deletebtn setTitle:@"資料庫刪除" forState:UIControlStateNormal];
     [self.deletebtn addTarget:self action:@selector(deleteSql) forControlEvents:UIControlEventTouchUpInside];
     [self.view addSubview:self.deletebtn];
 }

 #pragma mark - 顯示資料表中的所有資訊
 -(void)showSql {
     NSLog(@"顯示資料庫資訊");
     sqlite3 *db;
     int result=sqlite3_open([PATH UTF8String], &db);
     sqlite3_stmt *stmt;
     if (result==SQLITE_OK) {
         NSLog(@"連接成功");
         int res=sqlite3_prepare_v2(db, "select *from team", -1, &stmt, nil);
         if (res==SQLITE_OK) {
             while (sqlite3_step(stmt)==SQLITE_ROW) {
                 int stu_id=sqlite3_column_int(stmt, 0);
                 NSLog(@"stu_id is %d",stu_id);
                 NSLog(@"%@",[NSString stringWithFormat:@"%s",sqlite3_column_text(stmt, 1)]);
                 NSLog(@"%@",[NSString stringWithFormat:@"%s",sqlite3_column_text(stmt, 2)]);
                 NSLog(@"%@",[NSString stringWithFormat:@"%s",sqlite3_column_text(stmt, 3)]);
             }
         }
     }
 }

 #pragma mark - 增加資訊
 -(void)insertSql {
     sqlite3 *db;
     sqlite3_stmt *stmt;
     sqlite3_open([PATH UTF8String], &db);
     int rst=sqlite3_prepare_v2(db, "insert into team(stu_name,stu_password,stu_login) values(?,?,?)", -1, &stmt, nil);
     sqlite3_bind_text(stmt, 1, "wangwu", -1, nil);
     sqlite3_bind_text(stmt, 2, "123456", -1, nil);
     sqlite3_bind_text(stmt, 3, "ww", -1, nil);
     if (rst==SQLITE_OK) {
         if (SQLITE_DONE==sqlite3_step(stmt)) {
             NSLog(@"add ok");
         }else{
             NSLog(@"add fail");
         }
     }
 }

 #pragma mark - 修改資料庫
 -(void)updateSql {
     sqlite3 *db;
     sqlite3_stmt *stmt;
     sqlite3_open([PATH UTF8String], &db);
     // 方法一(使用綁定參數)
     /* int res = sqlite3_prepare_v2(db, "update team set stu_name=(?),stu_password=(?),stu_login=(?) where stu_id=2", -1, &stmt, nil);
     sqlite3_bind_text(stmt, 1, "xiaoming", -1, nil);
     sqlite3_bind_text(stmt, 2, "123456", -1, nil);
     sqlite3_bind_text(stmt, 3, "xm", -1, nil); */
     // 方法二(直接寫入語句)
     int rst=sqlite3_prepare_v2(db, "update team set stu_name='zl',stu_password='zl123',stu_login='zhangsan' where stu_id=4", -1, &stmt, nil);
     if (rst==SQLITE_OK) {
         if (SQLITE_DONE == sqlite3_step(stmt)) {
             NSLog(@"update ok");
         }else{
             NSLog(@"update fail");
         }
     }
 }

 -(void)deleteSql {
     sqlite3 *db;
     sqlite3_stmt *stmt;
     sqlite3_open([PATH UTF8String], &db);
     int rst=sqlite3_prepare_v2(db, "delete from team where stu_id=9", -1, &stmt, nil);
     if (rst==SQLITE_OK) {
         if (SQLITE_DONE==sqlite3_step(stmt)) {
             NSLog(@"delete ok");
         }else{
             NSLog(@"delete fail");
         }
     }
 }

 - (void)didReceiveMemoryWarning {
     [super didReceiveMemoryWarning];
 }
 @end
以上就是整理好的 iOS SQLite 資料庫各項操作範例。核心觀念是:先用 sqlite3_open 開啟資料庫,再用 sqlite3_prepare_v2 編譯 SQL 語句,最後透過 sqlite3_step 執行。新增、修改、刪除時建議使用 sqlite3_bind 系列函式綁定參數,能有效避免 SQL 注入並提升安全性。
- 上一篇文章: iOS SQLite 使用教程:基本操作、加密與事務
- 下一篇文章: iOS 設計模式實戰:簡單工廠模式與工廠方法模式的對比與應用