
自訂 UIBarButtonItem:四種建立方式與旋轉動畫範例
編輯:iOS 開發綜合
iOS 導航列上有 leftBarButtonItem 與 rightBarButtonItem 兩個位置,各自接受一個 UIBarButtonItem。這個類別提供了幾種不同的建立方式,應付不同的客製化需求。
四種初始化方法
- (instancetype)initWithBarButtonSystemItem:(UIBarButtonSystemItem)systemItem
                                     target:(id)target action:(SEL)action;

- (instancetype)initWithImage:(UIImage *)image
                        style:(UIBarButtonItemStyle)style
                       target:(id)target action:(SEL)action;

- (instancetype)initWithTitle:(NSString *)title
                        style:(UIBarButtonItemStyle)style
                       target:(id)target action:(SEL)action;

- (instancetype)initWithCustomView:(UIView *)customView;
一、用系統樣式建立
self.navigationItem.rightBarButtonItem = [[UIBarButtonItem alloc]
    initWithBarButtonSystemItem:UIBarButtonSystemItemDone target:self action:@selector(right:)];
可選的系統樣式:
typedef NS_ENUM(NSInteger, UIBarButtonSystemItem) {
    UIBarButtonSystemItemDone,
    UIBarButtonSystemItemCancel,
    UIBarButtonSystemItemEdit,
    UIBarButtonSystemItemSave,
    UIBarButtonSystemItemAdd,
    UIBarButtonSystemItemFlexibleSpace,
    UIBarButtonSystemItemFixedSpace,
    UIBarButtonSystemItemCompose,
    UIBarButtonSystemItemReply,
    UIBarButtonSystemItemAction,
    UIBarButtonSystemItemOrganize,
    UIBarButtonSystemItemBookmarks,
    UIBarButtonSystemItemSearch,
    UIBarButtonSystemItemRefresh,
    UIBarButtonSystemItemStop,
    UIBarButtonSystemItemCamera,
    UIBarButtonSystemItemTrash,
    UIBarButtonSystemItemPlay,
    UIBarButtonSystemItemPause,
    UIBarButtonSystemItemRewind,
    UIBarButtonSystemItemFastForward,
    UIBarButtonSystemItemUndo,
    UIBarButtonSystemItemRedo,
    UIBarButtonSystemItemPageCurl,
};
記得實作對應的 action:
- (void)right:(id)sender {
    NSLog(@"rightBarButtonItem");
}
二、純文字按鈕
self.navigationItem.leftBarButtonItem = [[UIBarButtonItem alloc]
    initWithTitle:@"back" style:UIBarButtonItemStylePlain target:self action:@selector(back:)];
樣式共三種:
typedef NS_ENUM(NSInteger, UIBarButtonItemStyle) {
    UIBarButtonItemStylePlain,
    UIBarButtonItemStyleBordered,   // iOS 8 起廢棄,建議一律用 Plain
    UIBarButtonItemStyleDone,
};
- (void)back:(id)sender {
    [self.navigationController popViewControllerAnimated:YES];
}
三、圖片按鈕
self.navigationItem.rightBarButtonItem = [[UIBarButtonItem alloc]
    initWithImage:[UIImage imageNamed:@"test"] style:UIBarButtonItemStylePlain
           target:self action:@selector(right:)];
四、自訂 UIView
這是最靈活的一種,也是解決「同時想改返回箭頭圖與文字」的正解——自訂 view 裡想放 UIImageView、UILabel 或任何組合都可以:
UIView *testView = [[UIView alloc] initWithFrame:CGRectMake(0, 0, 40, 60)];
self.navigationItem.rightBarButtonItem = [[UIBarButtonItem alloc] initWithCustomView:testView];
綜合範例:會旋轉的導航列按鈕
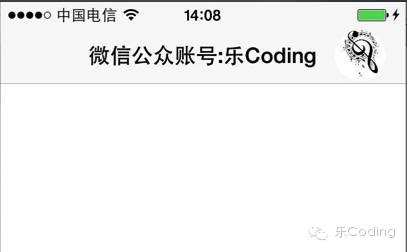
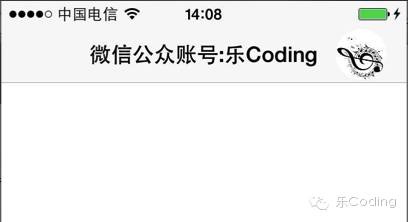
需求:做一個持續旋轉的 rightBarButtonItem,點一下開始旋轉、再點一下暫停。
#import "ViewController.h"

#define DEGREES_TO_RADIANS(angle) ((angle) / 180.0 * M_PI)

/// ImageView 旋轉狀態
typedef enum {
    RotateStateStop,
    RotateStateRunning,
} RotateState;

@interface ViewController () {
    CGFloat imageviewAngle;      // 旋轉角度
    UIImageView *imageView;      // 被旋轉的 view
    RotateState rotateState;     // 目前狀態
}
@end

@implementation ViewController

- (void)viewDidLoad {
    [super viewDidLoad];
    self.title = @"微信公眾賬號:樂Coding";
    [self buildBarButtonItem];
}

#pragma mark 加入 RightBarButtonItem
- (void)buildBarButtonItem {
    imageView = [[UIImageView alloc] initWithImage:[UIImage imageNamed:@"icon"]];
    imageView.autoresizingMask = UIViewAutoresizingNone;
    imageView.contentMode = UIViewContentModeScaleToFill;
    imageView.bounds = CGRectMake(0, 0, 40, 40);
    // 設為圓形
    imageView.layer.masksToBounds = YES;
    imageView.layer.cornerRadius = 20.f;

    UIButton *button = [UIButton buttonWithType:UIButtonTypeCustom];
    button.frame = CGRectMake(0, 0, 40, 40);
    [button addSubview:imageView];
    [button addTarget:self action:@selector(animate) forControlEvents:UIControlEventTouchUpInside];
    imageView.center = button.center;

    UIBarButtonItem *barItem = [[UIBarButtonItem alloc] initWithCustomView:button];
    self.navigationItem.rightBarButtonItem = barItem;
}

#pragma mark 點擊切換狀態
- (void)animate {
    if (rotateState == RotateStateStop) {
        rotateState = RotateStateRunning;
        [self rotateAnimate];
    } else {
        rotateState = RotateStateStop;
    }
}

#pragma mark 旋轉動畫
- (void)rotateAnimate {
    imageviewAngle += 50;
    // 0.5 秒旋轉 50 度
    [UIView animateWithDuration:0.5 delay:0.0 options:UIViewAnimationOptionCurveLinear
                     animations:^{
        imageView.transform = CGAffineTransformMakeRotation(DEGREES_TO_RADIANS(imageviewAngle));
    } completion:^(BOOL finished) {
        if (rotateState == RotateStateRunning) {
            [self rotateAnimate];   // 遞迴下去形成連續旋轉
        }
    }];
}

@end
這個範例的關鍵在於「用 UIView 動畫的 completion 遞迴呼叫自己」來形成無縫循環,並用一個狀態列舉控制是否繼續。要注意的是,動畫連續遞迴期間若頁面被釋放,block 仍可能被呼叫,實務上建議在 completion 中加上 weak self 判斷,並在 viewWillDisappear 中把狀態設為 Stop,避免不必要的動畫與記憶體佔用。