
iOS 實作可展開的二級列表效果
編輯:iOS 開發綜合
效果預覽
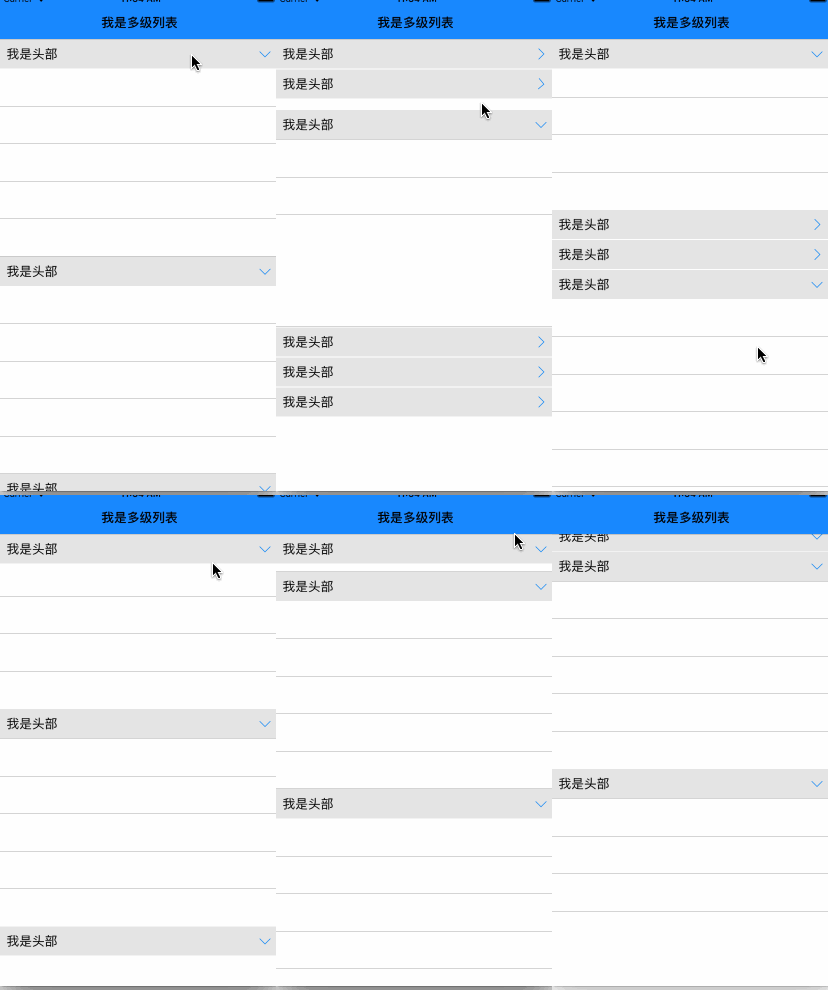
用法(類似 UITableView)
初始化 XDMultTableView,透過 openSectionArray 指定預設展開的 section,並設定 delegate 與 datasource:
@property(nonatomic, readwrite, strong) XDMultTableView *tableView;

_tableView = [[XDMultTableView alloc] initWithFrame:CGRectMake(0, 64, self.view.frame.size.width, self.view.frame.size.height - 64)];
_tableView.openSectionArray = [NSArray arrayWithObjects:@1, @2, nil];
_tableView.delegate = self;
_tableView.datasource = self;
_tableView.backgroundColor = [UIColor whiteColor];
[self.view addSubview:_tableView];
實作資料源
- (NSInteger)mTableView:(XDMultTableView *)mTableView numberOfRowsInSection:(NSInteger)section {
    return 5;
}
- (NSInteger)numberOfSectionsInTableView:(XDMultTableView *)mTableView {
    return 6;
}
- (NSString *)mTableView:(XDMultTableView *)mTableView titleForHeaderInSection:(NSInteger)section {
    return @"我是頭部";
}
實作代理
- (CGFloat)mTableView:(XDMultTableView *)mTableView heightForRowAtIndexPath:(NSIndexPath *)indexPath {
    return 50;
}
- (CGFloat)mTableView:(XDMultTableView *)mTableView heightForHeaderInSection:(NSInteger)section {
    return 40;
}
- (void)mTableView:(XDMultTableView *)mTableView willOpenHeaderAtSection:(NSInteger)section {
    NSLog(@"即將展開");
}
- (void)mTableView:(XDMultTableView *)mTableView didSelectRowAtIndexPath:(NSIndexPath *)indexPath {
    NSLog(@"點擊 cell");
}
展開/收合原理
核心是在每個 section header 上註冊一個點擊手勢,並以 tag 記住所屬的 section:
// section header view 設置 tag 值為 section
view.tag = section;
UITapGestureRecognizer *tap = [[UITapGestureRecognizer alloc] initWithTarget:self action:@selector(tapHeader:)];
[view addGestureRecognizer:tap];
手勢回應時,透過 _multopenSectionArray 記錄每個 section 的展開狀態。若已展開則移除並以 deleteRowsAtIndexPaths 收合、箭頭旋轉 -90 度;若未展開則加入並以 insertRowsAtIndexPaths 展開、箭頭回正:
- (void)tapHeader:(UITapGestureRecognizer *)tap {
    NSInteger section = tap.view.tag;
    NSNumber *sectionObj = [NSNumber numberWithInteger:section];
    UIImageView *imageView = (UIImageView *)[tap.view viewWithTag:100];
    if ([_multopenSectionArray containsObject:sectionObj]) {
        NSArray *deleteArray = [self buildDeleteRowWithSection:section];
        [_multopenSectionArray removeObject:sectionObj];
        [_tableView deleteRowsAtIndexPaths:deleteArray withRowAnimation:UITableViewRowAnimationFade];
        [UIView animateWithDuration:0.3 animations:^{
            imageView.transform = CGAffineTransformMakeRotation(-M_PI / 2);
        }];
    } else {
        [_multopenSectionArray addObject:sectionObj];
        NSArray *insertArray = [self buildInsertRowWithSection:section];
        [_tableView insertRowsAtIndexPaths:insertArray withRowAnimation:UITableViewRowAnimationFade];
        [UIView animateWithDuration:0.3 animations:^{
            imageView.transform = CGAffineTransformMakeRotation(0);
        }];
    }
}
小結
以上就是 iOS 實作可展開二級列表效果的完整內容,透過 section header 手勢與 insert/delete 動畫即可實現流暢的展開收合互動,希望對你的開發有所幫助。
- 上一篇文章: iOS 碎片化動畫實作詳解
- 下一篇文章: iOS 即時監控網路狀態的變化